
45xx Modular Disk Subsystem Manual for G-Series Releases
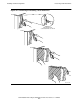
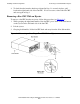
Table Of Contents
- What’s New in This Manual
- About This Manual
- 1 Introduction
- 2 Installing and Configuring the 6760 Adapter
- 3 Checking Hardware Operation
- 4 Installing and Removing CRUs
- Glossary
- Index
Installing and Removing CRUs
45xx Modular Disk Subsystem Manual for G-Series Releases—142466
4-8
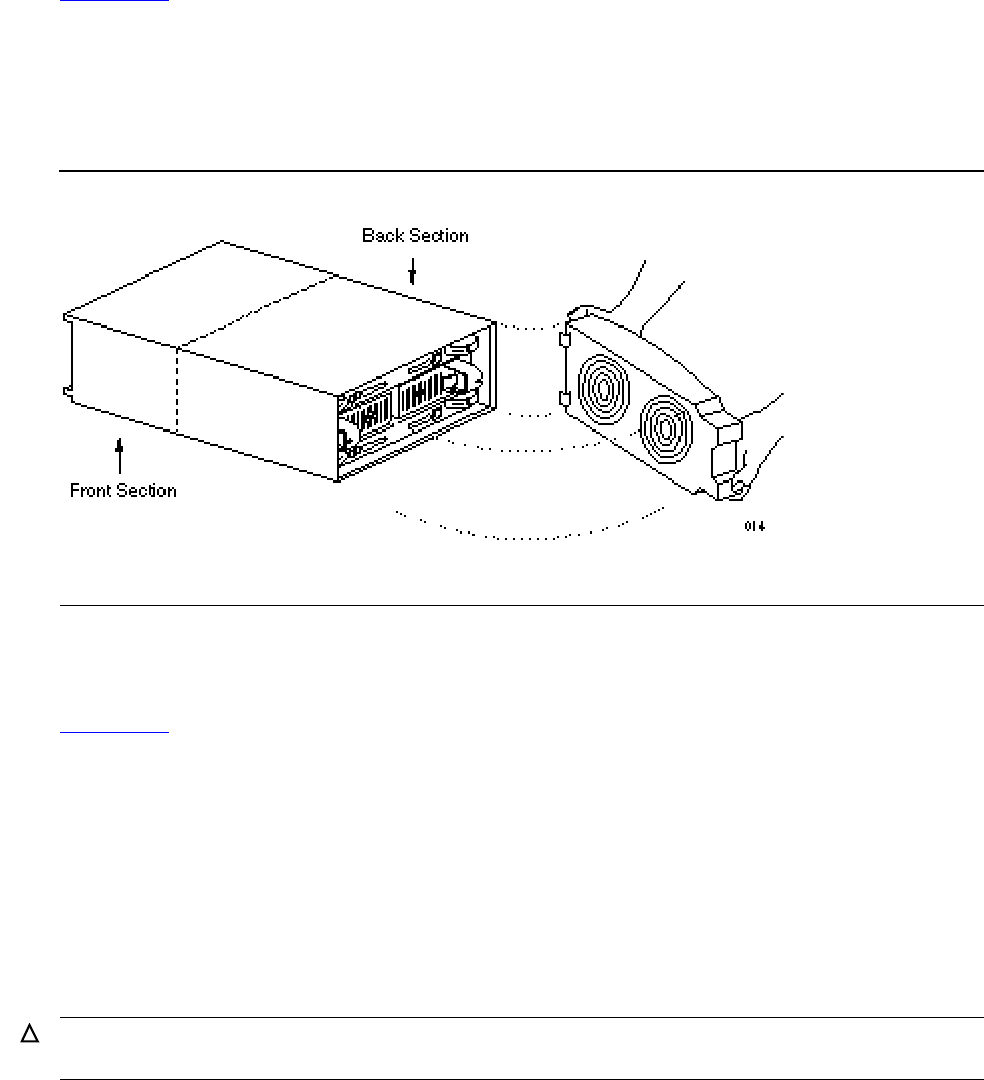
Removing a Fan CRU Without an Ejector
Removing a Fan CRU Without an Ejector
To remove a fan CRU that does not have an ejector, follow this procedure (see
Figure 4-3):
1. Supporting the fan CRU with both hands, unlatch the fan CRU by pulling on the left
side handle to disengage the snap studs of the fan CRU from the back section of the
45xx module.
2. Lift the fan CRU back and away from the module.
Installing a Fan CRU (Without Ejector)
To install a fan CRU that does not have an ejector, follow this procedure (see
Figure 4-3):
1. Insert the interface bracket on the right-hand side of the fan CRU into the slots on
the right-hand wall of the back section of the 45xx module.
2. Make sure that the snap studs on the left-hand side of the fan CRU are aligned with
the holes in the back section of the module. The snap studs have rounded ends that
fit snugly into these holes.
3. Gently press the left-hand side of the fan CRU against the back section of the
module until the snap studs snap into place. Both fans begin to spin as soon as the
power connector on the fan CRU engages the socket in the module.
Make sure that any power cords or fiber-optic cables for this module are routed
cleanly through the cutouts and into the extrusion channels on the side of the stack.
Figure 4-3. Removing or Installing a Fan CRU Without an Ejector
Caution. Press gently on the fan CRU. Using too much force to attach the fan CRU can shock
and possibly damage the disk drives.