
45xx Modular Disk Subsystem Manual for G-Series Releases
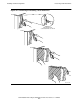
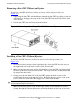
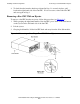
Table Of Contents
- What’s New in This Manual
- About This Manual
- 1 Introduction
- 2 Installing and Configuring the 6760 Adapter
- 3 Checking Hardware Operation
- 4 Installing and Removing CRUs
- Glossary
- Index
Installing and Removing CRUs
45xx Modular Disk Subsystem Manual for G-Series Releases—142466
4-12
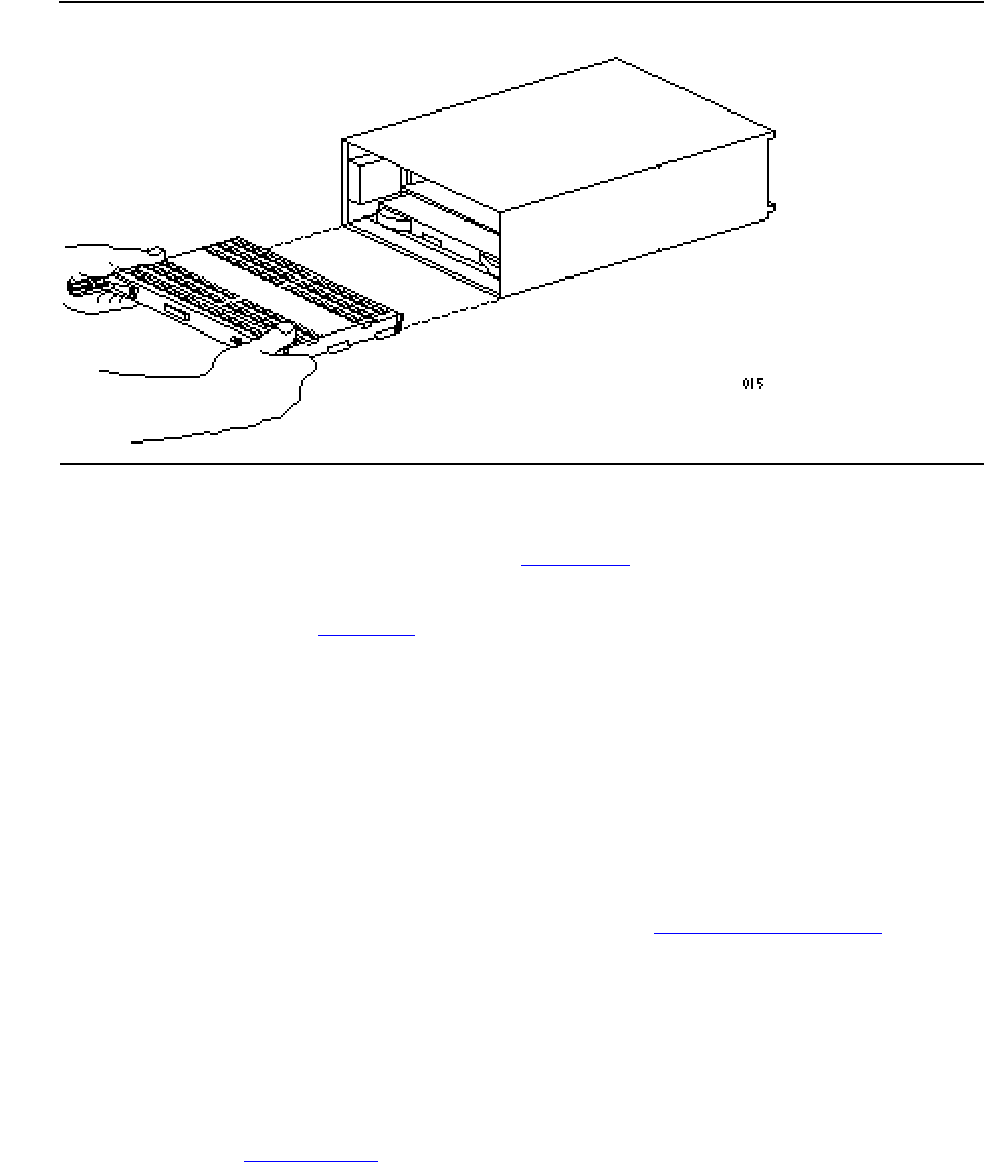
Installing a BEB
Installing a BEB
To install a BEB, follow this procedure (see Figure 4-5 on page 4-12):
1. Verify that the BEB you are installing has the same part number as the BEB you are
replacing. (Refer to Table 1-2
on page 1-4.)
2. Hold the replacement BEB so that it is oriented with the indicator LEDs to the right
of the fiber-optic connector. Also make sure that the BEB ejectors are unlocked.
3. Slide the BEB into the BEB slot of the module.
4. Engage the sides of the slot with the BEB ejectors. Push each ejector handle down
until it clicks. Lock the ejectors using the pentagonal key, if necessary.
5. Slide the fiber-optic cable connector into the receptacle in the BEB until the
connector clicks into place.
6. Replace the fan CRU for this module as described in Replacing a Fan CRU on
page 4-7.
Resuming Operations on a BEB
To resume operations on a newly installed BEB, you must bring up the path to the disk
drives controlled by this BEB and start up the processes that use those disk drives.
1. Bring up the path to the disk drives that use the controller connected to the new BEB
(see example Example 4-1
).
Figure 4-5. Removing or Installing a BEB