
5257/5257 ACL Installation and User's Guide for NonStop S-Series Tape Enclosures


Installing and Configuring the 5257ACL Tape Drive
5257/5257ACL Installation and User's Guide for NonStop Himalaya S-Series Tape Enclosures—522344-001
5-4
Setting the SCSI ID
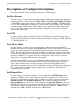
3. Press the down button four times to move the cursor to Configure Menu, then
press Enter. The Configure submenu in Figure 5-4 appears. Note that the at the
end of the fourth line means additional configuration options can be reached by
scrolling.
4. To select a configuration option, press the up
or down scroll buttons on the
control panel to move the cursor
on the display to the option to change. In this
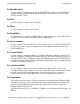
case, select "Set SCSI." Press Enter to display the choices for that option. The
submenu in Figure 5-5
appears.
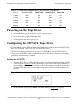
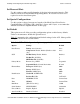
5. Note that the Library SCSI ID is set to 3. If the DLT1 bus ID needs to be set to 5,
check that the cursor
is next to line 1, and press the button repeatedly until the
display scrolls, as shown in Figure 5-6.
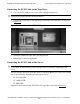
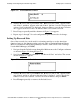
Figure 5-3. Main Menu
Figure 5-4. Configure Submenu
Figure 5-5. Set SCSI Submenu
Note. Look closely at the submenu in Figure 5-5. Note that the cursor4 on the display is next
to line 1, and that line 2 is indented, indicating that this is a two-tiered menu. The scroll buttons
work on two levels in this type of menu, which is typical of many submenus under Configure
Menu. First - level navigation: when you press the
button is pressed, the moves to line 3.
Pressing the button again, you will scroll down to DLT Bus ID. If you press the button, the
moves back to line 1.
If you press Enter while the
is next to line 1 (or line 3), the scroll buttons operate on the
second level. As a result, the moves next to line 2 (or line 4), and a appears at the end of
line 4, indicating that there is a list of options that you can view by scrolling.