
ATM Transaction Anayzer User and Installation Guide

Installing HP NonStop ATM Transaction Analyzer 37
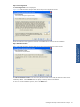
Step H: Confirm Entries and Copy Files
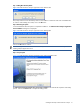
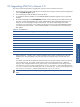
Figure 2-35 ATM Transaction Analyzer Web Server Setup Check Setup Information Screen
The next screen, Check Setup Information, displays the current settings, which have been selected so far. This
will depend on the Database Connection and the SQL Authentication Type. In case you want to change any of
the settings, you can do so by going back to the particular screen before you start copying the program files.
NOTE: You should check the location of the directory where ATM/TA Web Server is to be installed. In case
the location has to be changed after installation, you will have to reinstall the software.
Click on the Next button to continue. The program begins copying files to the directory specified.
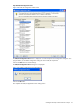
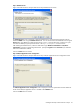
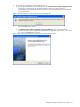
Step I ATM Transaction Analyzer Web Server – Installation Complete
Figure 2-36 ATM Transaction Analyzer Web Server Message Box
The next screen gives information that the ATM/TA Web Server has been successfully installed on the system.
Click on the OK button to complete the Setup.
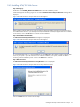
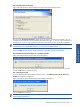
Step J: Rebooting the System
It is recommended to reboot the system for proper functioning. The ATM Transaction Analyzer Web Server
Installation message box is displayed.
Figure 2-37 ATM Transaction Analyzer Web Server Installation Message Box
Click on the OK button to continue.
NOTE: Clicking on the OK button does NOT reboot the system. It is recommended to reboot the system after
installing ATM/TA Web Server.
Installing HP NonStop ATM
Transaction Analyzer