HP NonStop Data Transformation Engine Type Designer Reference Guide Abstract This document contains information about the HP NonStop™ Data Transformation Engine (NonStop DTE) Type Designer. Product Version NonStop Data Transformation Engine 6.7.
Document History Part Number Product Version Published 427600-001 NonStop Data Transformation Engine 1.0 December 2000 522444-001 NonStop Data Transformation Engine 5.0.3 November 2001 522444-002 NonStop Data Transformation Engine 6.7.
Contents About This Document Related References........................................................................................... 9 Chapter 1 - Introduction Overview ...................................................................................................... 10 Type Trees .................................................................................................... 10 Data Content ............................................................................................
Contents Type Tree ................................................................................................ 41 Group Window........................................................................................... 42 Item Window ............................................................................................ 45 Category Window ....................................................................................... 46 Analysis Results ......................................................
Contents Date ....................................................................................................... 92 Time....................................................................................................... 93 Format .................................................................................................... 94 Use of Format Elements ............................................................................... 98 Date and Time Format Examples .................................
Contents Group Windows ............................................................................................ 135 Nested Components ...................................................................................136 Defining Components ..................................................................................... 136 Complete Type Name .................................................................................138 Relative Type Names......................................................
Contents Chapter 10 - Type Inheritance Type Inheritance........................................................................................... 174 Inheritance of Item Properties and Restrictions ..................................................... 174 Inheritance of Group Properties and Components................................................... 176 Inheritance of Category Properties and Components ............................................... 177 Organizing Types Under a Category ................
Contents Bound Types ................................................................................................ 203 Bound Components ........................................................................................ 204 A Group’s Starting Set .................................................................................... 206 A Group's Unbound Set.................................................................................... 207 Unbound Set of a Sequence Group ..........................
About This Document This document contains information about the Mercator Type Designer. This document assumes that the reader knows the Windows environment, has used the Mercator Design Studio, and understands words such as mapping, type trees, and other basic Mercator terminology. Related References The Mercator Online Library contains information about all products. Refer to the following references for more information about topics frequently discussed in this document.
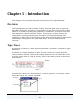
Chapter 1 - Introduction This chapter is an overview and general discussion of the Type Designer. Overview The Type Designer is used to define, modify, and view type trees. A type tree describes the syntax, structure, and semantics of your data. The syntax of data refers to its format including tags, delimiters, terminators, and other characters that separate or identify sections of data. The structure of data refers to its composition including repeating sub-structures and nested groupings.
Chapter 1 - Introduction Type Trees Each circle icon in the type tree identifies a data type. The tree has a root type and other types are connected to the tree through branches of the tree. The root type is the base type from which all other types stem, representing the data objects of all the types in the tree. By default, the types are in alphabetical order, from top to bottom. The order of new types is defined in the Value column of the Order subtypes Property.
Chapter 1 - Introduction Data Objects Data Objects A data object is a complete unit that exists in your input or is built on output. A data object may be simple (such as a date) or complex (such as a purchase order). A data object is some portion of data in a data stream that can be recognized as belonging to a specific type. When you create types, identify all the objects that make up the data: input objects and output objects.
Chapter 1 - Introduction Classes Group A group type represents a complex data object that consists of other objects and is identified in the Type Designer by the following green icons: , , and . See the section Group Subclass for icon descriptions. For example, FullName is a group type that contains the components: FirstName, MiddleInitial, and LastName. Samuel Joseph Sue J.Adams E.Jones B.
Chapter 1 - Introduction Hierarchy of a Type Tree Components Group objects consist of other objects. An object that is part of another object is called a component. Components are added and viewed in the group window. Groups and categories may contain components. For example, the item type Field is a component of the group type Record. Hierarchy of a Type Tree The types in a tree are arranged in a hierarchy. If a type is subordinate to another type, it is called a subtype.
Chapter 1 - Introduction Hierarchy of a Type Tree Subtypes have more specific properties. For example, two different kinds of fields, Name and Date, may be defined as subtypes of Field. Date and Name are subtypes of Field The item type Field describes any field. The item types Date and Name are more specific kinds of fields. The hierarchy in the type tree window is a classification hierarchy. The deeper the subtype is in the type tree, the more specific the data characteristics.
Chapter 1 - Introduction Hierarchy of a Type Tree Imagine a type tree representing your house; see the My House.mtt type tree below. There is a type for the entire house (House). A type for each room (Bath, Bed, and so on), and types for the different furnishings in these rooms (Bed, Chair, and so on). Type that represents the entire house Different kinds of rooms Different kinds of bedrooms Each type represents a complete object. A house is made up of rooms.
Chapter 1 - Introduction Hierarchy of a Type Tree For example, the My Tree.mtt type tree does not allow you to see Field as a component of Record, or Record as a component of File. By looking at a type tree in the type tree window, you cannot see how the data is defined because composition of the data is not visible. To view the data composition, double-click the group type File in the tree to open the File ROOT group window. To view the components of Record, click the plus sign to expand the group type.
Chapter 1 - Introduction Type Designer Files Subtypes Subtypes are created for a number of reasons like identifying distinct data object. Another reason is that specific types of an object may have different properties such as different date formats. Think of subtypes as different "flavors". Ice cream flavors can be chocolate, strawberry, or vanilla. To create a type tree to represent ice cream as data, the different flavors of ice cream could be subtypes of the type IceCream.
Chapter 1 - Introduction Extension File type .bak Backup type tree file Type Designer Icons Type Designer Icons The following table lists and briefly describes the icons that appear in the type tree window, group window, and category window.
Chapter 2 - Type Designer Basics This chapter introduces the Type Designer window and provides information about working with the graphical user interface. Type Designer Startup The installation program adds an entry for the Type Designer to the program folder. From the Windows Start menu, choose Programs > Mercator > Design Studio > Type Designer. At the Type Designer startup, the Startup window appears which enables you to select the way the Type Designer opens.
Chapter 2 - Type Designer Basics Type Designer Startup Double-click a file from this list to open it. To import a type tree 1 In the Startup dialog box, select Import a type tree. 2 Click OK. See the Type Tree Importers Reference Guide for information on using the Importer Wizard. To open an existing type tree 1 In the Startup dialog box, select Open an existing type tree file. 2 Click OK. From your file structure, select the type tree file (.mtt) that you want to open.
Chapter 2 - Type Designer Basics Type Designer Interface To open a recently used type tree Tip 1 Select one or more files from the list of recently used files. 2 Click OK. Configure the display of this dialog box at startup by enabling or disabling the Do not show this at startup check box. This Startup dialog box is always accessible from the Help menu by selecting Startup Window. Type Designer Interface The Type Designer provides a graphical user interface (GUI) to define type trees.
Chapter 2 - Type Designer Basics Type Tree Window As Work Book Option An open type trees may be viewed in a work book. To enable the view As Work Book option 1 From the View menu, select As Work Book. When the As Work Book option is selected, tabs for each open type tree are displayed Splitting the Type Tree View The type tree window displays a single type tree. However, multiple type tree windows may be open at the same time. You can split the type tree into two separate views.
Chapter 2 - Type Designer Basics Type Tree Window To split the type tree into two views 1 Move the mouse over the left border until you see 2 Drag the splitter until two views are displayed. (the splitter cursor). The splitter Drag 3 Expand and collapse types as desired in each side of the type tree window.
Chapter 2 - Type Designer Basics Item Window Item Window From the item window you can enter restrictions for item types. The viewable columns in the item window will differ depending on the item properties. Value, Character, and Range are the restriction options available. The restrictions of an item type are the values accepted as valid data objects or rejected as invalid data objects. Defining restrictions for an item type limits the valid values of that item to a specific set.
Chapter 2 - Type Designer Basics Group Window Group Window The group window is used to define the components of the group type. Group types represent objects composed of other objects. A component is an object that is part of a larger object. The components of the group are defined in the order in which they appear in the data. A group’s components are the objects of that group.
Chapter 2 - Type Designer Basics Category Window In the group window, the following icons are displayed in the Component column: Icon Description Sequence group type icon Group type with components that are currently hidden Group type with components that are currently shown Category Window The category window is used to define the components of the category type.
Chapter 2 - Type Designer Basics 2 Properties Window From the Type menu, choose Properties. To dock or float the Properties window 1 Right-click in any outer gray border of the Properties window. 2 From the content menu, select Allow Docking. A check mark appears next to Allow Docking in the content menu when the window can be docked.
Chapter 2 - Type Designer Basics 3 Help After selecting Allow Docking, toggle between a docked window and a floating window by double-clicking any outside border of the Properties window. Double-click to turn off docking Help A comprehensive Help system is available in the Type Designer, allowing easy access to descriptions and procedures that cover all application features and functions including menus and tools. From the Help menu, choose Contents to view the Table of Contents of the Help system.
Chapter 2 - Type Designer Basics Menu Commands and Tools Menu Commands and Tools Actions are performed in the Type Designer using menu commands, tools, and shortcut keys. Not all menu commands have corresponding tools and not all tools are represented in the command menus. When working with type trees, you can activate commands in several different ways: ♦ Choose the command from a menu. ♦ Right-click in any window in the Type Designer to display the context menu. ♦ Click the tools on the toolbar.
Chapter 2 - Type Designer Basics Toolbar Toolbar The toolbar is a part of the Type Designer window providing quick access to various tools that invoke Type Designer actions while working with types. For more information about each tool, use the What’s This tool tool for which you want help. and click the See the Introduction to the Design Studio for information on customizing the Type Designer toolbar.
Chapter 2 - Type Designer Basics Command Toolbar Tool Key Description Add to Source Control None Alt+F, l+A Adds selected file to source file Remove from Source Control None Alt+F, l+R Removes selected file form the source control Show Workfiles None Alt+F, l+f Shows all work files in the project Add Workfiles None Alt+F, l+W Adds selected files to source control Show History None Alt+F, l+H Shows the history for the selected files Show Properties None Alt+F, l+P Shows propertie
Chapter 2 - Type Designer Basics Toolbar Edit Menu (Alt+E) The Edit menu provides editing commands that are generally available in Windows applications. It also contains the Find command that is useful when locating types. Command Key Description Undo Alt+ Backspace Allows the user to undo multiple operations performed. For a detailed list, see Undo Command.
Chapter 2 - Type Designer Basics General Toolbar Group and Category Windows Item Window Moving Reorder Merging types View Menu (Alt+V) Use the View menu to control the display in your Type Designer environment.
Chapter 2 - Type Designer Basics Toolbar Command Tool Key Description Open None Alt+T, O Opens the window of the selected type (item, group, or category) Expand All Subtypes None Alt+T, M or Alt+X Expands all subtypes of the selected type Select All Subtypes None Alt+T, S Selects all subtypes of the selected type Tree Menu (Alt+R) The Tree menu includes choices of commands that apply to type trees. Command Tool Export Key Description Alt+R, E Exports the selected type tree.
Chapter 2 - Type Designer Basics Command Logic and Structure View Results Toolbar Tool Key Description None Alt+R, L+A Analyzes the type tree logic and structure None Alt+R, V Displays the analysis results for the selected type tree. Component Menu (Alt+C) The Component menu includes choices of commands that apply to components. Command Tool Key Description Insert Function None Alt+C, F Displays the Insert Function dialog box in which you can insert a function into a component rule.
Chapter 2 - Type Designer Basics Toolbar Command Tool Key Description Go To None Alt+C, G or Ctrl+G Displays the Go to dialog box in which you can specify the component number to receive current focus Save None Alt+C, S Saves the selected window Restriction Menu (Alt+S) The Restriction menu includes choices of commands that apply to items.
Chapter 2 - Type Designer Basics Options None Toolbar Alt+L, O Displays the Options dialog box in which you can configure your Type Designer environment Window Menu (Alt+W) The Window menu contains commands to control open windows.
Chapter 2 - Type Designer Basics Configuring the Type Designer Environment Help Menu (Alt+H) The Help menu includes choices that display information about the Type Designer.
Chapter 2 - Type Designer Basics Configuring the Type Designer Environment ♦ Change the look of the tools on the toolbar (see the Introduction to the Design Studio for details on customizing the toolbar.) ♦ Assign shortcut keys (see the Introduction to the Design Studio for details on creating shortcut keys.) Options From the Tools menu, select Options.
Chapter 2 - Type Designer Basics Configuring the Type Designer Environment Value Description Tab When enabled, the Tab key can be used to make changes to components. For example, if the Enter Key option is enabled, when you press Enter after typing a restriction in an item window, the text is entered and the next component cell is selected. Use the Rule Differences > Ignore white spaces and tabs option to specify whether to ignore white spaces and tabs in component rules.
Chapter 2 - Type Designer Basics Configuring the Type Designer Environment Group Window The Group Window options define the appearance of the group window. There are two tabs: General and Color Coding. General Tab The font for text in the group window can be changed. Click Font and define the font attributes in the Font dialog box. Show grid lines Use the Show grid lines check box to enable the group window grid lines. Line color Change the color of the grid lines in the group window.
Chapter 2 - Type Designer Basics Configuring the Type Designer Environment Show component number Use the Show component number check box to enable the component number display. The following example illustrates the Show component number, Show grid lines, and Show range column options. Grid lines Component number Range column Use ellipses Use the Use ellipses check box to control the appearance of object names in the group window.
Chapter 2 - Type Designer Basics Configuring the Type Designer Environment Color Coding Tab Use color coding Enable the Use color coding check box to use the color coding of component rules in the Type Designer. Show errors with background Enable the Show errors with background check box to show an invalid rule highlighted with a background color. Color Specifications The Color Specifications group box contains two drop-down boxes.
Chapter 2 - Type Designer Basics Configuring the Type Designer Environment Item Window The Item Window options define the appearance of the item window. The font for text in the item window can be changed by clicking Font and defining the font attributes in the Font dialog box. Show grid lines Enable the Show grid lines check box to display the item window grid lines. Line color Change the color of the grid lines in the item window.
Chapter 2 - Type Designer Basics Configuring the Type Designer Environment Category Window The Category Window options define the appearance of the category window. The font for text in the category window can be changed. Click the Font button and define the font attributes in the Font window. Show grid lines Use the Show grid lines check box to enable the category window grid lines. Line color Change the color of the grid lines in the category window.
Chapter 2 - Type Designer Basics Configuring the Type Designer Environment Analysis Results Use the Analysis Results option to specify the font to be used in the analysis results window after a type tree is analyzed. Confirmations Use the Confirmations options to select the actions for which you want a confirmation dialog box displayed before completing the action.
Chapter 2 - Type Designer Basics Configuring the Type Designer Environment Type Properties Use the Type Properties option to define the appearance of the font in the properties window. The font for text in the properties window can be changed by clicking Font and defining the font attributes in the Font dialog box.
Chapter 3 - Type Trees This chapter introduces the basic concepts of type trees. A type tree defines the entire contents of at least one input from which you intend to map or to which one output you intend to map. For example, one type defines the entire file; another type defines the entire record contained in that file. Other types in the same type tree define the data fields of the record. Basic Steps to Create a Type Tree A definition must exist for each piece of data.
Chapter 3 - Type Trees Creating Types To create a new type tree 1 From the File menu, choose New. A new type tree appears with a root type named Root. The default name of each new type tree file is TypeTree followed by a number. Creating Types Types are always created as a subtype of the currently selected type. A new type tree has a single root type. All types are added as subtypes of the root type and then as subtypes of other types.
Chapter 3 - Type Trees Viewing Types Note For detailed information on type properties, see Chapter 4 - Type Properties, Chapter 5 - Item Properties, and Chapter 7 - Group Properties. Viewing Types If a type has subtypes, the subtypes beneath it can be hidden or viewed. Expanding a Type A type with a plus sign next to it can be expanded. To expand a type Click here to expand the view You can use Expand all Subtypes to expand the selected type's subtypes.
Chapter 3 - Type Trees Opening an Existing Type Tree To collapse a type Click here to collapse the view Opening an Existing Type Tree To open an existing type tree, either double-click the type tree .mtt file in any directory listing or choose the Open command on the File menu. To open an existing type tree 1 From the File menu, choose Open. 2 Browse your file structure and select the type tree you want to open. 3 Click Open.
Chapter 3 - Type Trees Exporting a Type Tree For example, suppose you want to produce a document file that generates all of the InventoryData types in the tree Product Data.mtt. Select the type InventoryData and then choose Export from the Tree menu. Enter the name of the document file in the Save As dialog box. The default name is the name of the tree followed by an .mts extension. The sub-tree of the selected type is exported.
Chapter 3 - Type Trees Type Tree Differences you are generating a new tree and the document file has a command. Below is a portion of the document file generated by exporting the InventoryData sub-tree in Product Data shown earlier: Note To access an example of a type tree of an export script and an example map that converts an exported restriction list to a cross-reference table, click Start > Programs > Mercator version > Design Studio > Examples.
Chapter 3 - Type Trees Type Tree Differences To compare type tree files 1 From the File menu select Type Tree Differences. The Select First File dialog box appears. 2 Select the first type tree (.mtt) file and click Open. The Select Second File dialog box appears. 3 Select the second type tree (.mtt) file and click Open. The Type Tree Difference Analysis dialog box appears. When the analysis is complete, both trees open with the Properties windows.
Chapter 3 - Type Trees Exercise Notice that the Properties, Component, and Restrictions tabs are in red text. Red indicates differences in the properties, components, and restrictions of the selected type in the two trees. When there are no differences in the properties, components, and restrictions of the selected type, the text in the window is black.
Chapter 3 - Type Trees Exercise ♦ The minimum size of each column is one byte. There is no maximum size. ♦ The number of rows in the order is infinite. ♦ A carriage return/linefeed appears at the end of each row. After reading the specifications, make a list of the types to be created. Your list may look something like this: Type Name Description Order The type that represents the entire input or output. In this example, a type representing the entire order.
Chapter 3 - Type Trees 3 Exercise For this example, save this type tree as Orders. Enter Orders in the File name field. After the type tree is created and saved, start creating the types. To create example types 1 Select the Root type. This is the type under which all other types are added. 2 From the Type menu, choose Add. A new type confirmation dialog box appears. 3 Click Yes. A new type is created with the default name NewType1.
Chapter 3 - Type Trees 8 Exercise Create the Row type. Row is also a group because it represents a complex data object consisting of other objects. The Row group type should be on the same level as the Order type. Ensure the Root type is selected when you create the Row type or move the type. 9 Create the Column type, which is an item type. 10 As subtypes of Column, create the different kinds of columns: Product, Quantity, and Style. Your type tree now has all of the types in your data.
Chapter 4 - Type Properties This chapter discusses type properties and how to define them. Overview The properties of a type define the characteristics of the data objects of that type. For item types, properties define whether that item is text, a number, a date and time, or a syntax value. Properties include such characteristics as size, pad characters, and justification. For group types, the properties are related to the format of that group. The format of a group may be explicit or implicit.
Chapter 4 - Type Properties Defining Type Properties The Properties window is displayed. Note The properties of a type are accessible from any of the methods listed above. However, the menu method is used throughout this document for instruction purposes. After the Properties window is open, select any type to update the display of the Properties window and view the properties of the selected type.
Chapter 4 - Type Properties 5 Basic Type Properties Enter the type Description. The description of a type is recommended but not required. 6 Define other properties as needed. To define a certain property for the selected type, enter or select the property value in the Value column. You might need to expand each property to view all associated values of that property.
Chapter 4 - Type Properties ! Basic Type Properties Double-byte characters (Japan edition only) ♦ A type name cannot have the same name as another type on the same level in the same type tree. A type name may be up to 256 characters in length, but use a short type name if possible. The full path name of each type is used in map rules in the Map Designer. Refer to the Description to remember what the type represents.
Chapter 4 - Type Properties Basic Type Properties If you change a type to an item, all the types in its sub-tree become items. If you change a type to a group, all the types in its sub-tree become groups. This is because the type tree has a classification hierarchy and all the nested subtypes of an item must be items. Similarly, all the nested subtypes of a group must be groups. Description For the type Description, enter a description of the type. The Description value is used for user information.
Chapter 4 - Type Properties Basic Type Properties Initiator An initiator is a syntax object that appears at the beginning of a data object. Defining an initiator for a type specifies that when data of that type appears, the initiator appears at the beginning of the data object. The initiator becomes part of the data type definition. Property Description None There is no initiator. Literal The initiator is literal.
Chapter 4 - Type Properties Basic Type Properties Terminator A terminator is a syntax object that appears at the end of a data object. The terminator becomes part of the data type definition. Property Description None There are no terminators. Literal A constant value. Expand the Terminator property to define the literal terminator Value. Variable Allow for possible values. Expand the Terminator property to define the variable terminator Default, Item, and Find properties.
Chapter 4 - Type Properties Basic Type Properties ♦ The maximum size of an item does not include the release characters. Release Character Example 1 The group type Record type has a literal delimiter of , and a release character of ?. The group type Record has three item components. Data for the record looks like the following: Miller?, MD,Harkin Hospital,1996 The ? releases the comma after Miller. In the first field, the actual data value is Miller, MD.
Chapter 4 - Type Properties Basic Type Properties Record has a + infix delimiter and a ? release character. Set has an infix delimiter of ,. Data for Record might look like this: Measure Name Set 1.54+front,high+Mark If the data for the Area Field type (which is a component of Set) had a + and a ?, the data for Record may look like this: Measure Name Set 1.54+front?+back?,high+Mark Area Setting When the data for the entire Record is validated, the two active delimiters are + and ,.
Chapter 4 - Type Properties Basic Type Properties This data would be interpreted as follows: Measure Field 1.54 Set Area Field Setting Field front+back? high Name Field Mark The release characters are inserted as appropriate when the Record type is built for output. Note A release character is only one byte. National Language The National language default value is Western. For initiator, terminator, and release character Literal values, specify the Data language.
Chapter 4 - Type Properties XML Basic Type Properties Indicates an XML document type. When this value is set to XML and the appropriate DocumentVerification map settings are in place, the XML document will be validated by an external program in addition to the standard data validation process. Refer to the Map Designer Reference Guide for information about using the Document Verification option. Where Used Where Used shows how and where the type is used within other types in the tree.
Chapter 5 - Item Properties This chapter discusses the properties of item types. Item types define data for a selected type. Item types are divided into the following subclasses: Number, Text, Date & Time, and Syntax. Each item subclass has a specific set of properties. The following illustration breaks down the three class values and their type formats, presentations, and interpretations.
Chapter 5 - Item Properties Item Subclass To define the subclass of an item type 1 Access the Properties for the selected category or item type. The following image displays the Item Subclass properties for a category type: 2 For the Item Subclass property, select a value that defines the data for the type: Property Description Number Any number excluding active syntax objects. The interpretation can be either character or binary. See the section Number Item Subclass Properties.
Chapter 5 - Item Properties Number Item Subclass Properties Number Item Subclass Properties Number item subclass properties can be of Character or Binary value. When you choose Number as the Item Subclass value, you must choose an Interpret as value: Binary or Character. The Interpret as value defines how the data should be interpreted. Items with a subclass of Number, Text, and Date & Time can be interpreted as either character or binary.
Chapter 5 - Item Properties Number Item Subclass Properties ♦ Packed ♦ BCD Binary Integer Presentation The Integer value is a whole number. The following are binary integer properties: Property Description Length(bytes) Can have a length of 1, 2, or 4 bytes Byte order See the section Byte order Sign See the section Sign Binary Float Presentation The Float value is a number with decimals in a location as needed.
Chapter 5 - Item Properties Number Item Subclass Properties Binary Packed Presentation The Packed value is a number that has size, decimal places, and sign properties. The following are binary packed properties: Property Description Length Can have a length of 1 - 16 bytes Implied places Can be from 0 - 31 Sign Can be Trailing- or Trailing+ Note For Packed numbers, the Implied places cannot exceed the Length. Binary BCD Presentation The BCD value is a binary coded decimal number that has size.
Chapter 5 - Item Properties Number Item Subclass Properties Interpret as Character Character number items interpret the data as symbolic data. Symbolic data has the same meaning on different computers. For example, a comma is symbolic because it has the same meaning, regardless of the computer type. Character text items can have content size and pad properties. The following Properties window illustrates an example of a text item subclass with a Character value.
Chapter 5 - Item Properties Number Item Subclass Properties Character Integer Presentation The Integer value is a whole number. Note Further information on the Integer value is found in the Integer Separators section. Character Decimal Presentation The Decimal value is a number that contains decimals. Note Further information on the Decimal value is found in the Decimal Separators section. Zoned Character Presentation The Zoned value is a number that has a size, decimal place, pad, and sign properties.
Chapter 5 - Item Properties Number Item Subclass Properties Places > Implied Numbers have implied decimal places. The number of decimal places cannot exceed the length specification. The list of available decimal places varies with the length selected. In the Value column, enter a total number of decimal places (not to exceed 31). Size (content) Use the Size property to specify the minimum and maximum size of an item’s content.
Chapter 5 - Item Properties Number Item Subclass Properties Example In the following ASCII number there are a total of 12 characters: +1234567.999 However, because the initiator (+) and separator (.) are not counted, the number would validate for a maximum size of 10 (Max=10). Separators Integer and decimal number items can have a separator for thousands and fractional places. If you opt to have a separator, choose Yes and sub-options will appear that enable you to choose the format and syntax.
Chapter 5 - Item Properties Number Item Subclass Properties Property Description #.#### The thousands separator is required on input in the proper location. The separator is built on output. 1000’s Syntax > Value Define the thousands separator as either literal or variable. Select one of the following from the drop-down list in the Value column: Property Description Literal The thousands syntax is a constant literal specified in the 1000’s Syntax > Value column.
Chapter 5 - Item Properties Number Item Subclass Properties Note An item type with a class of Syntax must exist in the type tree to be a valid 1000’s Syntax Item. 1000’s Syntax (Variable) > Find For integer numbers with a variable thousands separator, the Separator property is Yes and the 1000’s Syntax is Variable The value of the separator can be the current value or the value of the separator can be determined each time an occurrence of that type is found.
Chapter 5 - Item Properties Number Item Subclass Properties The item is assumed to have an implicit number of decimal places. To specify the number of implied decimal places, use the Item Subclass > Places property to specify the number of implied decimal places. Separators > Format Use the Separators > Format property to specify the placement and value of the fraction separator. To define the separator format, select one of the separator formats from the dropdown list in the Value column.
Chapter 5 - Item Properties Number Item Subclass Properties ♦ 1000’s Syntax (Variable) > Item ♦ 1000’s Syntax (Variable) > Find Separators > Fraction syntax Use the Fraction syntax property to define the fraction syntax as either a constant literal value or a variable value. You can define the Fraction syntax as literal or variable. Property Description Literal A constant value. Use the Fraction syntax > Value property to select a literal fraction separator from the Symbols dialog box.
Chapter 5 - Item Properties Number Item Subclass Properties Sign Use the Item Subclass > Sign property to define whether the number is signed for either the Integer or Decimal value. A sign is a symbol that identifies a number as being either positive or negative. A positive sign is plus (+); a negative sign is negative (-). Property Description Yes The number is signed. Expand the Sign property to define the sign values.
Chapter 5 - Item Properties Number Item Subclass Properties Leading sign Enter the symbol to be placed before a number. Trailing sign Enter the symbol to be placed after a number. Required on input If the number has a sign, at least one value (If number is +, If number is -, or If number is 0) must be required on input. Select an option from the drop-down list: Property Description Yes The sign is mandatory on input. No The sign is optional on input.
Chapter 5 - Item Properties Number Item Subclass Properties Type the pad character symbol between angled brackets < > in the Value field or (browse) to display the Symbols dialog box to insert any non-printable click value. For example, to enter a FormFeed value for the pad character, in the Value field (browse) to select the FF (FormFeed) symbol from the enter or click Symbols dialog box.
Chapter 5 - Item Properties Number Item Subclass Properties Padded to > Length Input data may contain both content and pad characters. When an item is built for output, the item is padded to the number of bytes specified for Length. The Padded to > Length must be greater than or equal to the Size > Max value. Padded to > CountsTowardMinContent When you select Padded to > Min Content, the CountsTowardMinContent field appears.
Chapter 5 - Item Properties Tip Number Item Subclass Properties Use the TRIMLEFT and TRIMRIGHT functions to exclude pad characters from the justified side. In the following example, xxxxxxxxxx represent 10 spaces: For an input of 1234567891xxxxxxxxxx with a right justified pad, the rule =SIZE(input) returns 20. For the same input, the rule =SIZE(TRIMRIGHT(input)) would return 10 (removing the padding on the right). Pad > Apply pad Use the Apply pad property to specify when to apply the pad character.
Chapter 5 - Item Properties Number Item Subclass Properties Restrictions Restrictions of an item are the valid values of that item. When the Interpret as value is defined as Character, the Restrictions property is specific to the Character value and is not available as an option for a Binary value. Depending on other Item Subclass settings, the Restrictions property can be set to Value, Character, or Range. Refer to Chapter 6 - Item Restrictions for detailed information about item restrictions.
Chapter 5 - Item Properties Number Item Subclass Properties National language > Data language Use the National language > Data language property to define the data language or character set of this character text item. The available options are listed in the following table. Property Description Native Literal values for this character text item use the application’s native data language. ASCII Literal values for this character text item use ASCII for the data language.
Chapter 5 - Item Properties Text Item Subclass Properties None > Required on input and Zero > Required on Input Property Description Yes If the data object is NONE, use the Special value when building the item in the input. No Do not use the Special value. When building the item in the input, the item may be either the special value, or the default value for NONE. For example, consider an item containing all pad characters, and no actual data.
Chapter 5 - Item Properties Date & Time Item Subclass Properties ♦ Restrictions ♦ National language Date & Time Item Subclass Properties The Date & Time properties provide the flexibility to define multiple combinations of date-time formats. Date & Time items can be interpreted as either binary or character. (See sections Interpret as Binary and Interpret as Character). For binary Date & Time items, the Presentation property has two different values: Packed and BCD.
Chapter 5 - Item Properties Date & Time Item Subclass Properties Date > Format Select the date format that the data interpretation will be based on. For binary Date & Time items, the Date > Format property has four values. Note CCYYDDD and YYDDD Julian date formats are supported. ♦ CCYYMMDD ♦ YYMMDD ♦ CCYYDDD ♦ YYDDD Time For binary Date & Time items, use the Time property to define whether the time format is enabled.
Chapter 5 - Item Properties Date & Time Item Subclass Properties Format When the Item Subclass is Date & Time and the Interpret as is Character, (browse button) in the Value column for the Format property. The Date click Time dialog box appears. To define the Date & Time format Select Date or Time Second date part is optional when enabled Select a format or Custom Separator Select Date or Time Select a format or Custom Note You can use alphabetical characters as separators.
Chapter 5 - Item Properties Date & Time Item Subclass Properties Custom Date Format After choosing Custom from the date format drop-down list, click browse. The Date Format dialog box appears. Note You can only use non-alphanumeric characters (excluding the {, } and [, ] non-alphanumeric characters) as separators in the custom Date Format dialog box. The following table provides detailed information about date formats.
Chapter 5 - Item Properties Date & Time Item Subclass Properties Note After you define and save a custom format, the custom format string appears in the Properties window. For example, the custom date format CCYYMMDD, and the custom time format HH24MMSS display as: {CCYYMMDD}{HH24MMSS} Custom Time Format After choosing Custom from the time format drop-down list, click browse. The Time Format dialog box appears.
Chapter 5 - Item Properties Date & Time Item Subclass Properties Time Format Description Example +/-ZZZZ Hours and minutes before or after the Greenwich Mean Time. Optional for validation, is not built on output +0500 ZZZ A time zone abbreviation. See Time Zones for a list of supported time zones. EST Custom User defined custom time format Note After you define and save a custom format, the custom format string appears in the Properties window.
Chapter 5 - Item Properties Date & Time Item Subclass Properties Time Zone Abbreviation Hours before Greenwich Mean Time Hours ahead of Greenwich Mean Time Yukon Standard Time YST -9 +15 Hawaii Standard Time HST -10 +14 Nome Time NT -11 +13 New Zealand Time NZT -12 +12 No name; no location ### -13 +11 Guam Standard Time GST -14 +10 Japan Standard Time JST -15 +9 China Coast Time CCT -16 +8 West Australia Time WAT -17 +7 Zulu + 6 (Russia zone 6) ZP6 -18 +6 Zulu +
Chapter 5 - Item Properties Date & Time Item Subclass Properties element MON is used twice for a single item, with the following format string: MON D-MON D Suppose the data is this: Feb 28-Mar 31 28 is not validated for the month of February. Some combinations of reserved words are invalid. A separator must follow reserved words representing a variable number of digits (D and M for date) if data follows.
Chapter 5 - Item Properties Date & Time Item Subclass Properties Special When the Item Subclass has a Date & Time value and the Interpret as property has a Character value, the Special property has two properties: ♦ If Date & Time is NONE ♦ If Date & Time is Zero If Date & Time is NONE Select one of the following from the drop-down list: Value Description Yes An override data value for NONE can be specified.
Chapter 5 - Item Properties Syntax Item Subclass Properties If Date & Time is Zero Select a value from the drop-down list: Value Description Yes An override data value for Zero can be specified. Expand the If Date & Time is Zero property to define the following properties: Special value and Required on input. No No special values or input requirements are defines when data is Zero.
Chapter 5 - Item Properties Syntax Item Subclass Properties Example of Variable Syntax Object as an Item Type In this example, the group type Header has variable delimiter values of: , * + ~ 1 Create an item type with the Item Subclass of Syntax and the name Delimiter. (The name can be any valid type name, but naming this item Delimiter is useful). 2 To define the item restrictions, double-click the Delimiter type. The item window appears. 3 Define the restrictions in the Include column.
Chapter 5 - Item Properties Syntax Item Subclass Properties 4 In the Properties window, select Syntax for the Item Subclass property. 5 Define the properties of the delimited group type Header. 6 For the Syntax property, choose Delimited. 7 For the Delimiter property, choose Variable. 8 Expand the Delimiter property. 9 Define the Delimiter > Default literal value. 10 For the variable Delimiter > Item property, choose the item type Delimiter from the drop-down list.
Chapter 5 - Item Properties Syntax Item Subclass Properties The Properties window will look like this: Syntax Objects as Data The value of a syntax object (delimiters, initiators, terminators, and release characters) may appear as actual data that can be mapped. Syntax objects that appear as actual data are defined as components of a type. Example of Syntax Objects as Components of a Type The following is an example of defining a syntax object as a component of a group type.
Chapter 5 - Item Properties Syntax Item Subclass Properties Each message is made up of segments. Each department uses different segment delimiters and terminators. The message format specifies that the delimiter and terminator are the first two bytes of the message, followed by the actual data.
Chapter 5 - Item Properties Syntax Item Subclass Properties 4 Expand the Delimiter property. 5 For the variable Delimiter > Item property, select SegmentDelimiter from the drop-down list. 6 For the variable Terminator > Item, select SegmentTerminator from the drop-down list. During the data validation process, the component SegmentDelimiter appears in the data with a value of *. The group type Segment has a variable delimiter specified as the item type SegmentDelimiter, with the value *.
Chapter 5 - Item Properties Syntax Item Subclass Properties When the Initiator, Terminator, Release, or Delimiter property value is Variable, select one of the following from the drop-down list in the Value column: Property Description Yes Determine the value of the syntax object each time an occurrence of that type is found. After the value of that syntax object is found, that particular value is used until it is reset by another Find or by the occurrence of that syntax item as a component.
Chapter 6 - Item Restrictions Overview Chapter 6 - Item Restrictions This chapter discusses item restrictions. Item restrictions are an optional feature you can use to specify valid or invalid data objects for an item type. Overview Restrictions of an item type are the valid or invalid values for that item. For example, a unit of measure field in the data must be one of a set of values: CN, BX, PK, BR. These values should be defined as "include" restrictions of the item UnitOfMeasure.
Chapter 6 - Item Restrictions Defining Item Restrictions To define restrictions of an item 1 Double-click the item for which you want to define restrictions. The item window appears. 2 Type each restriction value in the appropriate cell and press Enter. Note The column headings of the restriction cells will differ based on the item properties set. 3 (Optional) In the corresponding cell, type a description of the value and press Enter.
Chapter 6 - Item Restrictions Defining Item Restrictions Inserting New Rows You can add new rows to the item window's columns by right-clicking or pressing the Insert key. The new row inserts after the selected row. For example, click on the row containing ANALYZE and right-click. After choosing Insert from the context box, the row is inserted under ANALYZE.
Chapter 6 - Item Restrictions Restrictions Settings Restrictions Settings In the Properties window, the Restrictions property has three values to choose from: Value, Character, and Range. Restriction settings: Value, Character, and Range Value Restrictions When the Item Subclass > Restrictions field is set to Value and Restrictions > Rule is set to Include, the Include and Description columns are present in the item window.
Chapter 6 - Item Restrictions Restrictions Settings Include column: Specify the restrictions to use in determining if input data is valid or invalid for the item. One-to-many values are allowed. The order in which restrictions appear in the list is not relevant. "Include" values are considered valid. An input item is considered invalid if a character other than those specified in the Include column appears in the data. Exclude column: Specify the text character values to be excluded.
Chapter 6 - Item Restrictions Restrictions Settings Include When the Restrictions field is set to Character and Restrictions > Rule is set to Include, the Include First and Include After columns are present in the item window. Include First column: Defines the first character of a character list. Include After column: Defines the character list of the characters to follow the first character (defined in the Include First column).
Chapter 6 - Item Restrictions Restrictions Settings For example, you can define XML item content that excludes markup delimiters by using the corresponding reference strings (because XML character text items cannot contain the markup delimiters <, >, or & in the raw form). To make it easier to specify a common range of characters, you can use reserved words and symbols. Note See Chapter 8 in the Introduction to the Design Studio for a list of reserved words and symbols.
Chapter 6 - Item Restrictions Restrictions Settings Exclude When the Restrictions value is Range and the Restrictions > Rule value is Exclude, the item window displays Exclude Minimum, Exclude Maximum, and Description columns. Exclude Minimum: Defines the minimum value of the range to be excluded or considered invalid. Exclude Maximum: Defines the maximum value of the range to be excluded or considered invalid. Description column: (Optional) Enter a brief description of the range restrictions.
Chapter 6 - Item Restrictions Restrictions Settings To specify a value as "not in range" 1 Select the field (cell) that contains the value to be designated as "not in range". 2 Right click on the value and choose the Value NOT In Range menu item. You can also click on the Value NOT In Range icon ( ) on the toolbar. The Value NOT In Range icon will appear to the left of the selected value.
Chapter 6 - Item Restrictions Restrictions Settings To insert a symbol 1 From the Component or Restriction menu, select Insert Symbols. The Symbols dialog box appears. 2 Select the desired symbol and click Insert. Or, double-click on the desired symbol The selected symbol appears in the Value field. 3 Click OK. Tips When a symbol is selected, the description of that symbol is shown at the bottom of the dialog box.
Chapter 6 - Item Restrictions Ignoring Restrictions Ignoring Restrictions There might be instances when you do not require the data for an item to match any of its restrictions. Suppose you defined restrictions for your data, but you want to run a test on some test data, and you do not want to use the restrictions for this time only. You can ignore the restrictions for a given execution of a map.
Chapter 7 - Group Properties This chapter explains group properties. Group properties include the group's Subclass and Format, which describes how to distinguish one component of that group from another component of that group. Group Subclass Group types have a subclass of Sequence, Choice, or Unordered. Property Description Sequence A partially-ordered or sequenced group of data objects. All group types in Version1.x and higher are converted to the Group Subclass of Sequence.
Chapter 7 - Group Properties Group Subclass Type syntax properties such as Initiator, Terminator, Release, and Empty may be applied to Choice groups. If a release character is defined, by default it applies to the Terminator. Choice Group Components The components of a choice group are similar to the partitions of a partitioned type. However, a Choice group can have both items and groups as components. A partitioned Sequence group can only have group subtypes.
Chapter 7 - Group Properties Sequence Group Formats Sequence Group Formats A sequence group has either an Explicit or Implicit format. Property Description Explicit The explicit format relies on syntax to separate components. Each component can be identified by its position or by a delimiter in the data. Delimiters appear for missing components. Implicit The implicit format relies on the properties of the component types. The format is not fixed.
Chapter 7 - Group Properties Explicit Format Suppose Name has an * initiator and a space pad character. This is the data for StudyGroup: *Carolyn * *Stuart *Margaret Notice that the second Name is missing. If Track Places is specified and you want to map the third Name, the empty Name would be counted as an occurrence, so the third Name would be Stuart.
Chapter 7 - Group Properties Explicit Format Each line is the same length; Line has a fixed syntax. It is made up of Header, which is fixed, followed by some items, all of which are fixed. Each is padded to a fixed size or its minimum and maximum content size are equal. Ultimately, Line is composed of items padded to a fixed size. Fixed group Padded to fixed size Padded to fixed size Guidelines for Defining a Fixed Group ♦ Each component must be a group with a fixed syntax or a fixed item.
Chapter 7 - Group Properties Explicit Format Explicit Delimited Syntax An explicit format group with a delimited syntax is one whose components are separated by a delimiter and the delimiter appears as a placeholder even when a component has no content. The only time a delimiter can be missing is if components following the delimiter are all optional and there is no data for these optional components. A delimiter is a character or series of characters that separates data objects.
Chapter 7 - Group Properties Implicit Format In the following data, a comma appears between the ID# and Name, between the Name and Department, and so on. The Address component is optional. If it is missing, the delimiter appears as a placeholder for the Address: Delimiter Delimiter Awe73,Elizabeth,Quality Assurance,839 Northwestern Lane,32awi979,Travis,Documentation,,39 Delimiter appears for missing address Delimiter In the Delimiter property, specify the value and location of the delimiter.
Chapter 7 - Group Properties Implicit Format Floating Component The floating component represents an object that may appear after any component of the group. An implicit group can have a floating component; an explicit group cannot. If the group is prefix or infix delimited, the floating component appears before the delimiter. If the group is postfix delimited, the floating component appears after the delimiter. A floating component can be an optional component that may appear after any other component.
Chapter 7 - Group Properties Implicit Format Implicit WhiteSpace Syntax Select WhiteSpace for the Component Syntax value when white spaces are not allowed it the data. When you select the WhiteSpace option, define the Build As and Character Set properties. Tip Helpful for XML data. Build As Enter the characters that will replace white spaces. Note The Build As property is only available when the Component Syntax property is defined as WhiteSpace.
Chapter 7 - Group Properties Implicit Format Implicit Delimited Syntax If a delimiter separates the components of a group, but the delimiter does not appear when a component is missing that group has an implicit format, with a delimited syntax. In certain data, the delimiter may not be a placeholder. For example, suppose you have an XML document with the following components and a delimiter: The number of B Elements is indefinite.
Chapter 7 - Group Properties Specifying a Delimiter Sometimes components of an implicit group may be distinguished because there is something in the data that distinguishes them. For example, the type Form has an implicit format with no syntax. It consists of a header, one or more items, and a trailer. These types are in the same partitioned sub-tree After the first item Line of the Form, the next data object could be another item Line. Or, it could be a Trailer Line.
Chapter 7 - Group Properties Specifying a Delimiter Data Language Choose the data language of the delimiter from the list. Select one of the following from the drop-down list in the Value column: Property Description Native Literal values for this character text item use the application’s native data language. ASCII Literal values for this character text item use ASCII for the data language.
Chapter 7 - Group Properties Specifying a Delimiter Variable Sometimes you do not know what delimiter is used in the data source, especially if you receive that data from an outside source. However, you know all of the possible values that the delimiter could be. You can create an item to represent this delimiter and specify all of the possible values as restrictions of that item. The value of the delimiter in the data is found.
Chapter 7 - Group Properties Specifying a Delimiter If a Delimiter Value Appears as Data Delimiters do not appear as part of the actual data. For example, if the delimiter is specified as a comma, the comma in the following text item would be considered a delimiter, rather than part of the data itself: Tom Smith, Jr. If the data does contain the delimiter value, there are ways to format the data so that both the data and the delimiter are distinguishable.
Chapter 8 - Components This chapter discusses the concept of components and how to define them. A component represents a data object that is part of another data object. Components are Required for Group Types Categories and groups can have components. Components of group and category types display in the group and category windows. Item types do not have components. Group types represent actual data objects, so groups must have components.
Chapter 8 - Components Components are Required for Group Types the number of occurrences. The range (s) represents some or any number greater than one. When a component is selected, the component name appears in the rule bar. Click in the rule bar after the component name to type the component range. The range appears in parentheses immediately after the component name. The range is two numbers separated by a colon.
Chapter 8 - Components Group Windows A Single Occurrence If there may be a minimum and a maximum of one consecutive occurrence of a component, its range is (1:1). This is the default. If there is no range after a component name, the range (1:1) is implied. When you drag a type to make it a component, it is automatically created with the default component range of (1:1). Group Windows The group window displays the components of the selected group type.
Chapter 8 - Components Defining Components Nested Components In a group window, nested components are displayed. For example, in the group window of CustomerList, the component Prolog(0:1) may be expanded to show Prolog’s components. In addition, the component XMLDesl AttList, within Prolog, may be expanded to show XMLDesl AttList’s components. When components are expanded, the rule cells associated with nested components are gray.
Chapter 8 - Components 2 Defining Components Drag each component from the type tree into the group or category window. The type name appears in the component cell. 3 Enter component ranges where necessary. For example, double-click File. 4 Drag each component from the type tree into the group window. Drag Record from the type tree into the component cell of File’s window. The name Record appears in the component cell. 5 Enter component ranges where necessary.
Chapter 8 - Components Defining Components Complete Type Name The complete name of a group appears in the title bar of its window. A type’s complete name is similar to a path name, beginning at the type and including all types in the path up to the root. Spaces appear between types in a complete type name. The type Name Field Data would look like this in the tree: The type NameField Data would look like this in the tree: You may have duplicate type names as long as they are not on the same level.
Chapter 8 - Components Defining Components the complete type name of both Row ROOT and Product Column ROOT, it is excluded from the relative type name Product Column. The complete name is Product Column Root The relative type name is Product Column The complete name Is Row Root Note If more than one type in a type tree has the same relative type name as another in a group, then the full path of the type is exported instead of the relative type name.
Chapter 8 - Components Defining Components Note If you delete a type that is used as a component of another type, and then perform an “Undo”, thus adding the type back, and the component name is ambiguous; the component name remains unresolved in the component list. The “Undo” operation will not result in a complete reversal of the operation being undone.
Chapter 8 - Components Defining Components For example, if you enter Item Category ROOT, or Item Category, the type name Item will be unique and the ambiguity will be removed. When you enter this unique path name, the type will be successfully entered into the component list. The ambibuity is thereby resolved, however, you will be blocked from adding the other Item type to the component list.
Chapter 8 - Components Defining Components 3 Enable the Show component number check box. 4 Click OK.
Chapter 8 - Components Defining Components Or, click with the right mouse button and choose Set Range from the context menu. 3 In the Set Range dialog box, enter the minimum and maximum number of occurrences. 4 Click OK. For example, to enter the range (0:1) for the component MiddleInitial Field, select MiddleInitial Field and choose Set Range from the Component menu. After you click OK, the range appears after the component name. The range appears after the component name.
Chapter 8 - Components Defining Components Viewing the Range Column You can view component ranges in a separate column. To view the component range column 1 From the Tools menu, choose Options. 2 Click Group Window. 3 Enable the Show range column check box. 4 Click OK. Types That Can Be Components There are certain guidelines to follow when defining types. It is not necessary to memorize these guidelines because the Type Designer assists you when you define components.
Chapter 8 - Components Defining Components Note A sub-tree is a branch of a type tree that includes a type and all of the subtypes that stem underneath it. 3 If a group is not partitioned, it must have at least one component. Non-partitioned groups are sequences of data objects rather than choices. A sequence must contain at least one component. 4 A type and one of its subtypes cannot be in the same component list.
Chapter 8 - Components Required and Optional Data Note The use of ANY is restricted to Categories and partitioned groups. For more information about using ANY in a partitioned group, see Chapter 9 - Partitioning. For a list of reversed words and symbols, see Chapter 8 in the Introduction to the Design Studio. Opening a Component Window You can open a component window by double-clicking the component. To open the window of a component 1 Double-click the component whose window you want to open.
Chapter 8 - Components Required and Optional Data Another example is a middle name field. Some people do not have a middle name, so the middle name field might be optional. The Type Designer needs to know what data is optional. This is evident from the component range. The range minimum tells how many occurrences of that object must be present in the data. These are the required occurrences. Optional occurrences are the ones that are not required.
Chapter 8 - Components Defining Component Rules Defining Component Rules A component rule is an expression about one or more components. It indicates what must be true for that component to be valid. For given data, it evaluates to either TRUE or FALSE. A component rule is similar to a test. If the data does not pass the test, it is invalid. Component rules are used for validating data. Some important points about component rules are: ♦ Only components of a group may have component rules.
Chapter 8 - Components Defining Component Rules For example, to create a rule for Quantity Column, select the rule cell to the right of it. 2 Enter the component rule in the edit window and press Enter. For example, type the following component rule to indicate that Quantity must be greater than 1000.
Chapter 8 - Components Defining Component Rules Examples of Component Rules A component rule can limit the acceptable values of a component as shown in the following example: Quantity < 10000 Interest Rate > .13 & Interest Rate < .
Chapter 8 - Components Defining Component Rules For example, the following expression means "The item number of the order record of the order": Item#:OrderRecord:Order All of the objects that can be used in component rules are shown in the group window. You can enter an object name into a component rule by pressing Alt and dragging the object into the edit window. The complete object name is automatically entered in the edit window.
Chapter 8 - Components Defining Component Rules Component Rules are Context-sensitive Component rules apply to components, not types. It applies to data in a certain context when the data is a component of a given group. Suppose you have some order data that contains two kinds of records: a regular order record and a bulk order record. In the bulk order record, the quantity ordered must be greater than 1000. In the regular order record, the quantity can be any number.
Chapter 8 - Components Defining Component Rules See Chapter 8 in the Introduction to the Design Studio for a list of nonprintable Hex and decimal values. Inserting Functions into Component Rules You can use most of the functions in a component rule. Component rules in the examples previously shown use the functions COUNT, PRESENT, SUM, and WHEN. Note The function WHEN is similar to the function IF. However, WHEN evaluates to True or False. IF evaluates to a data object.
Chapter 8 - Components Defining Component Rules The Insert Function dialog box appears. Use the Category drop down box to display the list of functions by category. Note Some functions are listed in more than one category. 4 Select the function you want and click Insert. The function and a set of parentheses are entered in the component rule. 5 Tip Click Close. Help is available for each function listed in the Insert Function dialog box.
Chapter 8 - Components Defining Component Rules Comments in Component Rules You can add comments to component rules. Comments do not affect how component rules are evaluated. A comment begins with the characters /* and ends with the characters */. A comment may appear anywhere in a rule as long as it does not separate object names.
Chapter 8 - Components Component Attributes 3 Enter the number of the component to which you want to go. 4 Click Go To. Managing Components You can easily move components around, copy them, or delete them. For information on general drag-and-drop procedures, see Chapter 11 - Managing Types. When you move, copy, or delete a component, if it has a range and/or a component rule, the range and rule are moved, copied, or deleted with the component.
Chapter 8 - Components Component Attributes Identifier Attribute The identifier attribute can be used on a component of a group. The identifier indicates the components that can be used to identify the type to which a data object belongs. All the components, from the first, up to and including the component with the identifier attribute, are used for type identification. When this data is validated, it knows that, when it reaches the identifier, it has found a specific group.
Chapter 8 - Components Component Attributes The 10 indicates the size of the following component. Some important points about using the sized attribute are: ♦ The component with the sized attribute must be defined as an unsigned integer. ♦ If a binary byte stream item does not have a fixed size, the component preceding it must specify its size and the sized attribute must be used on that component.
Chapter 9 - Partitioning This chapter discusses how to define your data to distinguish the difference between data objects based on values in the data or differences in the syntax. Introduction to Partitioning Partitioning is a method of subdividing objects into mutually exclusive subtypes. The following type tree illustrates that regions are mutually exclusive parts of the state Partitioned type Partitions A diamond ♦ icon in the type tree identifies a partitioned type.
Chapter 9 - Partitioning Introduction to Partitioning Determining When to Partition There are some cases in which you will need to partition your data and others in which you will want to partition your data. You are required to partition for unordered data when a data object at a certain place in the data stream can be any number of types and each type has different definitions. Choose to partition for convenience, either to simplify mapping rules or to put additional logic into your data’s definition.
Chapter 9 - Partitioning Introduction to Partitioning The following is an example of partitioning to simplify rules. The example compares the differences between rules needed with and without partitioning. In the rule without partitioning, you would specify a condition for each state abbreviation in each region. This could make your mapping rules long, difficult to read, and difficult to maintain. The mapping rule with partitioning is more concise, self-documenting, and easier to maintain.
Chapter 9 - Partitioning Partitioning Types ♦ It is easy to read this map rule and understand the mapping function being performed. For example, if the state belongs to the list of states in the eastern region, execute the MapEast functional map. ♦ The partitioning method is easier to maintain. If a value for State is added or moves from one region to another, it can be easily changed in the type tree and automatically reflected in any mapping rules that reference the partitioned object.
Chapter 9 - Partitioning Partitioning Types For example, in the following type tree, the data contains a ShipToCode Field. To map the data for the ShipToCodes differently based on region, partition ShipToCode into East, North, South, and West subtypes and define the ShipToCode Field values that fall into each subtype.
Chapter 9 - Partitioning Partitioning Types Example of Using Initiators In the following type tree, the partitioned type Employee has four subtypes: FullTime, PartTime, Retired, and Terminated. The format of each subtype is identical; however, the information for each kind of Employee begins with a different two-character code (the initiator).
Chapter 9 - Partitioning Partitioning Types Partitioning an Item Type using Restrictions If an item has restrictions, you can partition that type, create mutually exclusive subtypes, and divide the restrictions between subtypes. A restriction cannot appear in more than one subtype of that item. Example of Using Restrictions You have new data that needs to be entered into the Type Designer. Each new record contains the name of the employee and his or her department.
Chapter 9 - Partitioning Partitioning Types Define the example data as valid restrictions (enter in the Include column) of Department: If the departments are located in different offices, you can divide the data into separate files; one file per office. To do this, map the data from the main office to one file, the data from the development office to one file, and the data from the support office to another file.
Chapter 9 - Partitioning Partitioning Types The subtypes of Department inherit the restrictions of Department. Now allocate restrictions among subtypes. To do this, delete the restrictions from the subtype that do not apply to that particular office. For example, the MainOffice item has only the departments in that office, DevelopmentOffice item has only the departments in that office, and the SupportOffice item has only the departments in that office.
Chapter 9 - Partitioning Partitioning Types To specify a custom format 1 Select Custom from the list located beneath the Date/Time list in the Format group box. 2 Click 3 Define the custom date format. 4 Click OK. (browse) to the right to display a customization dialog box.
Chapter 9 - Partitioning Partitioning Types Partitioning a Group Type Using Identifiers Note In a component list, only one component may have the identifier attribute. The identifier attribute distinguishes the components that can be used to identify the type to which a data object belongs. Typically, use this technique to distinguish group partitions when components following the identifier are different for each partition, or, if you have a multi-level partitioned sub-tree.
Chapter 9 - Partitioning Partitioning Types The identifier symbol appears to the left of the component name. In the following example, the identifier attribute was added to the Temperature Field component. Identifier Example of Using Identifiers The following example illustrates the function of the identifier attribute. Each type of vacation had an identifier assigned to the temperature component.
Chapter 9 - Partitioning Partitioning Types Note The above group windows also contain component rules, which are discussed in Partitioning a Group Type Using Component Rules. The following example shows how the Type Designer processes a data object through the partitioned types to identify which subtype it belongs to. The data object in this example is a Standard Sun Vacation.
Chapter 9 - Partitioning Partitioning Types The components are validated once the data object is found. In this example, the process finished when Standard Sun Vacation was located. Note If you did not use the identifier, the system would continue validating the rest of Sun Vacation’s components before moving into the subtypes. You can see how using an identifier makes validation more efficient.
Chapter 9 - Partitioning Partitioning Types You can tell the difference between the types by looking at the value of the PaymentMethod Column. When the payment method is cash, the component rule is $="CASH". When the payment method is a credit card, the component rule is $="CREDCARD". When the payment method is a check, the component rule is $="CHECK". Note Notice how the component rules are used with identifiers in this type tree to define payment types.
Chapter 10 - Type Inheritance This chapter explains how properties, components, and restrictions of a type are inherited by the types created as subtypes under it. Also, some properties of a type can be propagated to already existing subtypes. Type Inheritance When you create a type, it becomes a subtype of whatever type is selected at the time. Everything that defines a type gets passed down: properties (with the exception of the Partitioned property), components, and restrictions.
Chapter 10 - Type Inheritance Inheritance of Item Properties and Restrictions The valid departments are its restrictions (Include column): When the type MainOffice is created as a subtype of Department, it inherits the properties and restrictions of Department. You can then delete the restrictions that are not in the MainOffice.
Chapter 10 - Type Inheritance Inheritance of Group Properties and Components Inheritance of Group Properties and Components The following examples illustrate the inheritance of group properties and components. OrderRecord has the components Item#, QuantityOrdered, and UnitPrice. OrderRecord has a delimited format. The delimiter is a comma that has an infix location.
Chapter 10 - Type Inheritance Inheritance of Category Properties and Components If you create the type Regular as a subtype of OrderRecord, it is a duplicate of OrderRecord. It has the same components and properties. Regular inherits the properties and components of OrderRecord Now, you can modify the definition of Regular. Suppose its delimiter is not a comma; it is an asterisk. Open the Properties window for the type Regular and change the delimiter to *.
Chapter 10 - Type Inheritance Inheritance of Category Properties and Components Organizing Types Under a Category If you have two tables defined in one type tree, you might divide the types of the two tables into different categories. Under one category would be the types of one table and under another category, would be the types of the other table. A benefit when you use a category is that you can have any class of subtype: other categories, groups, and items.
Chapter 10 - Type Inheritance Propagating Properties When Not to Use Categories Suppose you create a type and plan on creating subtypes under it. If you are only going to create items under that type, or only groups under that type, you probably do not want to make that type a category. Suppose you have a type named Field, and under it, you are only going to create items.
Chapter 10 - Type Inheritance Propagating Properties Propagating Affects Types in the Sub-tree When you propagate a property of a certain type, the property gets passed down to the types in its sub-tree. For example, if you propagate the terminator of Report, the terminator is assigned to all types in the sub-tree of Report. When you propagate the terminator of Report, the terminator is passed to all other types in the sub-tree of Report.
Chapter 11 - Managing Types This chapter explains how to manage existing types in a type tree. Standard Windows Capabilities The Type Designer supports standard Windows mouse and keyboard capabilities. Note In this section, the word "object" refers either to a graphical object (such as a type) or text (such as text in a component rule). Object Selection The Type Designer supports standard Windows selection capability.
Chapter 11 - Managing Types Moving and Copying Objects Cut, Copy, and Paste The Type Designer supports standard cut, copy, and paste features. ♦ To cut an object, select it, and press Ctrl + X. ♦ To copy an object, select it, and press Ctrl + C. ♦ To paste an object, select the destination, and press Ctrl + V.
Chapter 11 - Managing Types Moving and Copying Objects Using the Copy Command In addition to using the drag-and-drop method, use the Copy command to copy a type. To copy a type using the Copy command 1 Select the type you want to copy. 2 From the Type menu, choose Copy. 3 Select the type under which you want to copy the given type. 4 To change the name of the copied type, rename the type in the As field. 5 To copy the sub-tree of the given type, click Copy sub-tree. 6 Click Copy.
Chapter 11 - Managing Types Moving and Copying Objects When you move the type Name under Field: the component name in Employee Entry automatically changes to the new relative type name, Name Field. When you move a syntax item that is referenced as a number separator, initiator, terminator, delimiter, or release character, its referenced name changes.
Chapter 11 - Managing Types Moving and Copying Objects If you move Delimiter under Value, the referenced name changes to its new relative name, Delimiter Value: The referenced type name changes When you move a type that references other types, the references are automatically updated.
Chapter 11 - Managing Types Reordering Objects When you move Record under Update, the component name changes to its new relative name, City Info: The component name changed to City Info. Reordering Objects You can reorder the following objects within the Type Designer by using the dragand-drop method: ♦ Subtypes - to reorder subtypes, press Ctrl + Shift while dragging a subtype to the desired location.
Chapter 11 - Managing Types 4 To move a subtype, drag it to the desired position. 5 Click Close. Merging Types For example, to arrange the subtypes of Field in the order that they appear in the data, select Field and choose Reorder Subtypes from the Type menu. Merging Types You can merge types from one tree to another. Merging a type copies that type and all types referenced by that type to another tree.
Chapter 11 - Managing Types Merging Types To merge a type from one tree to another 1 Select the type you want to merge into another tree. 2 From the Type menu, choose Merge. 3 Enable the Merge sub-tree check box to merge the entire sub-tree. 4 Open the destination type tree if it is not already open. 5 Select the destination tree. 6 Click Merge. 7 Click Close.
Chapter 11 - Managing Types Renaming Types Detail Record and the types referenced by Detail Record are automatically copied. In addition, the types in Detail Record’s sub-tree and their referenced types are copied. Components of Detail were copied Detail's supertype was copied Detail and its sub-tree were copied Supertypes When you merge a type from one tree to another, the supertypes of that type are created. In the example above, notice that Detail’s supertype, Record, is included in the copied types.
Chapter 11 - Managing Types Using Find and Replace To rename a type 1 Select the type. 2 From the Type menu, choose Properties. Or, click (Properties). 3 Enter the new name in the Name field. 4 Close the Properties window. Note When you rename a type, it may move to a different position on the same level in the tree if types on that level are in alphabetic order. Before you rename a type, analyze the type tree.
Chapter 11 - Managing Types 7 Printing in the Type Designer Continue to click Find Next for as long as you want to search, then click Cancel. If a match is detected, the match is selected. Otherwise, a message asks if you want to continue searching. Using the Replace Command The Replace command replaces text. For example, you can rename types by using the Replace command. To replace text 1 Select the window in which you want to search. For example, the type tree window or the group window.
Chapter 11 - Managing Types Printing in the Type Designer Print Preview Features You can perform a print preview for a type tree. To preview a print job 1 Select the type tree to be printed. 2 From the File menu, choose Print Preview. The Print Preview window appears. The tool bar in the Print Preview window has the following options: Option Description Print Select this option to print. Next Page Select this option to view the next page.
Chapter 11 - Managing Types 2 Printing in the Type Designer From the File menu, choose Print Type Definition. The Print Type Definition dialog box appears. 3 Disable any check box next to the definition you do not want to print. 4 Disable the Include Sub-tree check box if you do not want to print the definitions of types in the sub-tree. 5 Click OK. The Print dialog box appears. 6 Click OK. Printing Type Properties You can print a type's properties from the Properties window.
Chapter 12 - Error Detection and Recovery This chapter explains how errors are detected in your data and how to recover from these errors. Error Detection During map execution, the input data is compared to the data definition in the type tree. If the data does not match the definition, it is invalid or "in error". To validate a data object as belonging to a certain type, the data must be matched to its type definition.
Chapter 12 - Error Detection and Recovery Error Detection If the system is looking for a data object of a particular type, and something in the data does not exactly match the type definition, the system bases the determination on whether to continue validation on whether that data object is known to exist. If a data object contains enough information to determine its existence, errors associated with that data object are recorded and validation continues.
Chapter 12 - Error Detection and Recovery Error Detection ♦ The data object is valid but contains errors. You indicated that you wanted to ignore certain errors. In addition to these conditions, the system can also tell if there is any unknown data remaining after the card object has been recognized. This can occur if there really is "junk" at the end.
Chapter 12 - Error Detection and Recovery Error Detection Function Description EXISTS Something in the data represents that data object. CONTENT The data contains at least one byte other than a syntactical placeholder, such as a pad character or delimiter. PRESENT The data object exists and has content. ABSENT The data object does not exist or it exists and has no content. Required components must exist. They do not necessarily have to be present.
Chapter 12 - Error Detection and Recovery Error Recovery Error Recovery You may want to map your data even when invalid data is encountered. For example, you have a file of records and if some of the records are invalid, that is fine. You do not want to stop; you want to go on and process all the valid records. Restart Attribute The restart attribute provides instructions for handling errors encountered in a data stream. The restart attribute may be assigned to a component.
Chapter 12 - Error Detection and Recovery Error Recovery How the Restart Attribute Works The restart attribute has the following properties: ♦ During validation, the restart attribute is used to tell the system where to start over when an unidentified foreign object (UFO) is encountered in the data. All unrecognized data is considered to be an error of the type with the restart assigned.
Chapter 12 - Error Detection and Recovery Error Recovery The example input data looks like this: Bad data x1, x2, x3, x4, x5, x6, y1, z1 a, z2 y3, z3 y4, z4 y5, b y6, z6 Bad data There are two invalid records in this data: the second and the fifth. The Y of the second record does not match the type definition of Y. The Z of the fifth record does not match the type definition of Z. Existence indicators and restart attributes determine how data is validated and mapped.
Chapter 12 - Error Detection and Recovery Error Recovery Example 3: Suppose you have this data: x1, x2, x3, x4, x5, x6, y1, a y3, y4, y5 y6, z1 Bad data and a missing component z3 z4 A missing component z6 In this example, Record 2 has a bad Y and a missing Z. Record 5 is missing a component. Without a restart, or any clue as to the existence of Record 2, the system cannot figure out what to do - it must stop validation.
Chapter 12 - Error Detection and Recovery Error Recovery be in error and Z missing. Validation of the data continues. Records 3 and 4 are found to be valid. Record 5 is marked as an error, recording the fact that the Z is missing. Record 6 is found to be valid. With no restart on Record, the File is still in error, but you are able to find out exactly where the errors are. With a restart, File is valid and the good Records are mapped to their output form.
Chapter 13 - Distinguishable Objects This chapter explains how differences are identified for objects in a data stream. This information is helpful a type tree analysis produced an error message concerning objects that are not distinguishable. Objects in a Data Stream A data stream is a byte-by-byte flow of data. Objects in a data stream include both data objects and syntax objects. Syntax objects indicate where a data object begins or ends.
Chapter 13 - Distinguishable Objects Bound Components An object of this type: Is bound if any of the following is true: Sequence Group ( ) It has an explicit fixed format. It has a terminator. Its last component is bound. It is postfix delimited and its last component has a fixed range. For example, Comment Field (3:3) has a fixed range of (3:3). Partitioned Group ( ) Each non-partitioned group ( ) in its sub-tree is bound. Choice Group ( ) It has a terminator.
Chapter 13 - Distinguishable Objects Component Condition Bound Components Example delimited group with a terminator. The system assumes the terminator will appear to indicate that there are no more Security Sequences. Component of an Implicit Group Its range is fixed and its type is bound. The component Inventory Record (3:3) is bound, if the type Inventory Record is bound according to any of the conditions listed in the Bound Types table. It has a component rule that binds it.
Chapter 13 - Distinguishable Objects A Group’s Starting Set A Group’s Starting Set Data objects in a data stream need to be distinguishable when they could belong to two different groups. Specifically, the difference between the data that can come first in one group and the data that can come first in the other group. All of the possible types of data that may appear first in a group are referred to as the group’s starting set.
Chapter 13 - Distinguishable Objects A Group's Unbound Set range of (1:1) is required. All the types of the components up to and including CustomerID Record are part of the starting set for File ROOT. The starting set of File ROOT is Statistics Record, Comment Record, and CustomerID Record. A Group's Unbound Set Based on the nature of a bound group, the end of a bound group is determined without analyzing the data that follows it.
Chapter 13 - Distinguishable Objects Initiator-Distinguishable Types ♦ It does not have a fixed syntax. ♦ It does not have a terminator. ♦ It is not postfix delimited with a last component with a fixed range. ♦ Its last component is not bound. The unbound set of Legacy File would be all of its unbound components, starting from the last component and moving up the list, until an unbound component is reached that does not have a range minimum of zero.
Chapter 13 - Distinguishable Objects Initiator-Distinguishable Types ♦ The type of the component has an initiator and ♦ The following set is empty or ♦ The type of the component is initiator-distinguishable from each type in its following set. Type trees are analyzed to determine if components are initiator-distinguishable. Each implicit sequence group, choice group, and unordered group is analyzed to determine if their components are initiator-distinguishable.
Chapter 13 - Distinguishable Objects Type1 Type2 Initiator-Distinguishable Types How to define them as initiator-distinguishable delimiter, and Type1 is initiator distinguishable from type of each component in the starting component set of Type2. item group or group Either: ♦ The Type1 and Type2 both have an initiator and the initiators are different. or ♦ Type1 has an initiator, Type2 does not, Type2 has no delimiter, and Type1 is initiator distinguishable from type of each component of Type2.
Chapter 13 - Distinguishable Objects Type1 group Type2 group or group Initiator-Distinguishable Types How to define them as initiator-distinguishable Type1 has no identifier and ♦ Type1 and Type2 both have initiators and the initiators are different. or ♦ Type1 has an initiator, Type2 does not have an initiator, Type2 has no delimiter, and Type1 is initiator distinguishable from the type of each component of the Type2.
Chapter 13 - Distinguishable Objects Type1 Type2 group group or group Distinguishable Objects of the Same Component How to define them as initiator-distinguishable Either: ♦ Type1 and Type2 both have an initiator and they are different. or ♦ Type1 has an initiator and Type2 has no initiator and no delimiter, and Type1 is initiator-distinguishable from the type of each component in the starting component set of Type2.
Chapter 13 - Distinguishable Objects Content-Distinguishable Types A component is content-distinguishable from its following set when: ♦ The following set is empty. or ♦ The type of the component is content-distinguishable from each component in its following set. Content-Distinguishable Types The following table lists the ways in which two types may be content-distinguishable.
Chapter 13 - Distinguishable Objects Type 1 Type 2 Content-Distinguishable Types How to define them as content-distinguishable second item, or ! The second type has no initiator and the initiator of the first type is distinguishable from the value of the second type.
Chapter 13 - Distinguishable Objects Type 1 Type 2 Content-Distinguishable Types How to define them as content-distinguishable ! The item has an initiator, the group has no initiator, and the item is content-distinguishable from the type of each component in the starting component set of the group, or ! The item has no initiator, the group has an initiator, and the item’s value is distinguishable from each type in the starting component set of the group.
Chapter 13 - Distinguishable Objects Type 1 group Type 2 item Content-Distinguishable Types How to define them as content-distinguishable The first component is either: ♦ A group marked as initiator distinguishable and ! The item has an initiator and the initiator value of the group is distinguishable from the initiator value of the item, or ! The second type has no initiator and the initiator value of the first type is distinguishable from the value of the second type.
Chapter 13 - Distinguishable Objects Type 1 Type 2 Content-Distinguishable Types How to define them as content-distinguishable content-distinguishable from the second group, or ! The first group has an initiator, the second group has no initiator and the first group is content-distinguishable from the type of each component in the starting component set of the group.
Chapter 13 - Distinguishable Objects Type 1 Type 2 Content-Distinguishable Types How to define them as content-distinguishable ! Both types have initiators, either the initiators are the same or both types have no initiator, and each component in the starting component set of the first group is content-distinguishable from the type of each component of the second group.
Chapter 13 - Distinguishable Objects Type 1 group or group Type 2 Content-Distinguishable Types How to define them as content-distinguishable group The first component is either: ♦ A group marked as initiator distinguishable and ! Both groups are different partitions of the same partitioned sub-tree, or ! The second type has an initiator and those initiators are mutually exclusive, or ! The second type has no initiator and the first group is initiator-distinguishable from each type in the starting set
Chapter 13 - Distinguishable Objects Type 1 Type 2 Ending-Distinguishable Types How to define them as content-distinguishable ♦ A group not marked as initiator distinguishable and ! Both groups are different partitions of the same partitioned sub-tree, or ! Both groups have an initiator and the initiator of the first group is distinguishable from the initiator of the second group, or ! The first group has an initiator, the second group has no initiator and the first group is content-distinguishable from
Chapter 13 - Distinguishable Objects Type1 Type2 Ending-Distinguishable Types How to define them as ending-distinguishable item item Type1 is bound or the value of Type1 is or content-distinguishable from Type2. group or group or group item Type1 is bound or the value of Type1 is item or content-distinguishable from each partition of Type2. group group Either: item or group ♦ Type1 is bound.
Chapter 13 - Distinguishable Objects Type1 Type2 Distinguishable Data Objects of an Implicit Group How to define them as ending-distinguishable must be ending-distinguishable from Type2. group Either: item or or group ♦ Type1 is bound. group or ♦ For each component of Type1, ! The type of that component is bound, or ! The type of that component is unbound, and that type must be ending-distinguishable from each partition of Type2.
Chapter 13 - Distinguishable Objects Distinguishable Data Objects of an Implicit Group ♦ If the type of a component or a contained component is not bound, the type of the component cannot have a delimiter that is the same as the delimiter of the implicit sequence. ♦ If the range of a component is not bound, the type of that component must be content-distinguishable from the type of each component in the following set of that component.
Chapter 13 - Distinguishable Objects Distinguishable Data Objects of an Explicit Group Guidelines for Defining an Implicit Unordered Group that has no Delimiter ♦ The type of a component cannot be a binary item whose length is not fixed. ♦ The type of a component must be content-distinguishable from the type of each other component. ♦ If the type of a component is unbound, the type must be ending-distinguishable from the type of each other component.
Chapter 13 - Distinguishable Objects Distinguishable Syntax Objects is assumed in the data stream for each series member of a component of an explicit group with a delimiter. Objects of a Choice Group When a data object belongs to a choice group, which component the data object belongs to is based on the order the components appear in the type definition. In a choice group, if a component is unbound it must be content-distinguishable from the type of each component that follows it in the component list.
Chapter 14 - Type Tree Analyzer This chapter explains how to use the type tree analyzer to analyze your type definitions. Type Tree Analyzer After you have created a type tree, analyze it by using the type tree analyzer. The type tree analyzer analyzes type definitions and ensures internal consistency. For example, if you defined a group as fixed, but accidentally defined one of its items with no Padded To length, errors occur during analysis.
Chapter 14 - Type Tree Analyzer Type Tree Analyzer The type Order consists of Row(s). After analysis the following error occurs: The error concerns the type File. File’s first component, Record(s) is a series. The way the data is currently defined does not allow one Record to be distinguishable from the next Record in the series. There are a number of reasons why the records may not be distinguishable.
Chapter 14 - Type Tree Analyzer Why You Should Analyze Your Type Trees Why You Should Analyze Your Type Trees This section describes reasons for analyzing your trees. Internal Consistency The analyzer checks the logic of your data definitions. For example, suppose you defined a group PO as fixed and consists of Line(s). For the PO to be fixed, it cannot have an indefinite number of Lines. An analysis error would occur, indicating that you defined PO as fixed but it has a variable number of components.
Chapter 14 - Type Tree Analyzer Error and Warning Messages Logical Analysis Logical analysis addresses the integrity of the relationships that you define. Logical analysis detects, for example, undefined components, components that are not distinguishable from one another, item restrictions that do not match the properties of that item, and circular type definitions.
Appendix A - Return Codes and Error Messages This appendix discusses error and warning messages that result from an analysis of a type tree. Type Tree Analyzer The Type Tree Analyzer checks the logic and internal consistency of your data definitions. Type tree analyzer error and warnings messages are issued on the type of analysis that is performed: logic and structural. ♦ Logical analysis addresses the integrity of the relationships that you define in the type tree.
Appendix A - Return Codes and Error Messages Type Tree Analysis Logic Error Messages Type Tree Analysis Logic Error Messages The following table lists the logic error messages that result from a logical analysis of a type tree: Return Code Message L100 COMPONENT neither inherited nor local: ‘type name’ of TYPE: ‘type name’ Hint: Look at the super-type’s component list. The component is a valid type, but the supertype has a component list that restricts you from using this type as a component.
Appendix A - Return Codes and Error Messages Type Tree Analysis Logic Error Messages Return Code Message L106 Default DELIMITER not specified – TYPE: ‘type name’ Hint: This Type was specified with a FIND option for its delimiter. Please add a default value to define what to use for building outputs. L107 Default DELIMITER not in restriction list – TYPE: ‘type name’ Hint: This delimiter was specified as a syntax item. Add the default value to the restriction list for that syntax item.
Appendix A - Return Codes and Error Messages Type Tree Analysis Logic Error Messages Return Code Message L114 RELEASE CHARACTER type has no restriction list – TYPE: ‘type name’ Hint: All syntax items need a restriction list. L115 Floating Component TYPE neither inherited nor local – TYPE: ‘type name’ Hint: The floating component name has been entered incorrectly.
Appendix A - Return Codes and Error Messages Type Tree Analysis Logic Error Messages Return Code Message L122 Default TERMINATOR not specified – TYPE: ‘type name’ Hint: This Type was specified with a syntax item for its terminator. Add a default value to define a value for that terminator has not been encountered in the data. L123 Default TERMINATOR not in restriction list – TYPE: ‘type name’ Hint: This Type was specified with a syntax item for its terminator.
Appendix A - Return Codes and Error Messages Type Tree Analysis Logic Error Messages Return Code Message L129 COMPONENT RULE references a COMPONENT later in the component list – ‘type name’ – TYPE: ‘type name’ Hint: Move the component rule to the component later in the list. L130 COMPONENT RULE references undefined type – COMPONENT # of TYPE: ‘type name’ Hint: Verify the spelling of the data object name.
Appendix A - Return Codes and Error Messages Type Tree Analysis Logic Error Messages Return Code Message L136 COMPONENT ‘type name’ occurs more than once in list – TYPE: ‘type name’ Hint: Each component in the same component list must have a unique type name. Try to make sub-types of the type name in error and replace each non-unique component with one of the new sub-types.
Appendix A - Return Codes and Error Messages Type Tree Analysis Logic Error Messages Return Code Message L143 COMPONENT ‘type name’ is super-type of initiator – TYPE: ‘type name’ Hint: This occurs when a syntax item is used to specify an initiator. You can add another sub-type to the syntax item and replace the component name with the new sub-type name. L144 COMPONENT ‘type name’ is same type as terminator – TYPE: ‘type name’ Hint: A component and a terminator cannot have the same name.
Appendix A - Return Codes and Error Messages Type Tree Analysis Logic Error Messages Return Code Message L150 COMPONENT ‘type name’ is same type as release character – TYPE: ‘type name’ Hint: This occurs when a syntax item is used to specify a release character. You can add sub-types to the syntax item and replace both the component name and the release character name with the new sub-type names.
Appendix A - Return Codes and Error Messages Type Tree Analysis Logic Error Messages Return Code Message L156 DELIMITER ‘type name’ is same type as terminator – TYPE: ‘type name’ Hint: A delimiter and a terminator cannot have the same name. You may need to add sub-types to the type name used in error and replace both the delimiter and terminator names to refer to the new sub-types.
Appendix A - Return Codes and Error Messages Type Tree Analysis Logic Error Messages Return Code Message L162 DELIMITER ‘type name’ is same type as Floating Component – TYPE: ‘type name’ Hint: A delimiter and a floating component cannot have the same name. Try adding sub-types to the type name used in error and replace both the delimiter and floating component names to refer to the new sub-types.
Appendix A - Return Codes and Error Messages Type Tree Analysis Logic Error Messages Return Code Message L168 INITIATOR ‘type name’ is same type as release character – TYPE: ‘type name’ Hint: This occurs when a syntax item is used to specify both an initiator and a release character. You can add sub-types to the syntax item and replace both the initiator name and the release character name with a new sub-type name.
Appendix A - Return Codes and Error Messages Type Tree Analysis Logic Error Messages Return Code Message L174 TERMINATOR ‘type name’ is same type as release character – TYPE: ‘type name’ Hint: A terminator and a release character cannot have the same name. You may need to add sub-types to the type name used in error and replace both the terminator and release character names with the new sub-types.
Appendix A - Return Codes and Error Messages Type Tree Analysis Logic Error Messages Return Code Message L180 RELEASE CHARACTER ‘type name’ is same type as Floating Component – TYPE: ‘type name’ Hint: A release character and a floating component cannot have the same name. You may need to add sub-types to the type name used in error and replace both the release character and floating component names to refer to the new sub-types.
Appendix A - Return Codes and Error Messages Type Tree Analysis Logic Error Messages Return Code Message L187 TYPE must be partitioned (since in a partitioned tree and has sub-types) – TYPE: ‘type name’ Hint: All types in a partitioned sub-type must have mutually exclusive data objects. Set the partitioned property for the type in error. L188 Reserved for future use.
Appendix A - Return Codes and Error Messages Type Tree Analysis Logic Error Messages Return Code Message L195 Cannot distinguish delimiter contained in COMPONENT # from terminator of TYPE: ‘type name’. Hint: Make that component bound or make that contained delimiter different from the type terminator. L196 Cannot distinguish delimiter of COMPONENT # from delimiter of TYPE: ‘type name’. Hint: Make that component bound or make that component’s delimiter different from the type delimiter.
Appendix A - Return Codes and Error Messages Type Tree Analysis Logic Warning Messages Type Tree Analysis Logic Warning Messages The following tables list the logic warning messages that result from a logic analysis of a type tree. The following table lists the warnings than can result when a map is compiled: Warnings should be resolved because they may produce unpredictable results at mapping time.
Appendix A - Return Codes and Error Messages Type Tree Analysis Structure Error Messages Return Code Message L206 DELIMITER cannot be found (because first component is not required) – TYPE: ‘type name’ (warning) Hint: If the delimiter is missing, a previously set initiator value or the default value is used. L251 COMPONENT NAME could apply to more than one type:’type name’ in TYPE: ‘type name’ (warning).
Appendix A - Return Codes and Error Messages Messages Type Tree Analysis Structure Warning Return Code Message S105 Invalid RELEASE Char pointer deleted – TYPE: ‘type name’ S106 Invalid default RELEASE Char pointer deleted – TYPE: ‘type name’ S107 Invalid INITIATOR pointer deleted – TYPE: ‘type name’ S108 Invalid default INITIATOR pointer deleted – TYPE: ‘type name’ S109 Invalid TERMINATOR pointer deleted – TYPE: ‘type name’ S110 Invalid default TERMINATOR pointer deleted – TYPE: ‘type name’
Appendix A - Return Codes and Error Messages Messages Type Tree Analysis Structure Warning Return Code Message S124 Resetting RESTRICTION NAME Use Count (was # now #) – RESTRICTIONS: ‘type name’ S125 Unused RESTRICTION DESCRIPTION deleted: ‘type name’ (at index #) S126 Invalid RESTRICTION DESCRIPTION deleted – TYPE: ‘type name’ S127 Resetting RESTRICTION DESCRIPTION Use Count (was # now #) – RESTRICTIONS: ‘type name’ S128 Unused RULE deleted: ‘type name’ (at index #) S129 Invalid RULE pointer
Appendix A - Return Codes and Error Messages Messages Type Tree Analysis Structure Warning Return Code Message S147 Resetting COUNT in COMPONENT LIST: some COMPONENTS may be lost S148 RULE truncated (due to internal error): ‘type name’ (at index #) S150 CATEGORY ‘type name’ was missing GROUP and/or ITEM attributes S151 GROUP ‘type name’ was missing GROUP attributes S152 ITEM ‘type name’ was missing ITEM attributes
Index decimal, 77 integer, 77 zoned, 77 character zoned numbers places, 78 sign, 77 size (content), 77 choice group objects, 225 class definition of, 63 collapsing types, 51 commands copy, 183 find, 33, 190 menu, 30 merge, 187 move, 182 replace, 191 undo, 33 comments component rules, 155 common item properties national language, 89 none, 90 pad, 85 special value, 90 components, 26, 133 attributes indentifier, 156 restart, 156 sized, 156 defining, 144 definition of, 14, 136 distinguishable, 212 implicit grou
Index rules, 148, 152 comments, 155 examples, 150 formatting, 154 inserting functions, 153 object names, 151 shorthand notation, 151 syntax, 150 errors, 155 searching for, 155 variable, 145 configuring, 39 CONTAINSERRORS function, 202 content distinguishable components, 212 copy command, 183 edit, 33 custom time format time zones, 97 cut edit, 33 D data composition, 16 defining, 11 object definition of, 12 objects subtypes, 18 date & time subclass properties, 92 custom date format, 95 custom time format, 9
Index components, 133, 136 definition of, 13 formats explicit, 121 delimited syntax, 124 fixed syntax, 122 implicit, 125 delimited syntax, 128 whitespace syntax, 127 inheritance, 176 window, 26, 135 group subclass, 119 choice, 119 sequence, 119 unordered, 119 H Help accessing, 29 menu, 39 hex values, 116, 152 hierarchy of a type tree, 14 I icons, 19 identifier attribute, 157, 169 implicit group distinguishable data, 222 Importer Wizard, 21 inheritance category, 178 components, 176, 177 item properties, 17
Index options dialog box, 38 analysis results, 47 category window, 46 confirmations, 47 general, 40 group window, 42 item window, 45 type properties, 48 type tree, 41 P pad characters, 87 pad property, 85 partitioning, 159, 160 benefits of, 161 convenience, 160 groups, 168, 169 component rules, 172 items, 163, 165, 167 required, 160 types, 64, 162, 225 paste edit, 33 places property, 91 presentation property, 92 printing type definitions, 192 type properties, 193 propagate types, 60 properties flow chart,
Index data, 104 variable values, 101 of a component rule, 150 release character, 66 terminator, 66 T terminator, 66 text item subclass properties, 91 interpret as, 73 time format custom, 96 time property, 93 time zones, 97 toolbars, 31 view, 34 tools menu, 37 trace option, 87 track property, 121 Type Designer configuring, 39 type tree analysis logic errors, 231 logic warnings, 246 structure errors, 247 structure warnings, 247 Type Tree Analyzer, 230 type trees analyzer, 203, 226, 228 As Work Book option, 2