
DSM/SCM Quick Reference Guide


Configuring a Host or Physical Target System
DSM/SCM Quick Reference Guide—529847-005
1-2
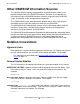
Task 0.4: Run SETUP.EXE
Task 0.4: Run SETUP.EXE
1. Double-click the SETUP.EXE file in the DSMSCM directory.
DSM/SCM displays the Setup Logo screen followed by licensing information, then
opens a series of dialog boxes.
2. Enter the Object Manager server class name if needed; then click OK.
3. Enter the Software Product Group type (Shared or Private); then click OK.
4. Enter the CNFGINFO process name if needed; then click OK.
SETUP asks whether you will use RSC or Winsock.
5. Click the Winsock button; then click OK.
SETUP asks for the full path name of the WINSOCK.DLL file.
6. Enter the full path name of the WINSOCK.DLL file.
7. Enter the IP address or name of the host system; then click OK.
8. Enter the IP port number for the DSM/SCM Winsock service; then click OK.
9. Enter the host system name; then click OK.
SETUP updates the DSMSCM.INI file on your PC with the information you entered.
10. Indicate no when prompted to start the Planner Interface.
Task 1: Configure the DSM/SCM System
Environment
You must use INITENV if you are changing:
•
The system name or number
•
A host system to a target system (can change only once)
•
The DSM/SCM database and Pathway environment owner
•
The DSM/SCM hometerm
•
The host system interface to the PC from Winsock to RSC
•
The HP NonStop Transaction Management Facility (TMF) volume
•
The SQL system catalog volume
•
The DSM/SCM server processes priority
This task assumes you will use Winsock, not RSC:
1. Log on to your system as the super ID (255,255).
2. Make ZDSMSCM the current subvolume; then run INITENV.