
G06.29 Software Installation and Upgrade Guide

Updating Service Processor (SP) Firmware
G06.29 Software Installation and Upgrade Guide—542744-003
7-6
Download the SP Firmware File to the System
Console (Optional)
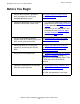
Verify there are no Firmware Updates being performed on this SP before
continuing.
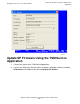
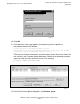
Are you sure you want to reset this SP?
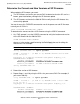
6. Verify that the SP reset finishes successfully. Wait until the display in the Action
Status box shows that the reset is Completed.
If the Action Status box shows that the reset has failed or if the completed status
does not appear, contact your service provider.
7. Repeat Steps 3 through 6 for the X-fabric service processors.
Download the SP Firmware File to the System Console
(Optional)
SP firmware updates are normally performed through either the OSM Service
Connection or the TSM Service Application. However, if you need to use the TSM or
OSM Low-Level Link Application to perform firmware updates on an SP, you must
have access to spntcde9, the SP firmware file that runs on a system console. HP
recommends that you download the SP firmware file spntcde9 into the \tsm\bin directory,
although you can use any directory you want, such as tmp.
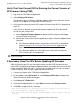
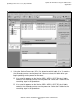
1. If necessary, start an OutsideView session.
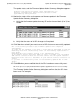
2. Select Session>Receive file to display the IXF Receive dialog box.
3. In the Host box, enter the host system name, and the volume and subvolume
where the firmware file resides, based on the SYSnn specified during the
Build/Apply phase of installing the new RVU. For example:
\prod2.$system.sys01
4. In the File box, enter spntcde9.
spntcde9 appears in the Local area File Name box.
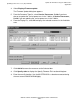
5. Under Download Path, click Browse to locate the file. Under Options, verify that
the Binary option is selected.
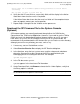
Note. If you have downloaded the spntcde9 file in previous RVU installations, verify that
the Overwrite local files option is also selected.