
G06.30 Software Installation and Upgrade Guide

Overview of Installing G06.30
G06.30 Software Installation and Upgrade Guide—543764-002
1-39
NonStop SQL/MX Release 2.1.1
*WARNING* Extents are lost when file/table labels are
deleted.
3. Rebuild the disk free-space table by using the SCF CONTROL DISK $volume,
REBUILDDFS command. For more information about CONTROL DISK, see
the SCF Reference Manual for the Storage Subsystem.
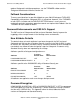
Installing NonStop SQL/MX Release 2.1.1
Before installing NonStop SQL/MX:
•
Check that TMF is configured and running on the system node where you will
install NonStop SQL/MX, as described in the TMS Installation and Management
Guide. Note that all SQL/MX objects must reside on volumes audited by TMF.
SQL/MX program files do not need to reside on audited volumes.
•
Perform all preinstallation instructions as outlined in Sections 1 and 2 of the
SQL/MX Installation and Management Guide.
Installing NonStop SQL/MX Release 2.1.1 consists of applying the ABX SPRs or
installing an RVU, such as G06.29, that contains the SPRs. Installation considerations
are generally the same as those documented for Releases 2.0 and 2.1.
You install NonStop SQL/MX after performing a system load of the new RVU and
performing other post-installation steps. (See Section 12, Resuming Normal
Operations.)
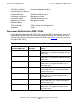
For more information about installing SQL/MX:
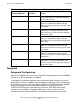
Note. When using DIRCHECK:
•
You must be the super ID (255,255).
•
The DIRCHECK DELETE command deletes any internal labels associated with a specified
file. Because of this, DIRCHECK indicates that multiple labels have been deleted after you
delete one file.
•
To view online help for DIRCHECK, enter:
$system.zutil.dircheck help
•
To view online help for the DIRCHECK DELETE command, enter:
$system.zutil.dircheck help delete
For This Information: See:
Summary of new
SQL/MX features and
characteristics
Release 2.1.0 highlights in the
Interactive Upgrade Guide 2
SQL/MX preinstallation
instructions
SQL/MX Installation and
Management Guide