
Gigabit Ethernet ServerNet Adapter Installation and Support Guide

Installing a GESA
Gigabit Ethernet Adapter Installation and Support Guide—523628.005
2-8
Install a GESA
Install a GESA
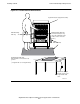
Unpack and Inspect the GESA
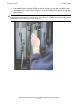
1. Put on an ESD wrist strap and attach the grounding clip to the antistatic mat.
2. Place the package containing the GESA on the antistatic mat.
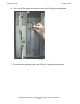
3. Open the packing container and remove the GESA.
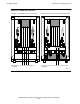
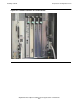
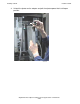
4. Visually inspect the GESA and the backplane connector for damage. Use a
flashlight, if necessary, to check for bent or broken pins. If the GESA is damaged
or has a damaged connector-pin socket, do not install it. Instead, contact your HP
service provider.
Note. HP recommends that you install a GESA first, then add the adapter using the
Subsystem Control Facility (SCF).
Table 2-2. Installation Checklist
Step Description
1. Unpack and Inspect the GESA
.
2. Install the GESA
.
3. Verify the Installation of the GESA
.
4. Add and Start the GESA Using SCF
.
Note. Whenever you handle a GESA, follow standard operating practices to avoid damage to
the equipment. See Review Standard Operating Practices
on page 2-6.
Caution. When opening the packing container, be careful not to cut into the ESD protective
bag.
Caution. If you insert a GESA that has a damaged socket into a slot, that GESA's backplane
pins and the connectors on other adapter boards also inserted into that slot can be damaged.
Moving a damaged adapter from slot to slot can damage other slots and other adapters.