IPSetup User’s Guide Abstract This manual describes IPSetup and its use in preparing Independent Products (IPs), release version updates (RVUs), and software product revisions (SPRs) for installation on HP NonStop™ servers. Product Version T0316H01 and T0082H01 Supported Release Version Updates (RVUs) This publication supports J06.03 and subsequent J-series RVUs, H06.03 and subsequent H-series RVUs, G02.00 and subsequent G-series RVUs, and D30.
Document History Part Number Product Version Published 524733-003 T0316V02 and T0082D31 October 2002 524733-004 T0316H01 and T0082H01 January 2005 524733-005 T0316H01 and T0082H01 May 2006 524733-006 T0316H01 and T0082H01 May 2010 524733-007 T0316H01 and T0082H01 September 2011
Legal Notices Copyright 2011 Hewlett-Packard Development Company L.P. Confidential computer software. Valid license from HP required for possession, use or copying. Consistent with FAR 12.211 and 12.212, Commercial Computer Software, Computer Software Documentation, and Technical Data for Commercial Items are licensed to the U.S. Government under vendor's standard commercial license. The information contained herein is subject to change without notice.
IPSetup User’s Guide Examples Legal Notices What’s New in This Manual iii Manual Information iii New and Changed Information iii About This Manual v Manual Organization v Notation Conventions vi 1. Automated Software Placement Using the IPSetup Windows Application Task 1: Launch IPSetup 1-1 Task 2: Provide Needed Placement Information Tracing IPSetup Activities 1-20 Running Trace 1-20 IPSetup Log File 1-20 1-2 2.
B. SETUPRUN and NSKUNPK Error Messages Contents B. SETUPRUN and NSKUNPK Error Messages SETUPRUN Error Messages B-1 NSKUNPK Error Messages (1000-7006) B-6 NSKUNPK Errors by File Name B-7 Examples Example 2-1.
What’s New in This Manual Manual Information IPSetup User’s Guide Abstract This manual describes IPSetup and its use in preparing Independent Products (IPs), release version updates (RVUs), and software product revisions (SPRs) for installation on HP NonStop™ servers. Product Version T0316H01 and T0082H01 Supported Release Version Updates (RVUs) This publication supports J06.03 and subsequent J-series RVUs, H06.03 and subsequent H-series RVUs, G02.00 and subsequent G-series RVUs, and D30.
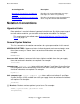
Changes to the 524733-006 manual: What’s New in This Manual Changes to the 524733-006 manual: Updated information related to SSH and SFTP support in the following topics: Task 1: Launch IPSetup on page 1-1 Task 2: Provide Needed Placement Information on page 1-2 Updated the GUI screens on pages 1-4, 1-5, and 1-8. Added the SSH and SFTP error messages under SSH and SFTP Error Messages on page A-7.
About This Manual IPSetup prepares IPs, RVUs, and SPRs for installation on workstations or NonStop servers. IPSetup does not install software. For workstations, IPSetup launches the appropriate workstation installer application after you designate in IPSetup that you are installing workstation components. For HP NonStop IP components: 1. You designate IPs, RVUs and SPRs in IPSetup. 2. IPSetup transfers the designated files from their delivery medium (for example, CD-ROM or DVD) to the NonStop server. 3.
Notation Conventions About This Manual Section/Appendix Description Appendix A, IPSetup Error and Warning Messages Describes the error and warning messages that might arise when using IPSetup Appendix B, SETUPRUN and NSKUNPK Error Messages Describes the error messages that might arise when using SETUPRUN and NSKUNPK Notation Conventions Hypertext Links Blue underline is used to indicate a hypertext link within text.
General Syntax Notation About This Manual A group of items enclosed in brackets is a list from which you can choose one item or none. The items in the list may be arranged either vertically, with aligned brackets on each side of the list, or horizontally, enclosed in a pair of brackets and separated by vertical lines. For example: FC [ num ] [ -num ] [ text ] K [ X | D ] address { } Braces. A group of items enclosed in braces is a list from which you are required to choose one item.
Notation for Messages About This Manual If there is no space between two items, spaces are not permitted. In this example, there are no spaces permitted between the period and any other items: $process-name.#su-name Line Spacing. If the syntax of a command is too long to fit on a single line, each continuation line is indented three spaces and is separated from the preceding line by a blank line. This spacing distinguishes items in a continuation line from items in a vertical list of selections.
Notation for Messages About This Manual The user must press the Return key after typing the input. Nonitalic text. Nonitalic letters, numbers, and punctuation indicate text that is displayed or returned exactly as shown. For example: Backup Up. lowercase italic letters. Lowercase italic letters indicate variable items whose values are displayed or returned. For example: p-register process-name [ ] Brackets. Brackets enclose items that are sometimes, but not always, displayed.
About This Manual Notation for Management Programming Interfaces Notation for Management Programming Interfaces This list summarizes the notation conventions used in the boxed descriptions of programmatic commands, event messages, and error lists in this manual. UPPERCASE LETTERS. Uppercase letters indicate names from definition files; enter these names exactly as shown. For example: ZCOM-TKN-SUBJ-SERV lowercase letters.
1 Automated Software Placement Using the IPSetup Windows Application To move IP, RVU, or SPR software from the CD-ROM or other IP delivery medium (DVD) to a NonStop system by using the IPSetup Windows application, perform: Task 1: Launch IPSetup Task 2: Provide Needed Placement Information For detailed information on each IPSetup dialog box, see the IPSetup online help. To access online help, click the Help button or press F1.
Automated Software Placement Using the IPSetup Windows Application Task 2: Provide Needed Placement Information Task 2: Provide Needed Placement Information 1. Exit all other Windows applications. When you run IPSetup, the Welcome dialog box appears. At this point, HP strongly recommends that you exit all Windows applications before running IPSetup. Click Cancel to quit IPSetup so you can exit other applications. Then run IPSetup again.
Automated Software Placement Using the IPSetup Windows Application Task 2: Provide Needed Placement Information c. Click Next >. The Placement Options dialog box appears: The target platform options on the Placement Options page are enabled or disabled depending on the platform type of the product you want to place on the NonStop server.
Automated Software Placement Using the IPSetup Windows Application Task 2: Provide Needed Placement Information Options screen. You must select the appropriate platform type and then specify the NonStop product directory/location in the Product Selection page.
Automated Software Placement Using the IPSetup Windows Application Task 2: Provide Needed Placement Information When the software package contains the TNS/R and TNS product, the following Placement Options dialog box appears: The Next > button is disabled until one of the enabled radio buttons is checked. 3. Select a target platform for your IP software. a. Click the button for the platform.
Automated Software Placement Using the IPSetup Windows Application Task 2: Provide Needed Placement Information 3. Follow the instructions in the installer application to finish installing the IP on your workstation. This completes installing the workstation software using IPSetup. Additionally, you can run IPSetup to place required NonStop components (if any) on the NonStop server. b.
Automated Software Placement Using the IPSetup Windows Application Task 2: Provide Needed Placement Information The Product Selection dialog box appears, listing the available NonStop products on the CD-ROM or DVD: VST002.vsd Note. For the systems running on D-series and G-series, the title of the dialog boxes appears as Independent Products Setup instead of Setup for Independent Products and NonStop Software. 4. Select the products to place on the NonStop system. a.
Automated Software Placement Using the IPSetup Windows Application Task 2: Provide Needed Placement Information VST003.vsd d. Click Add->. The selected products move to the Selected Products list. e. After you select all the products you want to place, click Next >.
Automated Software Placement Using the IPSetup Windows Application Task 2: Provide Needed Placement Information 5. Log on to the host. Note. Starting T0316H01^AAK (version 4.1.00.0) IPSetup supports two modes of communication: Telnet and Secure SHell (SSH). To use the SSH mode of communication, ensure that the SSH server is configured correctly and running on the NonStop server.
Automated Software Placement Using the IPSetup Windows Application Task 2: Provide Needed Placement Information c. For secure mode of communication select SSH, else accept the default Telnet, which sends data in unsecure mode. Depending on your selection, relevant fields are enabled/disabled. 1. If you selected SSH, change the SSH port as necessary. The port can be from 0 through 65535. The default SSH port is 22. 2. If you selected Telnet, change the Telnet and FTP ports as necessary.
Automated Software Placement Using the IPSetup Windows Application Task 2: Provide Needed Placement Information When you are logged on, the Host Target Settings dialog box appears: VST005.vsd 6. Specify the work and backup subvolumes and OSS file extraction on the host. (The Backup option will be disabled in the Host Target Settings dialog box for more than one product selected on the Product Selection dialog box.
Automated Software Placement Using the IPSetup Windows Application Task 2: Provide Needed Placement Information b. Select the Back Up Existing Host Files to: check box if you want the existing files in the work subvolume to be backed up to another subvolume. c. If you will back up existing files, set the backup subvolume. To specify a different location, click Browse... . The Subvolume Browser dialog box appears. Choose your volume and subvolume, and then click OK.
Automated Software Placement Using the IPSetup Windows Application Task 2: Provide Needed Placement Information VST006.
Automated Software Placement Using the IPSetup Windows Application Task 2: Provide Needed Placement Information VST009.vsd a. Expand an IP in the tree view. You can expand to view DSVs, ISVs (IPs), and their target files. b. Select a file to view where its DSV or ISV will be placed. c. If you want to use a different volume than is indicated, select it from the Volume menu. d. Repeat these steps for all the DSVs or ISVs for which you want to review the associated target volumes. e.
Automated Software Placement Using the IPSetup Windows Application Task 2: Provide Needed Placement Information The Placement Manifest dialog box displays all of the software that IPSetup will place on the host system: VST007.vsd a. Check that the manifest contains exactly the software that you want to place. b. Click Next >. If you select Backup Files in the Host Target Settings dialog box, IPSetup backs up any existing files to the backup subvolume.
Automated Software Placement Using the IPSetup Windows Application Task 2: Provide Needed Placement Information When IPSetup completes its tasks, the Placement Complete dialog box appears. 9. Finish your IPSetup session For IPs: VST010.vsd a. To view the release documentation when IPSetup closes, select the View release documentation check box. b. If you have specified to manage the product with DSMSCM, the Launch DSM/SCM planner interface check box is automatically selected.
Automated Software Placement Using the IPSetup Windows Application Task 2: Provide Needed Placement Information IPSetup closes and opens the release documentation, or launches DSM/SCM as specified. Note. You can specify both or neither option in this dialog box. If you specify both options, the release documentation appears, and DSM/SCM starts up in the background.
Automated Software Placement Using the IPSetup Windows Application Task 2: Provide Needed Placement Information For RVU or SPR: VST011.vsd a. To view the readme file when IPSetup closes, select the View the Readme File check box. b. If you have specified to manage the RVU or SPR with DSMSCM, the Start TAPESIM and Launch DSM/SCM planner interface check box is automatically selected. If you do not want IPSetup to start TAPESIM and launch DSM/SCM planner interface, clear the check box. c. Click Finish.
Automated Software Placement Using the IPSetup Windows Application Task 2: Provide Needed Placement Information Note. The Tapesim process $ZRVU simulates a real tape drive with a mounted tape. To utilize it, specify $ZRVU as the tape drive for your Receive Software request in the Planner Interface. Alternatively, it can also be used as a Restore command. For example, Use Restore $ZRVU,*.*.*, listonly.
Automated Software Placement Using the IPSetup Windows Application Tracing IPSetup Activities Tracing IPSetup Activities You can set IPSetup to trace its activities, which creates a special log of events as they are generated while running IPSetup. Logs generated by running a trace can be used to diagnose problems you might encounter while running the IPSetup Windows application.
2 Manual Software Placement Using FTP and SETUPRUN To move IP software from the CD-ROM or other IP delivery medium (DVD) to a NonStop system, using IPSetup without using the Windows application interface: Task 1: Determine the IP Version Task 2: Move the Files From the CD-ROM or DVD to the NonStop System Task 3: Unpack the Files on the NonStop System Task 4: Perform Cleanup Activities Task 1: Determine the IP Version 1. Read the readme.txt file. Locate the readme.
Manual Software Placement Using FTP and SETUPRUN Task 2: Move the Files From the CD-ROM or DVD to the NonStop System Task 2: Move the Files From the CD-ROM or DVD to the NonStop System The files you need to move, including SETUPRUN, NSKUNPK, and the IPSetup readme file, are located on your IP CD-ROM or DVD in this directory: \nsk_sw\tools\ platform\ where platform is the processor type for the platform on which you will use the IP software (CISC, RISC, or TNSE.) 1. Move the SETUPRUN file.
Task 3: Unpack the Files on the NonStop System Manual Software Placement Using FTP and SETUPRUN Task 3: Unpack the Files on the NonStop System For IPs The SETUPRUN TACL program places the software. That is, it unpacks each packed DSV file to an intermediate location and then reconstitutes all of its product component files into a DSV form. 1. Log on to the NonStop system, using a user ID with access to all the files that you moved in Task 2. 2. Run SETUPRUN.
Manual Software Placement Using FTP and SETUPRUN For RVU and SPR If not all files were unpacked successfully, before it finishes SETUPRUN displays: ----------------------------------------------------- xxxx OF xxxx PACKAGES WERE SUCCESSFULLY PLACED ---------------------------------------------------------To determine why some files were not successfully placed, check the error message that SETUPRUN issues. (See Troubleshooting Tips on page 2-12.) 4. Correct the problems if indicated. 5.
Manual Software Placement Using FTP and SETUPRUN For RVU and SPR rvu-id is the RVU ID in Ann.nn.nn format. The default value for the RVU ID is blank which indicates the SPR bundle. In case of RVU, the rvu-id is mandatory. Examples for using SETUPRUN for RVU or SPR files: SETUPRUN for RVU files If you have RVU pak files (1729 code) with H605001, H6050011, H6050012 and so on, use SETUPRUN with UNPAK option as: SETUPRUN unpak,vol $vol.subvol, rlse H06.05.
Manual Software Placement Using FTP and SETUPRUN For RVU and SPR If you specify Y, SETUPRUN starts the TAPESIM process, $ZRVU, and this message is displayed: Starting TAPESIM Process ... Informs the successful launch of the TAPESIM process, $ZRVU, with these messages: TAPESIM server process $ZRVU has been started successfully. Please stop the $ZRVU process after the DSM/SCM receive activity is over, or if you do not wish to receive the RVU or SPR into DSM/SCM immediately.
Manual Software Placement Using FTP and SETUPRUN For RVU and SPR 3. If SETUPRUN encounters any error, appropriate message will be displayed. For details on the error messages, see Appendix B, SETUPRUN and NSKUNPK Error Messages. Commands to start $ZRVU process manually: In TACL, VOLUME to the subvolume where the TAPESIM and TSERVER files are present.
Manual Software Placement Using FTP and SETUPRUN Task 4: Perform Cleanup Activities Task 4: Perform Cleanup Activities 1. Review the DSVLOCS file to determine where the DSVs were placed. The DSVLOCS file indicates the volume on which each DSV was established. 2. Check that the files are in their final destination. If you manage your software configuration using DSM/SCM: Issue a Receive Software request to move the files from their DSVs to the DSM/SCM archive.
Manual Software Placement Using FTP and SETUPRUN Task 4: Perform Cleanup Activities g. Delete IPSetup utilities and DSV packed files. Once all IP files from the DSVs are in the DSM/SCM archive or their ISVs, delete the DSVs and these files: SETUPRUN NSKUNPK FILEMGR DSVLOCS Example 2-1.
Manual Software Placement Using FTP and SETUPRUN Example: Using FTP to Transfer Files Example: Using FTP to Transfer Files This example shows how to use FTP to move the setuprun, filemgr, and nskunpk files from the CD-ROM or DVD to the NonStop system and how to run the setuprun file. On the PC: 1. Check that the CD-ROM or DVD is in the proper drive. 2. Open a command prompt and connect to the NonStop host system: C:\>ftp riddlr.tandem-education.com Connected to riddlr.tandem-education.com. 3.
Manual Software Placement Using FTP and SETUPRUN Example: Using FTP to Transfer Files 8. Change the FTP transfer to binary mode: ftp> bin 200 Type set to I. 9. Copy the filemgr file to the host system: ftp> put filemgr 200 PORT command successful. 150 Opening data connection for FILEMGR (130.252.147.121,4243d). 226 Binary Transfer complete. 92160 bytes sent in 0.43 seconds (213.83 Kbytes/sec) 10. Copy the nskunpk file to the host system: ftp> put nskunpk 200 PORT command successful.
Manual Software Placement Using FTP and SETUPRUN Troubleshooting Tips On the NonStop system: $CLASS1 INSTALL 5> run setuprun DSM/SCM SETUPRUN Function - T0082D31 - (13APR98) Copyright Tandem Computers Incorporated, 1997-1998 Verifying environment ... Running NSKUNPK Y0402000 ... PLACED DSV IN \RIDDLR.$CLASS1.Y0402V01 Purging Y04020* ...
Manual Software Placement Using FTP and SETUPRUN Troubleshooting Tips Specify a different NonStop volume to be the ISV. Add a purge parameter to the end of each FUP DUP command in the DSV2ISV file: , purge If you get an Error 11 when performing an OBEY command on the DSV2ISV file: Check that you correctly edited all the needed FUP DUP commands in the OBEY file. Check that all the DSVs have been moved to the NonStop system.
Manual Software Placement Using FTP and SETUPRUN IPSetup User’s Guide—524733-007 2-14 Troubleshooting Tips
A IPSetup Error and Warning Messages Error Messages These errors might appear while you run the IPSetup Windows application. A read error occurred on the file file-name. Cause. IPSetup could not read the specified file. Either it is corrupt, or it is not set to allow access to the user running IPSetup. Recovery. Check and correct the file’s security settings. If the file is viewable by the user, the file is corrupt and must be replaced. A window creation error occurred. Windows resources may be low.
IPSetup Error and Warning Messages Error Messages Could not create font. Windows resources are low. Cause. Memory resources on your PC are getting too low for IPSetup to run properly. Recovery. Exit IPSetup, close all other Windows applications, and run IPSetup again. Could not start inline FUP process: Cause. IPSetup could not start a FUP process in inline mode on the host. Recovery. Correct the error if possible and try again. Inline FUP process abended. Cause.
IPSetup Error and Warning Messages Error Messages Requisite file file-name could not be found. Click OK to close the application. Cause. The specified file could not be found. The license.txt file is probably missing. IPSetup cannot continue without the license file. Recovery. Click OK to quit IPSetup. If you are running IPSetup from a hard disk, check that the license.txt file is in the same directory as ipsetup.exe. Subvolume-name is not a valid subvolume name.
IPSetup Error and Warning Messages Error Messages Unable to alter file code on NSKUNPK: error. Cause. IPSetup could not alter the file code of NSKUNPK to make it executable on the host. Recovery. Check the security settings for the file. Unable to backup existing file: error Cause. IPSetup was unable to create a backup copy of the existing file in the selected backup subvolume. Recovery. Check the security settings for the backup subvolume. Unable to connect to host: host-name Cause.
IPSetup Error and Warning Messages Error Messages Unable to logon to host: host-name Cause. The user supplied an incorrect user name or password during the initial logon. Recovery. Check that a valid user name and password are provided in the Host Information dialog box. Unable to retrieve application directory. Cause. Windows was unable to determine the directory IPSetup is running in. Recovery. The ipsetup.exe file has been renamed before or after starting the application.
IPSetup Error and Warning Messages Error Messages Error during UNPAK. Cause. Either the UNPAK utility or the PAKed files are missing in the work subvolume, or any other error encountered by UNPAK. Recovery. Check the subvolume for appropriate PAKed files and UNPAK utility. Check the trace log for additional error messages from UNPAK. IPSetup cannot start a new TAPESIM server process, $ZRVU, as it is already running on the system. Therefore, the host installation will remain incomplete.
IPSetup Error and Warning Messages Warning Messages Only one RVU/SPR can be installed at a time. Cause. User tried to add more than one product to the available products list, when the already present product or the product being added is an RVU or SPR. Recovery. This is a restriction posed by the application. In the case of RVU and SPR, unlike IPs, only one product can be installed at a time. Warning Messages These warnings might appear while you run the IPSetup Windows application.
IPSetup Error and Warning Messages SSH and SFTP Error Messages Cause. IPSetup could not establish an SSH connection to the specified host on the SSH/SFTP port. Either login details, such as hostname or port, are not correct or the SSH service is not available. Recovery. Enter valid login details such as hostname, SSH/SFTP port. Ensure that the SSH service is configured and running on the NonStop server. SFTP error > SFTP subsystem request failed, closing channel Cause. The SFTP service is unavailable.
B SETUPRUN and NSKUNPK Error Messages SETUPRUN Error Messages Bad DSV found in log file DSVLOCS, record record number: log record Skipping record ... Cause. SETUPRUN has issued an internal error. The format of the indicated DSVLOCS record is incorrect. Recovery. If the record refers to a valid DSV that you want to rename, rename it manually outside of SETUPRUN. Correct errors and restart SETUPRUN. Cause. SETUPRUN encountered errors that caused it to terminate. Recovery.
SETUPRUN and NSKUNPK Error Messages SETUPRUN Error Messages FILEMGR must be licensed by SUPER.SUPER before SETUPRUN can continue. Cause. FILEMGR is not licensed to be used by the super ID. Recovery. License FILEMGR as the super ID and then rerun SETUPRUN. Files not renamed. Cause. SETUPRUN encountered a file error when attempting to rename the files in a DSV. Recovery. Correct the indicated file code errors and then manually rename the DSVs. Invalid subvolume specified. Cause.
SETUPRUN and NSKUNPK Error Messages SETUPRUN Error Messages Required file not found in current subvolume: FILEMGR Cause. Either you did not upload the FILEMGR program from the delivery medium (CD-ROM or DVD) to the NonStop system, it was misnamed during the upload, or it was not placed into the same subvolume as SETUPRUN. Recovery. Move FILEMGR from the delivery medium (CD-ROM or DVD) to the NonStop system (See Step 2 of Task 2: Move the Files From the CD-ROM or DVD to the NonStop System on page 2-2.
SETUPRUN and NSKUNPK Error Messages SETUPRUN Error Messages Unable to write to volume volume-name Cause. SETUPRUN tried to write to a volume that the user who ran SETUPRUN does not have access to. Recovery. Check that you have write access to the indicated volume, or specify a different volume and rerun SETUPRUN. volume-name is not a disk volume. Cause. SETUPRUN tried to access a disk volume that does not exist. Recovery. The indicated volume is not a valid volume name.
SETUPRUN and NSKUNPK Error Messages SETUPRUN Error Messages . UNPAK was unsuccessful! Completion Code = completion code Termination Code = termination code Cause. UNPAK encountered an execution error Recovery. Review and correct the error messages displayed by UNPAK. Then rerun SETUPRUN. . Unable to write to location: volume-name.subvolume-name. Cause. SETUPRUN tried to write to a location ($volume.subvolume) that the user who ran SETUPRUN does not have access to. Recovery.
SETUPRUN and NSKUNPK Error Messages NSKUNPK Error Messages (1000-7006) Required file not found in current subvolume: TSERVER Cause. You did not upload the TSERVER program from the product media to the NonStop system, or it was misnamed during the upload, or it was not placed into the same subvolume as SETUPRUN. Recovery.
SETUPRUN and NSKUNPK Error Messages NSKUNPK Errors by File Name ASSERTION FAILED CALLER-SPECIFIED DATA SYSTEM RESOURCES INTERNAL PROBLEM C LIBRARY FUNCTION FAILURE DSM/SCM LIBRARY FUNCTION FAILURE NSK LIBRARY FUNCTION FAILURE UN/PKG LIBRARY FUNCTION FAILURE !!! UNABLE TO RECORD ERROR DATA !!! return code is the type of error within the error class. (For example, if the error class identifier is NSK LIBRARY FUNCTION FAILURE, the Error Return value indicates a NonStop file system error.) Line # nnnn.
SETUPRUN and NSKUNPK Error Messages NSKUNPK Errors by File Name -100 Unsupported package file header revision level encountered. Header Revision-Level Expected: 1 Header Revision-Level Encountered: n Retrieve the NSKUNPK component of the T0082 product that was distributed with this package file and reinitiate the unpackaging process. Cause. A T0082D31 (or later) product version encountered a package file that is unversioned (that is, T0082D30 – initial release + AAA, AAC). Recovery.
SETUPRUN and NSKUNPK Error Messages NSKUNPK Errors by File Name Recovery. Contact your support representative. SIPDRVRC Error Class: CALLER-SPECIFIED DATA 1000 A ’base’ package file name must be specified. Cause. NSKUNPK was invoked without the name of a base package file name (for example, R7887000), which is a required parameter. Recovery. Specify a base package file name when running NSKUNPK (for example, RUN NSKUNPK R7887000). 1001 ’Base’ package name too long; NSK file name length limit is 8.
SETUPRUN and NSKUNPK Error Messages NSKUNPK Errors by File Name 2001 Several messages might appear under this Error ID: Unable to NEWPROCESS the FILEMGR program for use. Unable to locate FILEMGR program in execution subvol/$SYSTEM.SYS*. Copy FILEMGR program to one of the above locations; FUP LICENSE it. Cause. No FILEMGR program was found on $SYSTEM.SYS* or in the current execution subvolume. Recovery. Place a FILEMGR in one of these locations and use FUP to license it. $vol.subvol.
SETUPRUN and NSKUNPK Error Messages NSKUNPK Errors by File Name SIPUTILC Error Class: SYSTEM RESOURCES 2002/2008/2013 Specified NSK disk volume(s) non-existent. DSV dsv-name cannot be unpackaged. Cause. The NonStop disk volume specified to NSKUNPK does not exist. Recovery. Rerun NSKUNPK specifying an existing, functional NonStop disk volume. 2003/2009/2014 Specified NSK disk volume(s) inaccessible. DSV dsv-name cannot be unpackaged. Cause.
SETUPRUN and NSKUNPK Error Messages NSKUNPK Errors by File Name 2006 NSK disk(s) too fragmented to unpackage DSV A0CINFO file. DSV dsv-name cannot be unpackaged. Cause. The NonStop disk volume is too fragmented to accommodate the unpackaged A0CINFO file. Recovery. Rerun NSKUNPK specifying a NonStop disk volume that is less fragmented. 2007 (see 2005/2007) 2008 (see 2002/2008/2013) 2009 (see 2003/2009/2014) 2010 Insufficient scratch disk space to unpackage DSV files. DSV dsv-name cannot be unpackaged.
SETUPRUN and NSKUNPK Error Messages NSKUNPK Errors by File Name 2012 NSK disk(s) too fragmented to unpackage DSV files. DSV dsv-name cannot be unpackaged. Cause. The NonStop disk volume is too fragmented to accommodate the unpackaged DSV component files. Recovery. Rerun NSKUNPK specifying a NonStop disk volume that is less fragmented. 2013 (see 2002/2008/2013) 2014 (see 2003/2009/2014) 2015 Insufficient scratch disk space to place DSV files. DSV dsv-name cannot be unpackaged. Cause.
SETUPRUN and NSKUNPK Error Messages NSKUNPK Errors by File Name 2018 Unable to delete pre-existing A0CINFO file: file-name DSV dsv-name cannot be reconstituted. Cause. The ownership or security associated with the A0CINFO file file-name in the NonStop disk subvolume where a new DSV is to be placed prevents the NSKUNPK user from purging this file. Recovery.
SETUPRUN and NSKUNPK Error Messages NSKUNPK Errors by File Name 3005 More files were unpackaged than expected. DSV dsv-name cannot be unpackaged. Cause. More DSV files were unpackaged from the package file than are listed in the DSV’s A0CINFO file. Recovery. This error might indicate a problem in verifyPackageSet. If so, you should open a Genesis case against T0082.
SETUPRUN and NSKUNPK Error Messages NSKUNPK Errors by File Name 3009/3010/3011/3012 Invalid A0CINFO File - Unknown record type encountered. Unable to place version 2 A0CINFO file into DSV. Cause. An unknown version 3 A0CINFO record type was encountered. Recovery. Contact your support representative. 3013 Non-NULL ’fng_fnm_stru_ptr’ encountered where NULL pointer needed. Unable to reconstitute DSV file(s). Cause. A non-NULL pointer was encountered where a NULL pointer was expected. Recovery.
SETUPRUN and NSKUNPK Error Messages NSKUNPK Errors by File Name 4001 ’malloc’ failure - Unable to obtain sufficient memory. Cause. IPSetup could not allocate memory to record the local execution volume. Recovery. This error usually indicates a transient resource problem. Review and fix any problems if possible. Then rerun SETUPRUN. 4002 ’malloc’ failure - Unable to obtain sufficient memory. Cause. IPSetup could not allocate memory to record the local execution subvolume. Recovery.
SETUPRUN and NSKUNPK Error Messages NSKUNPK Errors by File Name 4007 ’malloc’ failure - Unable to obtain sufficient memory. Cause. IPSetup could not allocate memory to record the base package file name. Recovery. This error usually indicates a transient resource problem. Review and fix any problems if possible. Then rerun SETUPRUN. 4008/4009/4010/4011 ’malloc’ failure - Unable to obtain sufficient memory. Cause. IPSetup could not allocate memory to record a NonStop disk volume name. Recovery.
SETUPRUN and NSKUNPK Error Messages NSKUNPK Errors by File Name 4014 ’fclose’ failed writing to DSV placement log: file-name Unable to continue. Cause. SETUPRUN was unable to write a DSV file placement log. The DSV was unpacked, but no record of what was placed where. Recovery. This error is usually indicates a transient file-system problem. The DSV placement log is most likely an empty file. Review and fix any problems if possible. Then rerun SETUPRUN.
SETUPRUN and NSKUNPK Error Messages NSKUNPK Errors by File Name 4017 ’remove’ C library procedure failed purging a file: scratch-version3-A0CINFO-file-name Unable to place version 2 A0CINFO file into DSV. DSV dsv-name cannot be reconstituted. Cause. SETUPRUN was unable to purge a version 3 A0CINFO file and write a version 2 A0CINFO file into the DSV subvolume. DSM/SCM will not be able to input this DSV. Recovery. Assume a transient error. Another user might have purged this file.
SETUPRUN and NSKUNPK Error Messages NSKUNPK Errors by File Name SIPUTILC Error Class: DSM/SCM LIBRARY FUNCTION FAILURE 5000 ’ut25_Export_archive_file’ DSM/SCM lib procedure failed. Unable to reconstitute A0CINFO file for current DSV. Cause. DSM/SCM library procedure failed. Most likely a name-space collision (A0CINFO file already exists in named scratch subvolume), or the FILEMGR process failed. Recovery. Purge any files from the named scratch subvolume.
SETUPRUN and NSKUNPK Error Messages NSKUNPK Errors by File Name 5003 ’ut25_Export_archive_file’ DSM/SCM procedure failure. Unable to place DSV file file-name. DSV dsv-name cannot be reconstituted. Cause. The ownership or security associated with the file name of the existing DSV file prevents the NSKUNPK user from purging file-name in the NonStop disk subvolume where a new DSV is to be placed. Recovery.
SETUPRUN and NSKUNPK Error Messages NSKUNPK Errors by File Name SIPUTILC Error Class: NSK LIBRARY FUNCTION FAILURE 6004/6005 FILE_GETINFOLISTBYNAME_ failure - unable to continue. Cause. SETUPRUN is unable to determine the size of a NonStop file. Recovery. This error might be transient. Restart the program. If this problem persists, contact your support representative. 6006 FILENAME_FINDSTART_ failure. DSV dsv-name cannot be unpackaged. Cause.
SETUPRUN and NSKUNPK Error Messages NSKUNPK Errors by File Name 6008 FILE_CLOSE_’ NSK library procedure failed closing a file: file-name Unable to place version 2 A0CINFO file into DSV. DSV cannot be reconstituted: dsv-name Cause. FILE_CLOSE_ failed after reading a version 3 A0CINFO file into memory from a scratch subvolume. Recovery. This error is usually transient. Eliminate any residual files from scratch subvolumes and rerun SETUPRUN. If this problem persists, contact your support representative.
SETUPRUN and NSKUNPK Error Messages NSKUNPK Errors by File Name 6011 ’FILE_OPEN_’ NSK library procedure failed opening a file: file-name Unable to place version 2 A0CINFO file into DSV. Cause. Following creation of version 2 A0CINFO file in DSV, the attempt to open the file for exclusive write access failed. Recovery. This error is usually transient. Eliminate any residual files from scratch subvolumes and existing files from the DSVs. Then rerun SETUPRUN.
SETUPRUN and NSKUNPK Error Messages NSKUNPK Errors by File Name SIPUTILC Error Class: UN/PKG LIBRARY FUNCTION FAILURE 7000 ’openPackageSet’ failure on file Rnnnn000. Cause. openPackageSet failed to allocate enough memory for a packageSet object due to a memory allocation error. The package file is not opened by openPackageSet. Recovery. An invalid package file name length or format was specified. If you ran NSKUNPK manually, rerun NSKUNPK naming a valid base package file (for example, PKG000).
SETUPRUN and NSKUNPK Error Messages NSKUNPK Errors by File Name 7003 ’queryNextFileInPackageSet’ returned invalid DSV location: dsv-name Cause. queryNextFileInPackageSet was returned an invalid DSV name. Recovery. This error might be transient. Review and fix any problems if possible. Then rerun SETUPRUN. If this problem persists, contact your support representative. 7004 ’getNextFileInPackageSet’ failure - unable to retrieve A0CINFO file. DSV dsv-name cannot be unpackaged. Cause.
SETUPRUN and NSKUNPK Error Messages NSKUNPK Errors by File Name 7006 ’finishPackageSet’ failure. DSV dsv-name cannot be unpackaged. Cause. A file-system error occurred while trying to close the current package file. Recovery. This error might be transient. Eliminate any residual files from scratch subvolumes and restart the program. If this problem persists, contact your support representative.