
iTP Secure WebServer System Administrator's Guide (iTPWebSvr 5.1+)


Configuring the iTP Secure WebServer
iTP Secure WebServer System Administrator’s Guide—522659-001
7-25
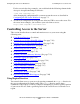
Setting Up Server Aliases
Setting Up Server Aliases
If you plan to advertise URLs for your server, you should register an alias for your
server machine. This section describes:
•
How Aliases Work (See below)
•
Why Aliases Are Useful (See page 7-25)
•
Setting Up an Alias (See page 7-25)
How Aliases Work
An alias, also known as a CNAME, is simply an alternative name for your server. You
register the CNAME and the local name with the Domain Name Server (DNS). For
example, if your server has the local name
aegean.compedia.com
you might select the following name as its DNS alias:
www.compedia.com
After registering this name with the DNS, you can then advertise www.compedia.com
as the name of your server. Users making requests through this alias would actually be
accessing aegean.compedia.com.
Why Aliases Are Useful
The major benefit to using an alias is flexibility. If your server has a registered alias, you
can physically move your server to a new host machine without having to change your
server’s name to reflect the name of the new host. If you did not use an alias and you
moved to a new host, you would need to change all your server URLs to point to the
new host and advertise the new URLs to your users.
Setting Up an Alias
You set up an alias for your server as follows:
1. Choose an alias for your machine and register it with the DNS. If you are not sure
how to register the name you choose, consult your local area network (LAN)
administrator or the system documentation.
2. Verify that your alias has been registered. Use the nslookup command if it is
available on your system.
3. In the server configuration file (httpd.config), set the
-name option in the Accept or
AcceptSecureTransport directive to the server’s alias name (see Appendix A,
Configuration Directives). This option configures the server to create URLs that
properly point to the server.