
iTP Secure WebServer System Administrator's Guide (iTPWebSvr 6.0+)


Installing the iTP Secure WebServer
iTP Secure WebServer System Administrator’s Guide—523346-002
2-12
Install a WISP
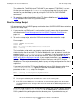
For Parallel Library TCP/IP users the next step after running the setup script is to
specify the TCPSAM process in the configuration file by use of the ACCEPT or
ACCEPTSECURETRANSPORT commands. For example:
ACCEPT -TRANSPORT G/ZSAM1 -PORT 80 -ADDRESS 143.17.211.104
You must also consider modifying the server directive of the configuration file. A new
attribute, DELETEDELAY <minutes>, is intended for use with PTCP/IP support.
Install a WISP
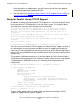
After you install the iTP Secure WebServer, you can install a WebSafe2 Internet
Security Processor (WISP) device by running install.WS (provided in the
/usr/tandem/webserver/admin/conf directory) with the -websafe option. This
adds the WISP configuration information to the existing iTP Secure WebServer
configuration file, and the script properly configures the WID and iTP Secure
WebServer for WISP operations.
You should back up prior versions of your configuration files before executing
install.WS.
Install the Resource Locator
You can install the optional Resource Locator feature with the iTP Secure WebServer.
The Resource Locator feature has specific dependencies that should be considered
prior to installation. See Section 10, Using the Resource Locator Service (RLS) for
information on using RLS.
Installation Considerations
Pathway CGI applications that are built with a newer version of libcgi.a than the
version of the httpd server will not run correctly. If you encounter problems, verify that
httpd and libcgi.a are the same version. You can do this by running VPROC on
these files.