
Jolt 1.2 Developer's Guide
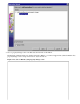
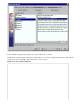
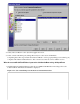

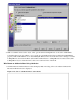

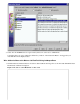
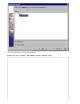
Table Of Contents
- Jolt for NonStop(TM) TUXEDO Developer's Guide
- Jolt for NonStop(TM) TUXEDO Developer's Guide
- About This Guide
- 1. Introducing Jolt
- 2. Installing Jolt
- 3. Configuring the Jolt System
- 4. Bulk Loading NonStopTM TUXEDO Services
- 5. Using the Jolt Repository Editor
- 6. Using the Jolt Class Library
- 7. Using JoltBeans
- 8. Using Servlet Connectivity for NonStopTM TUXEDO
- 9. Using Jolt 1.2 ASP Connectivity for NonStopTM TUXEDO
- A. NonStopTM TUXEDO Errors
- B. System Messages
- Index

With "accountId" selected as the object, select "get the current Jolt Input Event" as the action. Click Finish.
Completing these four steps enables you to type the account number in the first text field. The JoltFieldName
property of this JoltTextField is set to ACCOUNT_ID. Whenever the text inside this text box changes, it sends a
JoltInputEvent to the JoltServiceBean. (The JoltServiceBean listens to JoltInputEvents from this textbox.) The
JoltInputEvent object contains the name, value, and occurrence index of the field.
4.
Wire Button to JoltServiceBean Using JoltAction
Click the Interaction Wizard button. Select the Inquiry Button and drag a line to the JoltServiceBean. The
Interaction Wizard window is displayed.
Figure 7-20. Select "actionPerformed" as the Event
1.