
NonStop Cluster Essentials Installation and Quick Start Guide


5 Additional (Optional) Configuration
This section provides information about these optional configuration steps:
• “Configuring TimeSync” (page 27)
• “Exporting Cluster Configuration” (page 28)
• “Changing the Default SSH Port” (page 33)
• “Configuring SSL” (page 33)
Configuring TimeSync
In order for event logs of all of the systems in the cluster to be synchronized, the system time must
be the same across all of the systems in the cluster. The recommended configuration is for a
Windows-based Central Management Server (CMS) to be the TimeSync server and the NonStop
and Linux servers to be TimeSync clients. The CMS can also be defined as a client of an external
NTP server such as pool.ntp.org, and one CMS can be defined as a TimeSync server for the other
CMS. The TimeSync User’s Guide describes the configuration options in detail. To use NonStop
Cluster Essentials to configure TimeSync, follow the steps below:
1. Start an HP SIM browser session. Click on “All Systems” and select a NonStop Cluster. Click
the Tools & Links tab. Clink the “NonStop Cluster Management Tasks” link.
2. Click the “+” next to Time Management. The selection will expand to display “HP SIM Central
Management Server (CMS),” “Linux Server,” and “NonStop Server.”
3. Click the “+” next to “Linux Server.” Click the “+” next to “Server Management.” Click the
“Configure as Client” link.
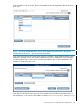
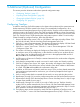
4. The window will change to display the Configure as Client dialog. Click the check box next
to each Linux server in the configuration, or the check box on the top row to select all Linux
servers. Enter “root” and the password for the root user in the appropriate fields and click
Run, then OK in the confirmation dialog box.
5. An SSH session will start and a TimeSync command executed in the windows that will appear,
one for each server.
6. Verify that the command did not result in an error for each window and close the window.
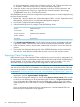
7. Click the “Configure Time Source” link. Again, the window will change to the Configure Time
Source dialog box. Select all the Linux servers as before. Enter the IP address or Host Name
of a CMS. Click Run and then OK in the confirmation dialog box.
8. As before, an SSH session will start for each Linux server. Since you have already entered the
Linux username and password for each server, you will not be prompted for them again in
this SSH session.
9. Verify in each window that the command did not result in an error and close the window.
10. Repeat steps 7 through 9, if you wish to configure more than one CMS as the TimeSync servers.
11. Repeat steps 3 through 10 for the NonStop servers. Choose “NonStop Server” in step 3. Login
as super.super instead of root in step 5.
12. Perform steps 3 through 9 for a CMS, if you wish a CMS to act as a TimeSync client for
another CMS or another external time source. Choose “HP SIM Central Management Server
(CMS)” in step 3. Login using domain\username and Windows password in step 5. Provide
the IP address or host name of the external time source in step 7.
13. The following steps must be executed on each CMS that is specified as TimeSync server in
step 7. Click the “+” next to “HP SIM Central Management Server (CMS).” Click the “+” next
Configuring TimeSync 27