
NonStop S-Series Hardware Installation and FastPath Guide (G06.25+)


Troubleshooting
HP NonStop S-Series Hardware Installation and FastPath Guide—529443-001
D-42
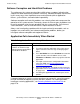
Restoring Software on the Hard Disk
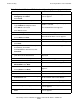
52. Select Do not allow virtual private
connections. Click Next.
The Allowed Users screen appears.
53. Select GCSC User. If this selection is
not available, call the GCSC. Otherwise,
click Next.
The Network Components screen appears.
54. Select Internet Protocol TCP/IP.
Click Properties.
The Incoming TCP/IP Properties screen
appears.
55. Under Network Access, select Allow
callers to access my local network.
The Incoming TCP/IP Properties screen
indicates the selection.
56. If the Specify an IP address check box is
not checked, check it.
The Incoming TCP/IP Properties screen
indicates the selection.
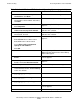
57. In the IP Address field, type:
Default From value: 192.231.36.77
Default To value: 192.231.36.78
Select Allow calling computer to
specify its own address.
Click OK.
The Networking Components Screen
appears.
58. Click Next. The Completing the Network Connection
Wizard and the default name of the Dialup
Connection appear.
59. Incoming Connection is selected. Click
Finish.
The Local Area Network Connection Status
screen appears.
60. Click Properties.
Double-click Local Area Connection.
The Local Area Connection Status screen
appears.
61. Click Properties. The TCP/IP Properties screen appears.
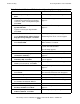
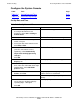
62. If the Specify and IP address check box
is not checked, check it. All the following
values are defaults.
63. In the IP Address field, type
192.231.36.1
64. In the Subnet Mask field, type
255.255.255.0
65. In the Default Gateway field, type
192.231.36.9
66. Click OK twice. The Local Area Communications Status
screen appears.
67. Click Close. You have completed the procedure.
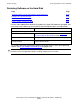
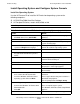
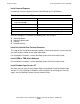
Table D-8. Install Windows XP Professional Operating System (page 4 of 4)
Action Result