
NonStop S-Series Hardware Installation and FastPath Guide (G06.29+)

HP NonStop S-Series Hardware Installation and FastPath Guide—541880-002
4-1
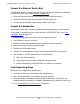
4 Installing Service-Side Doors
This section describes how to install optional service-side doors on NonStop S-series
system enclosures that are already installed and cabled. (New NonStop S-series
system enclosures are shipped with service-side doors installed.)
This section does not describe the installation of long doors and side panels. Long
doors and side panels are not customer-installable. To install long doors and side
panels on existing enclosures, contact your service provider.
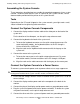
If you have not ordered service-side doors, skip this section and go to Section 5,
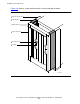
Installing, Starting, and Testing a System Console. Figure 4-4 on page 4-4 shows a
service-side door installed on a system enclosure.
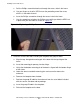
To install a service-side door on a system enclosure, perform these steps (you need a
Phillips screwdriver):
1. Obtain a service-side door add-on package (for part numbers, see Support and
Service Library on page xxiv), and verify that it contains these items:
•
Adapter frame
•
Enclosure door, service side (The service-side door is preinstalled on the
adapter frame.)
•
6 M5 Phillips screws
•
6 M5 KEPS nuts
•
1 4-mm diagonal wrench for unlocking the door
•
Group ID labels
•
Read Me instructions
2. Remove the door from the adapter frame. Then retrieve the adapter frame, which
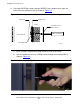
will be installed first.
3. Align the mounting hooks of the frame with the top, enlarged holes on the cable
channels of the enclosure.
4. Push the frame in and down so that the mounting hooks engage. Verify that the
frame is supported by and flush against the cable channels.
5. Verify that the four frame and cable channel mounting holes are aligned.