
NonStop S-Series Hardware Installation and FastPath Guide (G06.29+)


Configuring the System
HP NonStop S-Series Hardware Installation and FastPath Guide—541880-002
10-4
Create the Operating Configuration
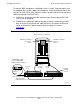
1. If the backup system console is not unpacked, see Unpacking and Assembling a
System Console on page 5-2.
2. Start and test the backup system console. See Starting and Testing a System
Console on page 5-8.
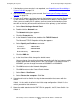
3. Change the IP address and host name for the backup system console. Because all
system consoles are shipped with the same default IP address and computer
name, you must modify the IP address and host name for the backup system
console so that they do not conflict with those of the primary system console:
a. Select Start>Settings>Control Panel.
b. Double-click the Network icon.
The Network dialog box appears.
c. Click the Protocols tab.
d. In the Network Protocols box, double-click TCP/IP Protocol.
The Microsoft TCP/IP Properties dialog box appears.
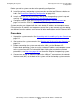
e. Select Specify an IP address and enter:
f. Click the DNS tab.
g. In the Host Name field, change the default name.
You can change it to anything that does not conflict with the host name used by
another workstation already on the LAN. For example, if the default name is
NONAME, you can change the name to NONAME1 or NONAME2.
h. Click OK to return to the Network dialog box.
i. Click OK to return to the Control Panel window.
j. Select Start > Shut Down.
k. Select Restart the computer. Click Yes.
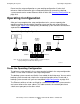
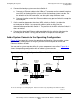
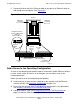
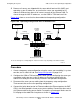
4. Unpack and install an Switch 2 using the documentation that comes with the
switch.
Switch 1 is the switch installed in the initial setup configuration. Switch 2 is the
switch you add for fault tolerance.
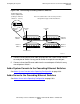
5. Move the cable attached to the PMF CRU in group 01, slot 55, from Switch 1 to
Switch 2.
IP Address 192.231.36.4
Subnet Mask 255.255.255.0
Default Gateway 192.231.36.9