
NonStop S-Series Hardware Installation and FastPath Guide (G06.29+)


Configuring the System
HP NonStop S-Series Hardware Installation and FastPath Guide—541880-002
10-7
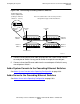
Add a System Console to the Operating
Configuration
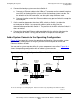
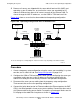
Before you add a system console to the operating configuration:
•
Install the primary and backup system consoles and the two Ethernet switches or
hubs. See Create the Operating Configuration on page 10-3.
•
Install, start, and test the server fully, and ensure the operating system is up and
running. See Section 8, Powering On and Starting the System.
•
Configure OSM or TSM. See Configuring the OSM or TSM Environment on
page 9-16 and the OSM User’s Guide or TSM Configuration Guide.
System consoles are shipped with the same default IP address and computer name.
Ensure that the IP address and computer name of the system console you are adding
are different from the address and name of all other workstations on the Ethernet LAN.
Procedure
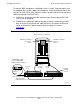
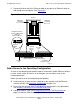
1. Unpack the system console. See Unpacking and Assembling a System Console on
page 5-2.
2. Start and test the system console. See Starting and Testing a System Console on
page 5-8.
3. Before connecting the system console to the LAN, use the Windows XP
Professional operating system to assign a unique IP address and computer name
to the system console. For information about setting these and other network
parameters, see Step 3 on page 10-4 or the online help for the operating system.
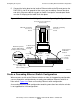
4. Connect one end of an Ethernet cable to the 10Base-T connector on the network
interface card (NIC) at the back of the system unit for the backup system console.