
NonStop Servlets for JSP System Administrator's Guide


Configuring NSJSP
NonStop Servlets for JavaServer Pages (NSJSP) System Administrator’s Guide—525644-001
3-7
iTP_server.xml
The default iTP_server.xml file is well commented, and you should read these
comments to become familiar with the contents of this file. Various additional elements,
not shown or described here but included in the default iTP_server.xml file, provide
for logging and other similar functionality, and define authentication realms.
The statements in the iTP_server.xml file, shown in Example 3-3, are required to
work with the iTP WebServer.
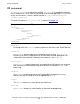
Context Paths
To add an application, you must add the context path into the context manager section
of iTP_server.xml and the associated filemap into the servlet.config file.
Assume that you want to add the application orders with associated servlets, JSP and
other resources. The context path should be entered as shown in Example 3-4:
The context path shows the context, essentially the start of the path for any URL
attempting to locate and run a servlet. The docbase could be used to create a separate
location for the application, other than the default webapps directory.
The corresponding filemap from servlet.config should look like this:
Filemap /orders $server_objectcode
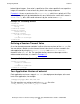
Example 3-3. iTP_server.xml Statements
<Server debug="0" >
<Service name="NSJSP-iTPWebServer">
<Connector
className="com.tandem.servlet.catalina.connector.
iTPWScgiConnector"
minProcessors="5" maxProcessors="75"
acceptCount="25" debug="0" />
<Engine name="NSJSP2.0" defaultHost="localhost" debug="0">
----------
<Host name="localhost" debug="0" appBase="webapps"
unpackWARs="true">
-----
</Host>
</Engine>
</Service>
</Server>
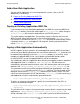
Example 3-4. Setting the Context Path
<Context path= "/orders" docBase="orders" debug= "0">
</Context>