
NonStop System Console Installer Guide
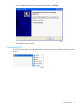
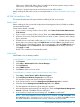

The HP OSM Low-Level Link Application Setup displays a welcome message.
4. Click Next:
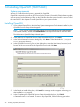
Setup displays the target directory (C:\OSM).
5. Click Next to continue.
Setup begins copying files to your hard drive. After the files have been copied, the HP OSM
Low-Level Link Application Installation Complete dialog box appears.
6. Click Finish.
If you want to continue with installation of other applications on the NonStop System
Management Tools Master Installer list, restart the system console after all applications have
installed. Otherwise, restart the system console now.
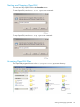
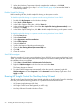
After you have completed installation of the selected OSM client-based components, the setup
program adds OSM client-based components to the Windows Start > All Programs menu. You can
access the OSM client-based components from the Start> All Programs > HP OSM submenu:
NOTE: The Start menu shortcuts for the OSM Low-Level Link are valid only if you selected the
dedicated LAN option during OSM installation.
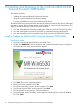
The Start menu shortcuts for the OSM Event Viewer and OSM Service Connection work only if you
have installed and started OSM server components and processes. The home page launched by
these shortcuts displays bookmarks to assist you in connecting to the server of your choice.
Bookmarks are created automatically from your existing TSM system list (if your NonStop S-series
servers were previously managed with TSM) or you can create them yourself when you connect
to an OSM server. The home page also contains information on how to launch a browser window
and connect to an OSM server in case you have no bookmark for that server.
47