
ODBC Server Installation and Management Manual


Using the NonStop ODBC Server Configuration
Manager
HP NonStop ODBC Server Installation and Management Manual—429395-002
3-39
Preliminary Steps
This sample configuration session includes the following steps:
Preliminary Steps
On the client side, configure a datasource, ODBCDBA, from the ODBC administrator.
Enter a host name using the NET_NAME (from the ADD NET_SERVICE statement)
DBAADMIN for NETBIOS, or ODBCIPX004 for SPX/IPX, and the IP Address and port
number (corresponding to ODBCTCP006) for TCP/IP, and the database name
MASTER.
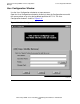
Launch the NonStop ODBC Server Configuration Manager by double-clicking the left
mouse button on the “conftool” icon.
Choose Connect from the session menu to reach the logon screen. Enter the
datasource name you just configured and specify the user ID as DBO; the password
should be the super ID password on your system. Click the OK button. You will receive
a “successful logon” message.
Now you are ready to configure new a SCS and server classes, profiles, and users
with the NonStop ODBC Server Configuration Manager.
The following is an example of configuring one SCS to support a maximum of 25
clients in five different server classes, five users per server class. At this time, you
should have five different legitimate Guardian users, such as:
SOFTWARE.CORE1
SOFTWARE.CORE2
SOFTWARE.CORE3
Step Title
Page
Number
Preliminary Steps
3-39
Step One: Configure Profiles 3-40
Step Two: Add Users 3-41
Step Three: Add the Net Service Configuration 3-42
Step Four: Add the SCS Configuration 3-44
Step Five: Configure the Server Classes 3-46
Step Six: Add Smap Configuration 3-47
Step Seven: Add Umap Configuration 3-48
Starting and Verifying the SCS 3-49
Optional: Add an Alias 3-50
Optional: Map the Alias 3-50
Optional: Add Trace Functionality 3-51
Optional: Add Resource Governing 3-52
Optional: Add Resource Accounting 3-53