
ODBC Server Installation and Management Manual


Using the NonStop ODBC Server Configuration
Manager
HP NonStop ODBC Server Installation and Management Manual—429395-002
3-46
Step Five: Configure the Server Classes
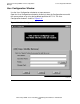
9. Click OK for the SQL SUCCESS message.
10. Click the Close button in the SCS Configuration window.
Step Five: Configure the Server Classes
The next step is to configure the various attributes of the server classes.
1. Choose ServerClass from the Configuration menu in the main window.
2. Click the Add control tab in the ServerClass Configuration window.
3. Type CLASSCORE1 in the Serverclass field.
4. Click the Advanced button.
5. Type the following values for the specified fields:
6. Click the Close button in the Serverclass Advanced Configuration window.
7. Click the Apply button.
8. Click NO for the Update System Configuration dialog.
9. Click OK for the SQL SUCCESS message.
To configure the other server class, you can copy the definition of the server class you
just added and change the attributes as needed.
1. Click the Copy control tab in the Serverclass Configuration window.
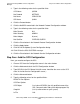
NOS Run Options N.A
Profile PROFILE_CORE1
CPU List 0,1,2,3,4 (a valid list of CPUs on your system)
Priority 157
Available Servers 1
Max Servers 5
Init Heap Size KB 750
Max Heap Size KB 1024
Idle Delete Delay Sec 60
NOS Create Options N.A
NOS Debug Options N.A
Swapvol $vol (a valid volume name on your system)
Guardian Name SOFTWARE.CORE1
Login Timeout Sec N.A
Cancel Timeout Sec N.A