
ODBC Server Installation and Management Manual


Using the NonStop ODBC Server Configuration
Manager
HP NonStop ODBC Server Installation and Management Manual—429395-002
3-48
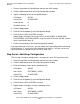
Step Seven: Add Umap Configuration
1. Choose Smap from the Configuration menu of the main window.
2. Click the Add control tab in the Smap Configuration window.
3. Type the following values for the specified fields:
4. Click the Apply button.
5. Click NO for the Update System Configuration dialog.
6. Click OK for the SQL SUCCESS message.
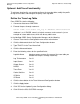
Repeat Steps 2 through 5 for server classes CLASSCORE2, CLASSCORE3,
CLASSCORE4, and CLASSCORE5, using the same SCS name, $SCSN, and the
same UseAsDefault entry, N.
7. Click the Close button in the Smap Configuration window.
If you need a default server class, you can modify the Smap configuration and change
UseAsDefault to “Y” for any one of the defined server classes. Only one server class
can be named as the default server class for a given SCS.
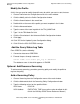
Step Seven: Add Umap Configuration
The last step in the basic configuration is to map users to an SCS and server class.
1. Choose Umap from the Configuration menu of the main window.
2. Click the Add control tab in the Umap Configuration window.
3. Enter the following values for the specified fields:
4. Click the Apply button.
5. Click NO for the Update System Configuration dialog.
6. Click OK for the SQL SUCCESS message.
7. Repeat Steps 2 through 6, using the following values:
SCS Name $SCSN
ServerClass CLASSCORE1
UseAsDefault N
Shutdown Server N
SCS Name $SCSN
Alias Name SOFTWARE_CORE1
ServerClass CLASSCORE1
SCS Name $SCSN
Alias Name SOFTWARE_CORE2
ServerClass CLASSCORE2