
ODBC Server Installation and Management Manual


Using the NonStop ODBC Server Configuration
Manager
HP NonStop ODBC Server Installation and Management Manual—429395-002
3-51
Optional: Add Trace Functionality
Optional: Add Trace Functionality
To add trace functionality, you need to configure the trace log table, modify the profile
to register that table, and configure the query status log table.
Define the Trace Log Table
From ODBCTest, do the following:
1. Connect to datasource ODBCDBA.
2. Execute the pass-through statement:
select "tdm: util create tra_log in database.owner.nostrace"
database is as in ZNSDB, owner is a logical username, and nostrace is just an
example of a trace table name, which can be any table name.
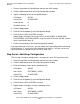
In the NonStop ODBC Server Configuration Manager, do the following:
1. Choose Trace from the Configuration menu of the main window.
2. Click the Add control tab in the Trace Configuration window.
3. Type TRACE1 in the Trace Name field.
4. Click the Advanced button.
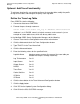
5. Enter the following values for the specified fields:
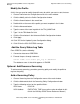
6. Click the close button in the Trace Advanced Configuration window.
7. Click the Apply button.
8. Click YES for the Update System Configuration dialog.
9. Click OK for the SQL SUCCESS message.
Logtable Name database.owner.nostrace (the name of the trace table you
created with the pass-through statement)
Log To Hometerm Y or N
Input Stream Y or N
Output Stream Y or N
NSSQL Y or N
Trace Error Y or N
Cache Statistics Y or N
SP Write Y or N
SP Read Y or N