
ODBC/MX Driver for Windows Manual (SQL/MX 2.x)


HP NonStop ODBC/MX Driver for Windows—527888-004
3-1
3
Configuring Client Data Sources on
Windows
Use the Microsoft ODBC Data Source Administrator to add, configure, and remove
ODBC/MX data sources. For information about supported versions of Windows, see
Client Components on page 1-1.
Accessing the Microsoft ODBC Data Source
Administrator from a Client Workstation
Start menu > Programs > NonStop ODBC-MX 2.0 > MS ODBC Administrator
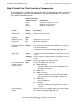
Adding New Client Data Sources
1. Bring up the Microsoft ODBC Data Source Administrator. You can usually find this
by selecting the Start menu, Programs option, NonStop ODBC-MX 2.0 option, then
select the MS ODBC Administrator option.
2. Click Add.
3. Click NonStop ODBC/MX 2.0 on the list then click Finish.
This starts the Create Data Source wizard.
4. Fill out each screen displayed by the wizard.
5. Repeat these steps for each data source you want to add.
Note.You can install and run ODBC/MX version 2.0 concurrently with MXCS version 1.8.
However, to remove or reconfigure ODBC/MX version 1.8 data sources, the corresponding
version of MXCS must be installed on your system.
Accessing the Microsoft ODBC Data Source Administrator from a Client
Workstation
3-1
Adding New Client Data Sources 3-1
Reconfiguring Client Data Sources 3-2
Configuring Client Data Sources using Connection String 3-2
Configuring Client Data Sources for Update Operations 3-2
Removing Client Data Sources 3-3
Tracing Client Data Sources 3-3