
OmniMessaging Installation Guide 1.7


OmniMessaging Installation Guide
07/22/04 Opsol Integrators Inc. Confidential and Proprietary 4
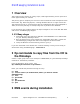
1 Overview
The install process consists of 3 easy steps, needs approximately 5 user inputs and
takes approximately 15 minutes.
The primary goal is simplicity for the novice user and hence some assumptions have
been made. E.g. Extracting objects, creating database files on a single volume etc.
The experienced user is encouraged to edit the configuration files (using Notepad or
Tedit) to tune the pathway or the SQL obey files to partition the database.
If you encounter any problem please call Opsol Integrators Inc at US 408-364-9915
and ask for OmniMessaging Support.
1.1 3 Easy steps
1. FTP install macro and the binary PAK file called ZINSTALL to an audited disk
on your NonStop Himalaya server.
2. Run the install macro and it unpaks the executable object files, creates the
OmniMessaging configuration files and configures the environment.
3. Unzip the Manuals and Provisioning Client to your pc.
If you are interested in the details then continue reading or else you are ready to
send emails using OmniMessaging™. Have fun !!!
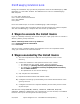
2 ftp commands to copy files from the CD to
the Himalaya
Create a super group user id (for example: SUPER.OMNI) on your NonStop Himalaya
machine for installation procedure.
From the Windows “Start” menu, type
ftp <Himalaya Host name or ip address>
Enter your userid and password and log on to ftp
ftp> pwd
ftp> cd $vol.subvol (an audited disk, where you want to install
OmniMessaing)
ftp> ascii
ftp> put install
ftp> bin
ftp> put ZINSTALL
ftp> quit
3 EMS events during installation