
OSM Migration and Configuration Guide (G06.30+)


Configuring Remote Services
OSM Migration and Configuration Guide—527273-021
C-4
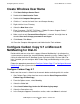
Configure Carbon Copy 5.7
7. In the Connections section, make sure that none of the check boxes are selected.
8. Select the Logins tab.
9. Select Require Logins.
10. Click Use Carbon Copy Security.
11. Change Minimum Password Length Required to a value of 5.
12. Click Apply, Click OK.
13. From the Options menu, select Communications.
14. Select the Wait For Call tab.
15. From the list of Connection Types, select TCP/IP Network. If it is not available in
the list, reboot the system console and then perform this Configure Carbon Copy
5.7 procedure again. Make sure that no other Connection Types entries are
selected on this screen. Once TCP/IP Network has been selected, never change
the configuration of the Wait For Call tab, no matter what is displayed, or the
Carbon Copy configuration will not be correct after the system console has been
rebooted.
16. Deselect Use ILS.
17. Select Wait for Call on Startup.
18. Select Minimize on Wait for Call.
19. Select the Workstation tab.
20. Make sure that the Workstation Name field contains an entry that is unique from
any other PC on the private LAN. The name in this field should match the Windows
name assigned to the PC.
21. Select Publish Workstation Name.
22. Click Apply, then click OK.
23. Deselect the Wait to Receive an Incoming Call/Stop Waiting for Incoming Call,
then reselect it (you must perform this step any time the Wait for Call tab
configuration is changed).
24. From the task bar, bring back up the Carbon Copy window.
25. Select the User Profiles tab. (The tab may be scrolled off the left side of the screen.
If necessary, use the arrow keys on the bottom right of the screen to scroll to the
left, or use the Menu item View/User Profiles.
26. Double-click Create New User from the list.
27. Enter User Name = "GCSC," Login and Confirm Password = "texas". Click Next.
28. Select Callback Type = None. Click Next.