
OSM Migration Guide (G06.25+)

Configuring Remote Services
OSM Migration Guide—527273-008
C-6
Configure OSM Notification Director (ND) for Each
Host Server
Configure OSM Notification Director (ND) for
Each Host Server
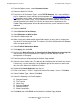
1. At the Primary system console, start the OSM Notification Director.
2. From the Systems menu, select Configure\systemname for the host server to be
configured.
3. Enter a valid NSK Super Group User Name and Password (for example,
Super.Tandem, compaq. This must be a valid username and password that is valid
on the \systemname selected. If the username and/or password changes on the
\systemname selected at any time in the future, you must return to the OSM
Notification Director and update it here also. If the username and/or password is
not accurate, the console will not dial out).
4. Select Save user name and password, then click Logon.
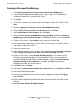
5. Select the Your Site Contact tab.
6. Verify that the Site Information Contact information is accurate for all of the Work
Shifts or just the All Shifts entry only. If not, enter/correct at minimum, the Primary
Contact: First Name, Last Name, Phone Number, FAX number and the Location of
This Compaq Himalaya Server fields. Click Apply.
7. Select the Preferences tab.
8. Check all 3 boxes under the "Auto Dial-out" section. Choose the levels of Problem
IR severities to dial-out.
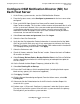
9. Select Primary Dial-out Point or Backup Dial-Out Point in the Dial-out Definition
section, depending on whether this will be a primary or backup dial-out point for
this host server.
10. Set the Periodic Incident Report Frequency. (default of 20 is OK)
11. Select Get Pending IRs at Start-up.
12. Ensure the E-mail Address field is completely blank. (including the black square
block and any spaces) (this feature not supported)
13. Click Apply, Click OK.
14. Click the System Name being configured, From the Actions menu, select Get
Pending IRs.
15. Select and click the Delete button for all old IRs from the Incident Report List
screen for this system.
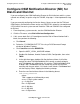
16. Perform steps 1-15 for each “Configure \systemname” under the Systems menu.
For step 9, not all of the systems have to use this system console as the primary
Dial-out point if you have other system consoles.