
OSM Migration Guide (G06.28+)

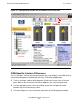
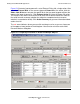
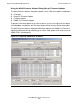
Table Of Contents
- What’s New in This Manual
- About This Guide
- 1 Introduction to OSM
- 2 Preparing for OSM
- 3 OSM Server-Based Components
- 4 OSM Client-Based Components
- 5 Getting Started With OSM Applications
- 6 TSM Coexistence and Fallback
- A Migrating Your Registry Settings
- B Memory Guidelines for OSM
- C Configuring Remote Services
- Configure Modem for Dial-In and Dial-Out
- Create Windows User Name
- Configure Carbon Copy 5.7 or Microsoft NetMeeting for Dial-In
- Configure OSM Notification Director (ND) for Each Host Server
- Configure OSM Notification Director (ND) for Dial-In and Dial-Out
- Configure Incoming Connections
- Reconfigure System Standby and Hibernate Mode
- D Troubleshooting
- E Uninstalling TSM
- Index
Getting Started With OSM Applications
OSM Migration Guide—527273-015
5-5
Functional Differences
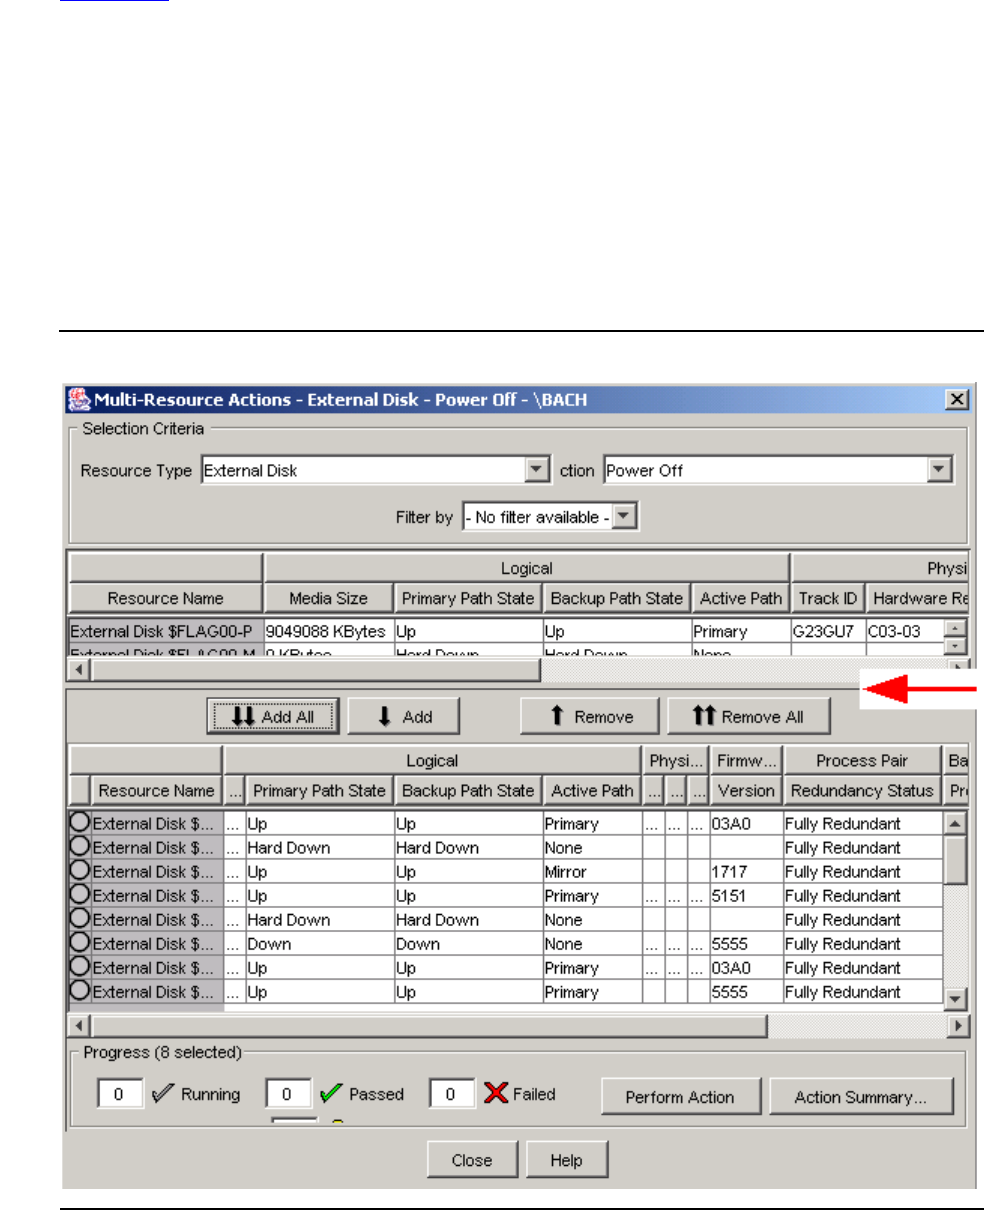
Figure 5-3 illustrates how to power off a set of External Disks with a single action. After
you select External Disk as the resource type and Power Off as the action, click the
Add or Add All buttons to move the specific disks that you want to power off from the
upper to the lower resource list. Click Perform Action to initiate the Power Off action.
The Progress bar and the circle to the left of each disk resource indicate the status of
the action on each resource (whether the action has completed on that resource,
whether it succeeded or failed). Click Action Summary to get more information about
actions that fail.
The red arrow indicates where you can click and drag to resize so you can view more
of the upper or lower portion of the dialog box. You can also resize the entire Multi-
Resource Actions dialog box.
Figure 5-3. Preparing to Perform an Action on Multiple Objects