
OSM Migration Guide (G06.28+)
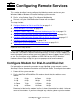
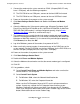
Table Of Contents
- What’s New in This Manual
- About This Guide
- 1 Introduction to OSM
- 2 Preparing for OSM
- 3 OSM Server-Based Components
- 4 OSM Client-Based Components
- 5 Getting Started With OSM Applications
- 6 TSM Coexistence and Fallback
- A Migrating Your Registry Settings
- B Memory Guidelines for OSM
- C Configuring Remote Services
- Configure Modem for Dial-In and Dial-Out
- Create Windows User Name
- Configure Carbon Copy 5.7 or Microsoft NetMeeting for Dial-In
- Configure OSM Notification Director (ND) for Each Host Server
- Configure OSM Notification Director (ND) for Dial-In and Dial-Out
- Configure Incoming Connections
- Reconfigure System Standby and Hibernate Mode
- D Troubleshooting
- E Uninstalling TSM
- Index

Configuring Remote Services
OSM Migration Guide—527273-015
C-3
Create Windows User Name
Create Windows User Name
1. Click Start>Settings>Control Panel.
2. Double-click Administrative Tools.
3. Double-click Computer Management.
4. Click the “+” next to the Local Users and Groups directory.
5. Right-click the Users Directory.
6. Select the New User action.
7. Enter Username = "GCSC," Full Name = "Global Customer Support Center,"
Password and Confirm Password = "austin."
8. Make sure that only Password Never Expires is selected. You might have to
deselect User must change password at next logon.
9. Click Create, Click Close.
10. Close the Computer Management and Administrative Tools windows.
Configure Carbon Copy 5.7 or Microsoft
NetMeeting for Dial-In
Decide which tool to use for dial-in support. Microsoft NetMeeting is installed on the
system console as part of the standard Windows operating system. Carbon Copy 5.7
can be installed from the HP NonStop System Console Installer CD from G06.21 or
later. If needed, you can configure both Carbon Copy and NetMeeting on the system
console.
Follow the appropriate procedure to Configure Carbon Copy 5.7 or Configure Microsoft
NetMeeting on your system console:
Configure Carbon Copy 5.7
Make sure that no one is dialed in to the console before continuing with this section.
1. Start Carbon Copy. (either from icon next to clock or Start>Programs>Altiris
Carbon Copy>Carbon Copy).
2. From the Options menu, select Security.
3. Select the Global tab.
4. Select Load Carbon Copy before the Windows login prompt.
5. Select the Connections tab.
6. In the Prompt to Approve Connections section, make sure Never is selected.