
OVNM 5.3 - Operations Agent for NonStop Installation Guide

OVNM Installation on Windows 19
OVNM Installation on Windows 19
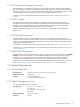
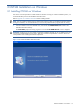
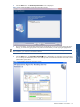
4. Click the Next button. The Check Setup Information screen is displayed.
Figure 2-5 HP OVNM Installation Check Setup Information Screen
5. The current settings, which have been selected so far are displayed. In case you want to change any of the
settings, you can do so by going back to the particular screen before you start copying the program files.
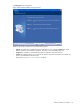
NOTE:
You should check the location of the directory where OVNM is to be installed. To change the location
after installation, you will have to reinstall the software.
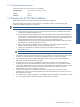
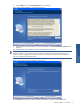
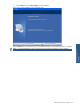
6. Click the Next button. The Locked Files Informatio
n
screen is displayed if any of the files were found locked
or in use during the modification process. The screen provides a list of all the locked files. These files will be
updated after system reboot.
Figure 2-6 HP-OVNM Locked Files Information Screen
Installing OVNM on
Windows