
OVNPM 1.5.2 - Performance Agent for NonStop Display Agent Guide

Using Views: SystemInsight 88
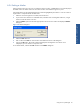
6-11-5 Animating Recent-Past Data
The Animate function plays back recent and past data with a rapid refresh rate. To animate data you select a
starting date, time, and a refresh rate. The starting date and time can be the previous time period, or a specific
time period in the past. Each refresh updates the display by one time period. The amount of data shown for each
time period depends on the time interval. You can stop and restart the animation at any time.
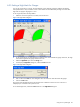
Follow the steps below to start an animated replay of recent-past data or to restart a stopped display.
1. Select the time reference to start the animation.
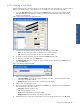
2. From the Options menu, select the Animate option. Alternatively, click on the icon.
3. The Animate dialog box is displayed. Use the spin box to select a refresh rate for the display and click on
the OK button.
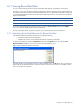
4. To stop the animation, select the Stop option from the Options menu. This action can also be performed
using the
icon.
6-11-6 Switching from Replay to Real-Time Monitoring
To switch from a replay of historical data to real-time monitoring select the Resume option from the Options menu.
6-12 Using Comments in a View
You can attach your own notes or comments to any view. The comment is not displayed with the view. However,
you can view, change, or remove comments at any time. For example, this is a convenient way to connect a
reminder about prior occurrences or future activities to the view.
The comment appears when the view is printed. For example, you can use a comment to annotate the printed
output of a view for record keeping or presentations.
NOTE: This procedure is valid for both views and reports.
When you edit a comment you can include additional text or replace all the text.
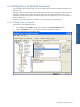
Perform the following steps to create or modify comments of a view.
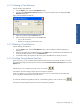
1. From the Available Views list in the Insight tab page, select a view and click on the Open button.
2. In the displayed view window, select the Edit Comment option from the View menu. The Edit Comment
dialog box opens. If there is an existing comment, it is displayed in this box.
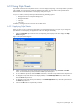
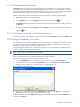
Figure 6-30 Edit Comment Dialog Box
3. Type a new or replacement comment in the Comments box and click on the OK button. The comment is
displayed any time Edit Comment is selected from the View menu.
To delete a comment, open the Edit Comment dialog box and delete the comment text from the Comments box
and click on the OK button.