
OVNPM 1.5.2 - Performance Agent for NonStop Server Management Guide


36
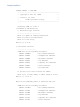
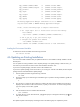
Copy $DATA01.OVNPM50.VTMPL to $DATA01.OV15SRC.VTMPL.
Copy $DATA01.OVNPM50.xcfgfil to $DATA01.OV15CFG.xcfgfil.
Copy paramfic to $DATA01.OV15CFG.paramfic.
Copy dcprm to $DATA01.OV15CFG.dcprm.
Copy xcfgfil to $DATA01.OV15CFG.xcfgfil.
Copy UMTG10 to $DATA01.OV15CFG.usermt.
Copy appcfg to $DATA01.OV15CFG.appcfg.
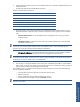
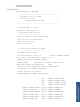
The Nonstop Application Manager environment is set to ENABLED.
Stop and Start OVNPM to ENABLE NonStop Application Manager
Please, execute following steps to complete installation:
1) Use 'super.super' user to license basic collector and library
with command:
'fup license ($DATA01.OV15EXE.bc,$DATA01.OV15EXE.vlib)'.
2) Run sv_get_key to get your licenses keys.
3) Configure the product with command:
'run $DATA01.OV15TACL.vconf'.
Notice command 'run $DATA01.OV15TACL.visload' to load environment.
Loading the Environment Variable
To load the Environment Variables use the following command.
run vistacl.visload
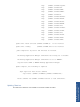
4-6 Updating an Existing Installation
You must use the VGEN installation utility to update the software in case OVNPM is already installed on the HP
NonStop host.
You can update an existing installation with a complete package or an update package. In both the cases, you
must check if you have full access to the content of the Installation subvolume –ISV--.
If you have a complete package; extract the content in the installation ISV.
If you have an update package, extract the content in your existing ISV. If the ISV was deleted, the last complete
package must be extracted before the update package.
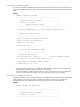
1. Start the update procedure using the following command.
run VGEN
2. The utility prompts you to select the type of installation type. To update an existing installation, type U and
press Enter.
U
3. The next step is to specify the TACL subvolume to update. The location of the OVNPM environment file is
displayed. You can either use the current location, or specify a new location. To use the existing location,
type Y. To specify a new location, type N.
N
4. Enter the location for the new OVNPM TACL subvolume.
$VOL.OVPMTACL
5. To confirm the new Ovnpm TACL subvolume, type Y at the prompt. To change the subvolume, type N and
enter the new location.
Y
The update completes with the display of messages. Perform the following steps to complete the process.