
OVNPM 1.5.2 - Performance Agent for NonStop Server Management Guide


42
5 Modifying/Upgrading OVNPM Server Components
5-1 Modifying OVNPM Server Components on Windows
This section covers the procedure to modify OVNPM NonStop Server components on Windows workstation after
installing OVNPM.
Step A: Maintenance Welcome
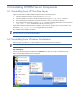
1. Insert the installation CD in the CD-ROM drive.
2. If Autorun is enabled on your system, the installation starts automatically and you can skip steps 3 -5.
3. From the Start menu, select Run.
4. In the Run dialog box, type D:\OVNPMServerInstallation.exe (Substitute the appropriate letter of your CD-
ROM drive for D with whatever is applicable).
5. Follow the instructions on the screen.
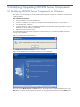
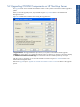
The Install Shield prepares the Setup program for use and prompts you to close all the OVNPM components
running on the workstation.
Figure 5-1 OVNPM Server Information Box
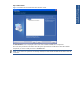
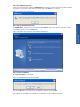
The OVNPM Server Maintenance Welcome screen is displayed.
Figure 5-2 The OVNPM Server Maintenance Welcome screen is displayed.
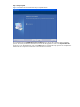
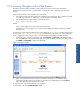
The screen has the Modify, Repair and Remove options. The Modify option is selected by default. Click on the
Next button to continue with the maintenance process. We strongly recommend that you use the Modify option.