Data Management Library Pathmaker Programming Guide Abstract Part Number Edition Published Product Version Release ID Supported Releases This manual explains, in detail, how to design, develop, and maintain a Pathmaker application. 067868 Fourth September 1993 Pathmaker D20 D20.00 This manual supports D20 and all subsequent releases until otherwise indicated in a new edition.
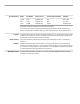
Document History Edition Part Number Product Version Earliest Supported Release Published Second Third Fourth 84179 27449 067868 Pathmaker C20 Pathmaker C30 Pathmaker D20 N/A N/A D20.00 March 1989 June 1990 September 1993 New editions incorporate any updates issued since the previous edition. A plus sign (+) after a release ID indicates that this manual describes function added to the base release, either by an interim product modification (IPM) or by a new product version on a .
New and Changed Information The Pathmaker Programming Guide provides detailed instructions for using the Release 3 version of the Pathmaker product. The manual includes the product information previously located in the Pathmaker Programming Manual C30 and also contains detailed information about product features new for this release. Several new sections containing high-level product usage information, task check lists, and screen summaries have also been added.
New and Changed Information several new Pathmaker screens. The Pathmaker product uses this information to generate SQL statements that are eventually included in the generated server source code. The application developer writes statements in a Custom Source File (formerly called a Transaction Copy Library) to execute the generated SQL statements. See “Defining a Custom Service” in Section 4 for details.
New and Changed Information Pathmaker Full Screen Interface Changes Seven new screens have been added to the Pathmaker full screen interface and several existing screens have been modified to support the new product features for Release 3. Refer to the screen descriptions in the Pathmaker Reference Manual for more information.
New and Changed Information vi 067868 Tandem Computers Incorporated
Contents About This Manual xix About the Pathmaker Manual Set Section 1 xxiii Pathmaker Tasks Preparing for Pathmaker Application Development Prerequisites 1-1 Task Summary 1-2 Developing a Pathmaker Application Prerequisites 1-3 Task Summary 1-3 1-1 1-3 Managing Pathmaker Application Development 1-4 Prerequisites 1-4 Task Summary 1-4 Using Pathmaker Reports 1-4 Using Pathmaker Utilities 1-5 Using PMADL 1-5 Controlling Multiple Versions of Pathmaker 1-5 Using Pathmaker for Client/Transaction Server
Contents Creating and Customizing a Pathmaker Project 2-21 How Many Pathmaker Projects Should You Create? 2-21 Project Size Limitations 2-21 Adding a Pathmaker Project 2-21 Ownership of a Pathmaker Project 2-22 Loading a New Project From an Existing Project 2-22 Modifying a Project 2-22 Adding User-Supplied Functions 2-23 Defining Data for a Pathmaker Project 2-24 Documenting Enscribe Data 2-25 Documenting NonStop SQL Data 2-27 Creating Additional DDL Structures 2-30 Creating the Physical Database 2-31 Des
Contents Section 4 Creating Services and Servers Service and Server Types 4-1 Standard Services and Servers 4-1 Registered Services and Servers 4-2 Custom Services and Servers 4-3 Server Type Summary 4-3 The Structure of Pathmaker Custom Services and Servers Custom COBOL85 Servers 4-4 Custom COBOL85 Services 4-8 Custom C Servers 4-11 Defining a Custom Service 4-4 4-18 Coding Custom Services 4-21 Custom Source File 4-21 Guidelines for Custom Source Files 4-44 Invoking Macros From a Custom Source File 4-
Contents Section 5 Creating Requesters Requester Development Overview 5-1 Defining the Requester and Its Screen 5-1 The Default Screen 5-2 Modifying the Default Screen 5-2 Coordinating IPC Messages and Parameters 5-3 Generating and Compiling SCREEN COBOL Source Code Screen and Task Summaries 5-5 Requester Definition Tasks 5-8 Defining Requesters 5-8 Selecting a Requester Type Initial Requesters 5-13 5-9 Controlling Default Screen Layout 5-15 DDL Clauses That Affect Default Screen Layout 5-15 Attribute
Contents Section 6 Using the Screen Painter Screen Painter Components 6-1 Screen Elements 6-2 Paging Information 6-3 Basic Screen Painter Editing Functions 6-4 Assigning Video Attributes 6-4 Defining or Modifying a Data Field 6-5 Defining or Modifying a Paging Area 6-8 Defining or Modifying a Point Field 6-10 Defining or Modifying a Pseudofield 6-11 Deleting a Block of Screen Elements 6-13 Moving a Block of Screen Elements 6-13 Drawing a Box or Line 6-13 Moving a Page Within the Paging Area 6-14 Moving or
Contents Section 8 Maintaining Pathmaker Applications Changing Screen Decorations or Screen Layout 8-2 Reassigning the Active Server Class for a Service 8-2 Repackaging Services Into Servers 8-4 Repackaging Services Into Existing Servers Packaging Services Into New Servers 8-5 8-4 Adding Help Text 8-7 Adding, Modifying, or Deleting Requesters Adding Requesters 8-8 Modifying Requesters 8-11 Deleting Requesters 8-12 8-8 Adding, Modifying, or Deleting Services 8-13 Adding New Services to New Server
Contents Modifying the SQL Generation Macro 9-52 Modifying Requester/Server Pairs 9-54 Using Pathmaker Pseudofields 9-54 Using Reason Codes (T9154-REASON-CODE) Creating Screens That Display Lists 9-60 9-59 Section 10 Sample Pathmaker Sessions Creating a Simple Application 10-1 Summary of Application Creation Steps Application Creation Steps 10-4 10-3 Creating a Custom Application 10-18 Summary of Application Creation Steps Application Creation Steps 10-22 10-20 Creating a NonStop SQL Pathmaker Appl
Contents Undoing an INSERT, DELETE, or UPDATE (Shifted F13) Undoing a DELETE Operation B-16 Undoing an UPDATE Operation B-16 Undoing an INSERT Operation B-16 Operator Display and Error Messages Terminal Function Keys Appendix C B-16 B-17 B-18 Defining Data for a NonStop SQL Pathmaker Application Using Null Values C-1 General Guidelines for Using Null Values C-2 Using Null Values in Database Requesters C-4 Using Null Values in Transaction Requesters C-8 Using Clustering Keys C-9 Using Date and Time D
Contents Figure 4-5. C Server Generation for NonStop SQL Figure 4-6. Contents of a Generated C Service Figure 4-7. C Service Generation and Compilation for NonStop SQL Figure 4-8. Custom Source File COBOL85 Sample Code Figure 4-9. Custom COBOL85 Server Sample Code Figure 4-10. Example of Invoking a Registered Macro 4-47 Figure 4-11. Generating INVOKE Statements for IPCs 4-49 Figure 4-12. Generating Host Variables Figure 4-13.
Contents Figure 10-5. Record Instance Detail Screen 10-10 Figure 10-6. Application Screen Viewed Through Screen Painter Figure 10-7. Requester Definition Screen Figure 10-8. Function Key Assignments - 6520/6530 Screen Figure 10-9. Application Screen Viewed Through Screen Painter 10-12 10-13 Figure 10-10. Screens for a Sample Pathmaker Session 10-14 10-15 10-18 Figure 10-11. SEND Parameter Definition Screen 10-26 Figure 10-12. SEND Parameter Definition Screen 10-27 Figure 10-13.
Contents Table 3-2. Summary of Standard Services Table 4-1. Custom Application Service Check List Table 4-2. Pathmaker Screens for Creating Custom Services Table 4-3. Pathmaker Common Service Utility Library Table 4-4. Video Attributes for Advisory Messages Table 4-5. Enscribe File Error Messages Table 4-6. Common NonStop SQL Messages Table 4-7. Pathmaker Screens for Creating Custom Servers Table 4-8. Custom Application Server Check List Table 5-1.
Contents xviii Table A-11. Pathmaker Screens for Creating Requesters Table A-12. Custom Application Requester Check List Table A-13. DB Requester Application Check List Table A-14. Pathmaker Screens for Completing and Installing an Application A-20 Table B-1. Example of Enscribe Records Returned for READ GENERIC B-6 Table B-2. Standard Services Summary Table C-1.
About This Manual The Pathmaker product is a tool that assists in the creation of Pathway applications for computer systems that use the Tandem NonStop Kernel. The Pathmaker Programming Guide is a comprehensive task-oriented guide for the effective use of the Pathmaker product. The Pathmaker Programming Guide provides not only instructions for creating applications with the Pathmaker product, but also guidelines and procedures for preparing for and a controlling Pathmaker application development effort.
About This Manual Application developers who are creating services and servers for a Pathmaker application must already know how to code in COBOL85 or C, and NonStop SQL, if applicable. They must also know how to test and debug a Pathway server. If additional code is to be incorporated into a Pathmaker requester, application developers must know how to write and debug SCREEN COBOL code.
About This Manual Section 3, “Pathmaker Application Development Overview,” provides an overview of the tasks that must be completed to create and maintain a Pathmaker application. This section is of interest to individuals who are responsible for implementing and maintaining a Pathmaker application. Section 4, “Creating Services and Servers,” describes in detail how to create Pathmaker custom services and servers and includes directions for using Pathmaker to generate SQL data manipulation statements.
About This Manual How to Use This Manual If you are new to the Pathmaker product, you should read Section 1, “Pathmaker Tasks” for an overview of the major tasks performed during a Pathmaker application development effort. Then use the appropriate sections of this manual, the online help, and the Pathmaker Reference Manual to learn how to complete the tasks for which you are responsible.
About This Manual About the Pathmaker Manual Set The Pathmaker manual set for Release 3 consists of four Pathmaker manuals. Figure 1 is a documentation map that shows how the Pathmaker manuals are related to each other and to other Tandem manuals. The map, read from the top down, indicates the order in which the manuals should be read. Manuals grouped by brackets are corequisites. Figure 1.
About This Manual The following chart explains the purpose of each Pathmaker Release 3 manual and its intended audience: Pathmaker Manual Description Audience Introduction to Pathmaker Provides a comprehensive introduction to the Pathmaker product. This manual explains how an application created with the Pathmaker product looks and behaves, defines basic Pathmaker terminology, and suggests several general approaches for successfully using the product.
About This Manual Related Manuals The Pathmaker product interacts with several other Tandem products.
About This Manual xxvi 067868 Tandem Computers Incorporated
Notation Conventions The following list summarizes the conventions for syntax presentation in this manual. Notation Meaning UPPERCASE LETTERS Uppercase letters represent keywords and reserved words; enter these items exactly as shown. Lowercase italic letters represent variable items that you supply. Brackets enclose optional syntax items. A group of vertically aligned items enclosed in brackets represents a list of selections from which you can choose one or none. Braces enclose required syntax items.
1 Pathmaker Tasks This section presents an overview of the three major groups of tasks performed during a Pathmaker application development effort. These tasks are based upon the suggested life cycle for a Pathmaker application outlined in the Introduction to Pathmaker manual. Some of the tasks listed here are optional, others are required.
Pathmaker Tasks Preparing for Pathmaker Application Development Task Summary To prepare for a Pathmaker application development effort, complete these tasks: Install the Pathmaker software Design a Pathmaker application Decide whether to modify the Pathmaker files used for code generation (optional) Create and customize a Pathmaker project Create one or more Pathmaker projects Load a new project catalog from an existing catalog (optional) Add user-supplied functions (optional) Define data for the project
Pathmaker Tasks Developing a Pathmaker Application Developing a The development tasks for a Pathmaker application and the skills needed to complete Pathmaker Application those tasks are summarized in this subsection. These tasks are outlined in greater detail in Section 3, “Pathmaker Application Development Overview.” Sections 4, 5, 6, 7, 8, and 9 of this manual contain detailed instructions for completing the tasks in this group.
Pathmaker Tasks Managing Pathmaker Application Development Managing Pathmaker Application Development Prerequisites Some of the most common tasks involved in managing a Pathmaker application development effort are summarized in this subsection. Details about how to accomplish these tasks appear in various places in the Pathmaker manual set and are identified in this section.
Pathmaker Tasks Managing Pathmaker Application Development These reports can provide valuable information during the development of a Pathmaker application and can also be used to produce documentation when a Pathmaker application development effort has been completed. For a detailed description of each Enform query provided with the Pathmaker product and information about how to use the queries to produce reports, refer to the project catalog information in the Pathmaker Reference Manual.
Pathmaker Tasks Using Pathmaker for Client/Transaction Server Application Development If no release number is specified, the most recent version is invoked. Ensure that application developers are told which version of the Pathmaker software they should use. Refer to the Utilities section of the Pathmaker Reference Manual for details about using the PMINSTAL utility to install more than one version of the Pathmaker software.
2 Preparing for Pathmaker Application Development Proper design, planning, and setup are critical to the ultimate success of a Pathmaker application. This section describes the tasks that should be completed and itemizes the issues that need to be addressed while preparing for a Pathmaker application development effort. This section is of interest to you if you are responsible for organizing a development effort or for designing a Pathmaker application.
Preparing for Pathmaker Application Development Task Summary Task Summary Table 2-1 summarizes the preparation tasks for a Pathmaker application development effort. Some of these tasks are required, the remainder are optional and provide ways for you to customize Pathmaker projects to meet your particular requirements. These tasks are discussed in detail in this section.
Preparing for Pathmaker Application Development Designing a Pathmaker Application Installing the One of the first tasks that should be completed while preparing for a Pathmaker Pathmaker Product application development effort is the installation (or upgrade) of the Pathmaker product on a development system. This task is normally handled by a system administrator or other qualified person. The PMINSTAL utility is the tool used both to install and upgrade the Pathmaker product.
Preparing for Pathmaker Application Development Designing a Pathmaker Application Requester Information The description of the requesters for an application should include: Chart of the application screen hierarchy Type of terminal where the application will be run (6520, 6530, 3270, or terminals that accept Kanji characters) Description of requester, including requester type, requester name, picture of the screen layout, including function keys, and name of the service or requester a function key accesses
Preparing for Pathmaker Application Development Designing a Pathmaker Application Designing Custom Services A service is a unit of work to be performed by a server. A service corresponds to the work performed by a function key action. The Pathmaker product offers three types of services: Standard services Registered services Custom services Standard services, the services provided by the Pathmaker product, include reading the next record or inserting a new record.
Preparing for Pathmaker Application Development Designing a Pathmaker Application Custom servers (used by TRNS requesters) Standard servers (used by DB requesters) Registered servers (servers not created with the Pathmaker product) Application developers create custom servers by grouping together one or more custom services. The Pathmaker product allows application developers to package from 1 to 40 services in a server. Custom servers can only be used with TRNS requesters.
Preparing for Pathmaker Application Development Designing a Pathmaker Application class name, allowing the application requester to issue a legal Pathway SEND statement. Although you can designate which custom services should be packaged into which custom servers and what the active server class for each service should be in the application design specification, these decisions can be quickly changed during testing.
Preparing for Pathmaker Application Development Designing a Pathmaker Application 2. Estimate service time for each service. You can estimate the time required to perform a service by examining the number of file I/O operations it executes. Many I/O operations result in longer run time for a service. Estimating the service time should be sufficient for your first configuration. If more accuracy is required, you can use Measure to time the services.
Preparing for Pathmaker Application Development Designing a Pathmaker Application Designing Requesters A requester is an application module under control of a Pathway terminal control process (TCP) that interacts with a user. The requester translates the user’s input into requests for action by a service. Each requester contains the presentation logic for a single logical screen (which can contain several pages).
Preparing for Pathmaker Application Development Designing a Pathmaker Application As you plan the screens, you should consider whether you want to restrict access to a screen to a subset of end users. The security hierarchy best suited for the organization should be determined while you are designing the application. You are responsible for adding code that enforces the security hierarchy you design. Note A maximum of 120 to 150 data fields can be displayed on a Pathmaker screen at one time.
Preparing for Pathmaker Application Development Designing a Pathmaker Application A Pathmaker application for use on a 3270 type terminal, can be designed to use up to 24 function keys (PF1 through PF24 and PA1 and PA2) on each requester screen. All of the requesters in one application must designate the same terminal type. If you are designing an application that will be run on more than one terminal type, create separate Pathmaker projects for each specified terminal type.
Preparing for Pathmaker Application Development Designing a Pathmaker Application creating the prototype screens is much faster when DDL definitions are already defined. If you use DDL, you can type values into the data fields; data is not retained, but using DDL gives a better simulation of actual screens than a simulation without DDL.
Preparing for Pathmaker Application Development Designing a Pathmaker Application The following pages list rules for forming each of these names. Project Catalog and Subvolume Names When you add a project, Pathmaker creates a project catalog that contains information about the application you are creating. A project catalog resides on a project subvolume. You must specify the name of a project subvolume when you add a project.
Preparing for Pathmaker Application Development Designing a Pathmaker Application Here are some examples: MYPROJ TEST-PROJECT-1 Note You specify the project name when you use the PMPROJECT utility to add a project. Refer to the Pathmaker Reference Manual for details about the PMPROJECT Utility. Pathmaker Objects Pathmaker objects are entities that you define within the Pathmaker environment.
Preparing for Pathmaker Application Development Designing a Pathmaker Application Here are some examples of object names: Note Requester Names Server Names Service Names Server Class Names Requester-01 TRNS-REQ Server-01 PLACE-ORDER Service-1a1 SERV-CODE-02 Sclass-005 SLOW-SERV The Pathmaker product upshifts all lowercase letters before storing names in the project catalog; therefore, Requester-01 will become REQUESTER-01, Server-01 becomes SERVER-01, and so forth.
Preparing for Pathmaker Application Development Designing a Pathmaker Application NonStop SQL Table Object Names. Rules for naming NonStop SQL table objects are: A NonStop SQL table object name can contain up to 30 characters consisting of: Letters (A-Z) (a-z) Digits (0-9) Hyphens (-) The name must start with a letter. The name cannot contain spaces. The name cannot end with a hyphen. Uppercase and lowercase letters are not distinguished. The names cannot be a COBOL, C, or Screen COBOL reserved word.
Preparing for Pathmaker Application Development Designing a Pathmaker Application Disk File Names. A disk file name is a name for a physical file. A disk file name consists of a system name, volume name, subvolume name, and file ID. Application developers specify disk file names for files such as service code files and requester copy libraries. A disk file name is specified in any of these forms: \SYSTEM.$VOLUME.SUBVOLUME.FILENAME $VOLUME.SUBVOLUME.FILENAME SUBVOLUME.
Preparing for Pathmaker Application Development Designing a Pathmaker Application NonStop SQL DEFINE Names Application developers should use DEFINE names in the embedded NonStop SQL code of the service to refer to a table. When the statement is executed, the name of the physical table is substituted for the DEFINE name. This is what the form of a DEFINE name looks like: =identifier The rules for identifier names are: Names can contain up to 23 characters.
Preparing for Pathmaker Application Development Deciding Whether to Modify Files Used for Code Generation Deciding Whether to There are several files included with the Pathmaker product that are used, in Modify Files Used for conjunction with information in a Pathmaker catalog and with files supplied by Code Generation application developers, to generate source code for requesters, servers, C services, and NonStop SQL data manipulation statements.
Preparing for Pathmaker Application Development Deciding Whether to Modify Files Used for Code Generation T9154CPY is copied onto the project subvolume when a Pathmaker project is added and affects requesters for only one Pathmaker project. If you want to change T9154CPY for only one project, change the copy found on the project subvolume. If you want to change T9154CPY and have the changes apply to every Pathmaker project, you can make changes to the T9154CPY file on the installation subvolume.
Preparing for Pathmaker Application Development Creating and Customizing a Pathmaker Project Creating and Before Pathmaker application development can begin, one or more Pathmaker projects Customizing a must be added to the development system. The creation of a Pathmaker project Pathmaker Project should be completed before application developers begin creating the services, servers, and requesters for a Pathmaker application.
Preparing for Pathmaker Application Development Creating and Customizing a Pathmaker Project Note Ownership of a Pathmaker Project The Pathmaker product for Release 3 requires that project catalogs be created on or imported to disk volumes that are audited by the Transaction Monitoring Facility (TMF) product. An existing Pathmaker project can be converted to Release 3 only if the catalog for that project resides on an audited volume.
Preparing for Pathmaker Application Development Creating and Customizing a Pathmaker Project Adding User-Supplied Functions The Pathmaker full screen interface supplies a function key on the Main Menu that you can set up to provide application developers with direct access to other Tandem processes from within the Pathmaker full screen interface. To use a user-supplied function, you must write a requester and a server that function outside of the Pathmaker product.
Preparing for Pathmaker Application Development Defining Data for a Pathmaker Project Defining Data for a An application built with the Pathmaker product is capable of accessing data in either Pathmaker Project an Enscribe or NonStop SQL database, or both. The type of database accessed causes some differences in the data definition methods. This subsection discusses the data definition tasks that you perform for a Pathmaker project.
Preparing for Pathmaker Application Development Defining Data for a Pathmaker Project Documenting Enscribe Data When creating Pathmaker applications that use Enscribe, you can document the design of the data by creating an EDIT file called a schema.
Preparing for Pathmaker Application Development Defining Data for a Pathmaker Project 02 MODEL TYPE *. 02 ENGINE-NUMBER TYPE *. 02 REGISTRATION-DATE TYPE 02 SALES-PRICE TYPE *. 02 PERSON-ID TYPE *. END. *. ?SECTION VEHICLE-RECORD RECORD VEHICLE-RECORD. FILE IS "VEHICLE" KEY-SEQUENCED. DEFINITION IS VEHICLE-RECORD-DEF. KEY IS LICENSE-PLATE DUPLICATES NOT ALLOWED. KEY "en" IS ENGINE-NUMBER. KEY "pi" IS PERSON-ID. END.
Preparing for Pathmaker Application Development Defining Data for a Pathmaker Project Documenting NonStop SQL Data The file used to create the physical database contains NonStop SQL data definition statements to create all of the tables, views, constraints, and indexes needed by this application (unless, of course, these structures already exist). This file will be used as input into the NonStop SQL Conversational Interface (SQLCI).
Preparing for Pathmaker Application Development Defining Data for a Pathmaker Project Creating Constraints You can create constraints for a table definition to control the values allowed for a column. Creating simple constraints on a column allows the Pathmaker product to generate MUST BE checks in the requester. Note that the Pathmaker product cannot generate MUST BE checks for every type of constraint that you can create in SQL.
Preparing for Pathmaker Application Development Defining Data for a Pathmaker Project Using Enscribe DDL for NonStop SQL Data Occasionally, you need to create Enscribe DDL definitions for use in a NonStop SQL application. Situations where you might do so include: The Pathmaker product does not allow you to pass a single column of a table from a requester and to a single column of a service.
Preparing for Pathmaker Application Development Defining Data for a Pathmaker Project The advantage of this approach is that it provides a single location where all data used by the application is described. If you want to create both a file containing NonStop SQL data definition statements and a file containing Enscribe DDL statements, there are several approaches that can be used. You must make sure, however, that the data is defined consistently in both places.
Preparing for Pathmaker Application Development Defining Data for a Pathmaker Project Creating the Physical Database For Pathmaker applications that access Enscribe files, those Enscribe files do not have to exist until the application is ready for testing. For Pathmaker applications that access NonStop SQL tables and views, those tables and views must exist before the Pathmaker product can be used to create the application.
Preparing for Pathmaker Application Development Defining Data for a Pathmaker Project DDL Enhancements Enscribe DDL is a major Tandem product that has been enhanced and modified to work closely with the Pathmaker product. Because of this close association, DDL must always be accessed through the Pathmaker full screen interface or PMADL when developing a Pathmaker application.
Preparing for Pathmaker Application Development Defining Data for a Pathmaker Project Pathmaker ignores the RENAMES and the REDEFINES clause if you use it in your DDL source schema. You can, however, use RENAMES and REDEFINES in the Working-Storage Section of the service code.
Preparing for Pathmaker Application Development Defining Data for a Pathmaker Project Using DDL Commands With Pathmaker The following points are guidelines for using DDL commands from within the Pathmaker interface: Using ?DICT! causes the DDL compiler to: Purge all records and definitions in the dictionary, even if the dictionary is opened for update by more than one user.
Preparing for Pathmaker Application Development Defining Data for a Pathmaker Project Table 2-6 contains a brief description of DDL commands and one DDL statement that are related to Pathmaker programming. Table 2-6. Related Enscribe DDL Commands Command Description ?COBCHECK ?SOURCE file Causes the DDL compiler to perform COBOL syntax and semantic tests as if the compiler were going to produce COBOL source code; lists any errors discovered by testing.
Preparing for Pathmaker Application Development Defining Data for a Pathmaker Project Note If you are keeping a master edit copy of DDL for your project, you can manually apply output update file changes to your master file or you can use the ?DDL command to obtain a new master file after you have made all changes. OUTPUT UPDATE file is composed of three sections: DELETE statements to delete any objects that directly or indirectly refer to the specified object.
Preparing for Pathmaker Application Development Defining Data for a Pathmaker Project Defining Access Paths for NonStop SQL Tables If your Pathmaker project will be used to create COBOL85 custom services that access NonStop SQL tables and if you expect application developers to use the Pathmaker product’s facility to generate SQL data manipulation statements, you should identify the access paths that will be required. Access paths are optional attributes of SQL table objects.
Preparing for Pathmaker Application Development Defining Data for a Pathmaker Project When the Pathmaker product designates an access path as efficient, the Pathmaker product assumes that NonStop SQL will be able to use an underlying index to complete any FETCH operation that uses that access path. An access path with the Efficient attribute equal to N is not necessarily inefficient, it just does not meet the conditions the Pathmaker product has set for efficiency.
Preparing for Pathmaker Application Development Defining Data for a Pathmaker Project For each unique index that is efficient, one unique access path is created on all the columns of the index. For each nonunique index that is efficient, one nonunique access path is created on all columns of the index. No default access paths are created for shorthand views.
Preparing for Pathmaker Application Development Defining Data for a Pathmaker Project Delete and re-add the SQL table object associated with that table on the SQL Table Registration screen, and then use the resulting default access path for the index you added. (This approach will delete any access paths that you have added manually for the table.) Add a new access path composed of the columns of the new efficient index you added.
Preparing for Pathmaker Application Development Preparing Shared Code for a Pathmaker Project Preparing Shared Often during the design of an application, functions that are needed by more than one Code for a Pathmaker service or requester are identified. Ideally, code to perform such common functions Project should be written only once and then shared.
Preparing for Pathmaker Application Development Preparing Shared Code for a Pathmaker Project Registering a macro in a Pathmaker project provides several advantages. These include: Allowing application developers to invoke a macro in the code they write using only its Pathmaker name. If the location of the physical file containing the macro changes, the code invoking the macro does not have to be changed. Only the source file name on the Macro Registration screen has to be changed.
Preparing for Pathmaker Application Development Preparing Shared Code for a Pathmaker Project Figure 2-2 shows an example of a macro that is used to check for the existence of data in either the DEPT table or the EMPNUM table, depending upon the value of the parameters passed to the macro.Refer to “Invoking Macros from a Custom Source File” in Section 4 of this manual for an example of how this macro could be used in service code. Figure 2-2.
Preparing for Pathmaker Application Development Creating a Master Requester, Service, or Server Creating a Master Requester, Service, or Server Note 2–44 One way to help application developers quickly create an application that conforms to your business’s standards is to create one or more master requesters, services, and servers.
3 Pathmaker Application Development Overview After the preparation for a Pathmaker application development effort has been completed, it's time to construct and test the requesters, services, and servers for the application. This section explains how to use the Pathmaker full screen interface to accomplish the application development tasks. It identifies the specific Pathmaker screens used for each task and provides check lists to help you track your progress as you develop an application.
Pathmaker Application Development Overview Before You Begin Before You Begin It is expected that the required preparation tasks for Pathmaker application development, described in Section 2, have already been completed.
Pathmaker Application Development Overview Before You Begin Pathmaker Application Types A Pathmaker application can be composed of both DB requesters accessing standard services and TRNS requesters working with custom services all connected by MENU requesters. Although production applications are often like this scenario, this manual discusses DB requester applications and custom applications as separate entities to make learning how to use the product easier.
Pathmaker Application Development Overview Before You Begin Bottom-Up Versus Top-Down Application Development When using the Pathmaker product, it is possible to implement an application's requesters and services in any order you choose, but generally the development proceeds in a bottom-up or top-down order. There are certain advantages and disadvantages to each approach that should be considered when choosing how you will use the Pathmaker product to implement the components of your application.
Pathmaker Application Development Overview Before You Begin Figure 3-1.
Pathmaker Application Development Overview Before You Begin Top-Down With the top-down approach, you use the Pathmaker product to create the requesters for the application first, generally from the highest to the lowest level. Then you create the services for the application. You cannot generate and compile a requester that calls a lower level requester that does not yet exist in the Pathmaker catalog, unless no reference is made to the lower level requester.
Pathmaker Application Development Overview Before You Begin Figure 3-2. Creating Pathmaker Applications Top Down Develop Services (For Custom Applications Only) Develop Requesters Coordinate: 1. IPC messages between TRNS requester and services (for custom applications only) 2.
Pathmaker Application Development Overview Before You Begin How to Operate the Full Screen Interface One of the major components of the Pathmaker product is the full screen interface. Many of the tasks performed during a Pathmaker application development effort are performed through this interface. This subsection provides general information about how to operate the full screen interface.
Pathmaker Application Development Overview Before You Begin If this error is displayed "*** Unable to open Pathmon, error: 14" when an attempt is made to access a Pathmaker project, the owner of the project must cold start the project using the PMPROJECT utility.
Pathmaker Application Development Overview Before You Begin Using Function Keys You navigate from one Pathmaker screen to another and, therefore, from one Pathmaker task to another, by pressing the appropriate function keys on the keyboard. Some function keys (common function keys) are used to perform the same function on all of the Pathmaker screens, while other function keys (specialized function keys) are used to perform different functions on the various Pathmaker screens.
Pathmaker Application Development Overview Before You Begin Specialized Function Keys. Every screen in the Pathmaker full screen interface has specialized function keys. Some of these function keys allow navigation to related Pathmaker screens; others perform specific actions, such as initiating the compilation of source code. Certain Pathmaker screens can be reached from several other, different, Pathmaker screens.
Pathmaker Application Development Overview Before You Begin The work subvolume can be different for each person using the Pathmaker product and can be changed at any time during a Pathmaker session. The project subvolume for a project is designated when the project is created. The project subvolume contains the catalog, and other associated files, for a project. The project subvolume cannot be changed, unless the entire project is moved. Main Menu Function Keys.
Pathmaker Application Development Overview Before You Begin F5 - Server Definition After the services needed for an application have been created, this series of screens is used to package them into servers. These screens are normally used by application developers. F7 - Macro Registration This series of screens is used to create and register shared source code for an application.
Pathmaker Application Development Overview Before You Begin Informational Screens A group of informational screens is provided as part of the Pathmaker full screen interface. Most of these screens list the names of Pathmaker objects, such as requesters, services, and servers found on the same system and created with the same release of the Pathmaker product as the current project. The name of an object on a list screen can be selected by using the cursor and the F10 function key.
Pathmaker Application Development Overview Creating a Custom Pathmaker Application Creating a Custom Custom applications are created to handle the crucial data processing needs of a Pathmaker Application business. In addition to performing the usual database functions such as adds, updates, and deletes, a custom application can also perform calculations, manipulate data, and enforce integrity rules on critical business data.
Pathmaker Application Development Overview Creating a Custom Pathmaker Application Figure 3-5. Creating a Custom Pathmaker Application Develop Custom Services Package Services into Custom Servers, Generate and Compile Develop Requesters, Generate and Compile (Lowest level to highest level) Prepare Application for Testing Note: Simulation of the application screens is an optional step that can occur anytime after requesters have been added.
Pathmaker Application Development Overview Creating a DB Requester Application Creating a DB requester applications are data management applications that must be developed DB Requester quickly but are not used for business-critical tasks where maintaining database Application integrity is essential. These applications can be used to add, maintain, or retrieve information from one or more related tables or files in a database.
Pathmaker Application Development Overview Creating a DB Requester Application Limitations for DB Requester Applications If you choose to use a DB requester, you can use the same DDL source code that you would use with any Pathmaker requester with the following restrictions: If you identify the entire record as a key field, the Pathmaker application will use the first group or elementary item in the record as the key.
Pathmaker Application Development Overview Creating a DB Requester Application 4. A message is sent containing the entered data to the standard service for that operation. 5. The standard service performs the operation on the database and returns a message. 6. The message is displayed on the screen indicating whether or not the operation was successful, returning data to the end user, if appropriate.
Pathmaker Application Development Overview Creating a DB Requester Application Using NonStop SQL Keys If an asterisk (*) appears to the left of a label on a DB requester application screen, the label identifies a primary key column. If a plus sign (+) appears to the left of the label on a DB requester application screen, the label identifies an index column. SYSKEYs are generally not displayed. The end user enters information in these key columns on the screen to indicate to which row an operation applies.
Pathmaker Application Development Overview Creating a DB Requester Application Enscribe Keys A DB requester application that accesses Enscribe files uses key fields to identify specific records in a file. Three categories of keys exist for Enscribe files: Primary keys Alternate keys Courtesy keys A Primary key is a field (or contiguous fields) in a file whose value is used to uniquely identify each record in that file.
Pathmaker Application Development Overview Creating a DB Requester Application Note Single-File and Multifile DB Requesters If a READ APPROXIMATE is requested for an Enscribe file that has a multifield key, all values entered in those key fields will be used to determine which record to read first.
Pathmaker Application Development Overview Creating a DB Requester Application Figure 3-8.
Pathmaker Application Development Overview Creating a DB Requester Application Multifile DB Requesters A Pathmaker application based on multifile DB requesters allows the end user to access or maintain information from more than one related file. These applications display a screen to the end user that contains a title, one or more sets of data fields, labels that identify these fields, and function key prompts. Boxes.
Pathmaker Application Development Overview Creating a DB Requester Application Multifile Considerations. Before you create a multifile DB requester application, you need to make sure that: The files used (that is, the DDL records or SQL table objects) contain related information. Those files contain matching fields. You cannot mix NonStop SQL tables and Enscribe files in a DB requester.
Pathmaker Application Development Overview Creating a DB Requester Application Multifile applications and any single-file applications that display several repetitions of a record use the cursor position to determine to which box or record an operation applies.
Pathmaker Application Development Overview Creating a DB Requester Application Figure 3-10.
Pathmaker Application Development Overview Creating a DB Requester Application Standard Services Standard services perform common database functions such as inserts, deletes, and updates. These services are packaged in two standard servers provided by the Pathmaker product: one for use with NonStop SQL tables and one for use with Enscribe files Remember that you cannot mix Enscribe files and NonStop SQL tables in one DB requester.
Pathmaker Application Development Overview Creating a DB Requester Application Table 3-2. Summary of Standard Services Default Function Key Standard Service Description READ FIRST Retrieves the first record(s) in a file, sorted by the key field indicated by the cursor, regardless of the value on the screen. Use F5 to continue reading. F4 (PF4) READ NEXT Retrieves the next record(s) in sequence according to the operation in progress.
Pathmaker Application Development Overview Creating a DB Requester Application Restrictions for DB Requester Applications Accessing NonStop SQL Databases Restrictions for NonStop SQL DB requester applications are: You cannot use a shorthand view in a DB requester. NonStop SQL tables in a Pathmaker DB requester can only be linked on a single column. If you use a protection view, the view must include every column of the primary key or of a unique index.
Pathmaker Application Development Overview Creating a DB Requester Application Additional Considerations for DB Requesters Accessing NonStop SQL Tables When a table is defined in NonStop SQL DDL, a primary access path to the table is specified by defining a primary key, and an alternate access path to the table is specified by creating an index. When end users query a table, however, they are not restricted to reading the table along the primary access path or alternate access path.
Pathmaker Application Development Overview Creating a DB Requester Application You cannot mix the ordering (ascending or descending) of the columns of a primary key or index. A primary key has uniform ordering if all the columns of the table’s primary key have the same ordering. A unique index has uniform ordering if all the columns of a unique index have the same ordering.
Pathmaker Application Development Overview Creating a DB Requester Application For example, assume you have the following SQL DDL for a multifile DB application: CREATE TABLE SUPPLIER ( SUPPLIER_NUM PIC 9 COMP, SUPPNAME PIC X(20), PRIMARY KEY (SUPPLIER_NUM, SUPPNAME) ) ORGANIZATION KEY SEQUENCED; CREATE TABLE FROMSUPP ( SUPPLIER_NUM PIC 9 COMP, PARTNUM PIC 9 COMP, DESCRIPTION PIC X(30), PRIMARY KEY (SUPPLIER_NUM) ) ORGANIZATION KEY SEQUENCED; SUPPLIER (parent) is joined to FROMSUPP (child) on SUPPLIER_NUM.
Pathmaker Application Development Overview Creating a DB Requester Application Rule 3: Efficient Multicolumn Join. For a child joined to a parent on the first column of an efficient multicolumn key, the second column is an efficient access field if it is displayed. You could have several efficient access fields of this type.
4 Creating Services and Servers This section provides detailed information about creating services and servers. Pathmaker services and servers can be created using either PMADL or the full screen interface.
Creating Services and Servers Service and Server Types There are two DB standard servers. The object file name of the standard server for Enscribe is DBSERVER. The object file name of the standard server for NonStop SQL is SQLGS. (The standard Pathmaker server is sometimes referred to as the general server.) These object files are located in the installation subvolume. The Pathway server class name for the NonStop SQL standard server is SQL-SERVER-nnn.
Creating Services and Servers Service and Server Types Custom Services and Servers Custom Pathmaker services, packaged into custom servers, perform database access, data manipulation, editing, and calculations for production applications. The Pathmaker product provides a framework for each custom service. Application developers must supply the COBOL85 or C code that does the work.
Creating Services and Servers The Structure of Pathmaker Custom Services and Servers The Structure of Pathmaker Custom Services and Servers Custom COBOL85 Servers This subsection describes the structure of a Pathmaker custom server and the services it contains and explains which portions the Pathmaker product creates for you and which portions of a server you are responsible for creating. When creating a custom server using Pathmaker, follow these steps: 1.
Creating Services and Servers The Structure of Pathmaker Custom Services and Servers NonStop SQL data manipulation statements for single tables (optional) An error-handling paragraph that is called by the WHENEVER directive The Pathmaker product creates the previous items using information that you enter on Pathmaker screens.
Creating Services and Servers The Structure of Pathmaker Custom Services and Servers Figure 4-1 illustrates the structure of a COBOL85 Pathmaker server and the services it contains. Figure 4-1. Structure of a Pathmaker COBOL85 Server Procedure Division MAIN PROGRAM ••• PROCEDURE DIVISION.
Creating Services and Servers The Structure of Pathmaker Custom Services and Servers The Pathmaker product generates server source code from information in a Pathmaker project catalog and from several other sources. You can initiate the generation and compilation of a Pathmaker custom server by filling in a screen that tells the Pathmaker product the generation and compilation options you want and then pressing a function key.
Creating Services and Servers The Structure of Pathmaker Custom Services and Servers Custom COBOL85 Services The Pathmaker product provides a framework for each custom service; you must supply the COBOL85 code that does the work.
Creating Services and Servers The Structure of Pathmaker Custom Services and Servers Figure 4-3 illustrates the contents of a custom COBOL85 service that has been generated by the Pathmaker product. Figure 4-3. Contents of a COBOL85 Custom Service Service 1 Subprogram Pathmaker Generates You Provide Pathmaker Generates You Provide Pathmaker Generates Identification Division. ••• Environment Division. ••• Data Division. Working-Storage Section.
Creating Services and Servers The Structure of Pathmaker Custom Services and Servers Generating services as COBOL85 directly contained programs provides modularity for each service and independence between services, reducing the possibility of conflicts between services packaged together into a single server. For example, you can write the Working-Storage Section of each service completely independently, without crosschecking variable names used in other service modules for possible conflicts.
Creating Services and Servers The Structure of Pathmaker Custom Services and Servers Custom C Servers After you have created custom C services, you can package those services into a custom C server and then initiate the generation and compilation of the server. When you initiate the compilation of a custom C server, custom C services the server contains are generated and compiled, and the resulting service object files are bound into the C server.
Creating Services and Servers The Structure of Pathmaker Custom Services and Servers Figure 4-4 illustrates the structure of a Pathmaker C server and the services it contains. Figure 4-4. Structure of a Pathmaker C Server Data declarations from common service utility library header.
Creating Services and Servers The Structure of Pathmaker Custom Services and Servers The Pathmaker product generates C server source code from information in a project catalog and from several other sources. You can initiate the generation and compilation of a Pathmaker C custom server by filling in a two-page screen that tells the Pathmaker product the generation and compilation options you want and then pressing a function key.
Creating Services and Servers The Structure of Pathmaker Custom Services and Servers Figure 4-5 illustrates the generation of source code for a C server that accesses NonStop SQL tables. In this example, the C services have already been generated and compiled. Figure 4-5.
Creating Services and Servers The Structure of Pathmaker Custom Services and Servers Custom C Services A Custom Source File is created by the Pathmaker product, if the file does not already exist, when you add a C service using the Pathmaker Service Definition screen. A Custom Source File initially contains empty definitions. You add data declarations and functions to this file to perform the service’s business task. A Custom Source File can contain code for several different services.
Creating Services and Servers The Structure of Pathmaker Custom Services and Servers If the Pathmaker product does not encounter any errors during generation or compilation, the message Generation successful is displayed in the Last Attempted Generation Message field the next time you list the Service Definition screen for this service. The Pathmaker product uses the generated source file as the primary input file when compiling a C service.
Creating Services and Servers The Structure of Pathmaker Custom Services and Servers Figure 4-7 illustrates the generation and compilation of source code for a C service that accesses NonStop SQL tables. Figure 4-7.
Creating Services and Servers Defining a Custom Service Defining a Custom A custom service can be defined by using either the Pathmaker full screen interface or Service PMADL. The steps for creating a custom service using the Pathmaker full screen interface are as follows: 1. Define and add a service to a Pathmaker project catalog by using the Service Definition screen. Using the first page of the screen, follow these steps: a. Name and describe the service. b.
Creating Services and Servers Defining a Custom Service Note The Pathmaker product requires DEFs and RECORDs used in C services to be compiled by DDL with the CFIELDALIGN_MATCHED2 command. As a consequence of this requirement, field alignment of existing DEFs and RECORDs could change when they are recompiled with the CFIELDALIGN_MATCHED2 command, making them incompatible with services, clients, requesters, and database files that use old versions of the DEFs and RECORDs.
Creating Services and Servers Defining a Custom Service Table 4-2 lists Pathmaker full screen interface screens used for creating Pathmaker custom services. Table 4-2. Pathmaker Screens for Creating Custom Services Function Key Path Minimum Times Normally Used Required ? The first page is used to define service attributes. The second page is used to define generation options for C services. The generation and compilation of a C service can be initiated on this screen. Used to copy an existing service.
Creating Services and Servers Coding Custom Services Coding Custom When you add a custom service, the Pathmaker product creates a file called the Services Custom Source File for you to use for your COBOL85 or C custom service code. This subsection explains what you need to code in this file, including the Pathmaker required variables. A brief example of service code and tables listing file error messages is also included.
Creating Services and Servers Coding Custom Services and closing of files. Comments regarding the intended use of these files are included in the appropriate section of the default Custom Source File. The sections in the Custom Source File produce the following statements in the generated COBOL85 server: beginning of main program . . . WORKING-STORAGE SECTION. . . . working-storage for main program . . . EXTENDED-STORAGE SECTION. . . . extended-storage for main-program . . . PROCEDURE DIVISION. . . .
Creating Services and Servers Coding Custom Services Custom Source File Contents for a C Service For each C service it contains, the Custom Source File must contain a section naming the service and three functions.
Creating Services and Servers Coding Custom Services Table 4-3. Pathmaker Common Service Utility Library (Page 1 of 5) Function Name Description Parameters Description Return Value cobstr_to_cstr Converts a COBOL-style character string to a Cstyle character string. char *outbuff Pointer to char Address of result returned if not truncated; NULL if truncated. size_t inlen Pointer to null-terminated string converted from ‘inbuff’. Maximum size of out buffer.
Creating Services and Servers Coding Custom Services Table 4-3. Pathmaker Common Service Utility Library (Page 2 of 5) Function Name Description Parameters Description Return Value svc_advisory Stores an advisory message in the reply advisory fields of the current service. short severity Severity of the advisory message. Void char *text Stores an advisory message in the reply advisory message buffer of the current service describing the last error encountered by a logical file.
Creating Services and Servers Coding Custom Services Table 4-3. Pathmaker Common Service Utility Library (Page 3 of 5) Function Name Description Parameters Description Return Value lfseekkey Positions a structured logical file by key field value and length. LOGICAL_FILE *file Pointer to the logical file to position. short keytag Identifier of the comparison key field in the file.
Creating Services and Servers Coding Custom Services Table 4-3. Pathmaker Common Service Utility Library (Page 4 of 5) Function Name Description Parameters Description Return Value lfreadlock Reads and locks the next record in the current access path. LOGICAL_FILE *file Pointer to the logical file to read. void *buffer Pointer to the buffer that receives the record. size_t bufflen Maximum size of the receiving buffer. LOGICAL_FILE *file Pointer to the logical file to read.
Creating Services and Servers Coding Custom Services Table 4-3. Pathmaker Common Service Utility Library (Page 5 of 5) Function Name Description Parameters Description Return Value lfunlockfile Unlocks all records in a logical file. LOGICAL_FILE *file Pointer to the logical file to unlock. lfrwrite Writes a new record to a logical file. LOGICAL_FILE *file Pointer to the logical file to write. void *buffer Pointer to the record to write.
Creating Services and Servers Coding Custom Services Custom Source File Required Variables Five Pathmaker variables must be manipulated in the T9PR-service-name section of your Custom Source File for a COBOL85 service and in the processing function for a C service. These variables for a COBOL85 service are: T9154-REPLY-FLAG T9154-ADVISORY-MSG-TEXT T9154-TMF-ABORT-FLAG T9154-ADVISORY-MSG-SEVERITY T9154-REASON-CODE These variables for a C service are: reply->header.reply_code reply->header.
Creating Services and Servers Coding Custom Services If reply->header.reply_code is equal to REPLY_LONG, the reply-with-data message is returned to the requester. If reply->header.reply_code is equal to REPLY_SHORT, the advisory-only message is returned to the requester. An advisory message is always a part of the IPC reply. You must supply the text of the message in reply->header.advisory_text. You can set reply->header.
Creating Services and Servers Coding Custom Services T9154-ADVISORY-MSG-TEXT or reply->header.advisory_text. This field contains the message that will be displayed on the Advisory line of the application screen upon return from this service. The text that you move to this field must be less than or equal to 76 characters. T9154-TMF-ABORT-FLAG or reply->header.tmf_abort_flag. This flag indicates whether you want the requester to Abort (Y) or End Transaction (N) upon return from this service.
Creating Services and Servers Coding Custom Services Custom Source File COBOL85 Example Figure 4-8 is an example of custom service code in a Custom Source File. Figure 4-8. Custom Source File COBOL85 Sample Code ?SECTION T9WS-S215-CALC 01 S215-WS-1. 05 S215-TEMP-TOT 05 S215-TEMP-AVG 01 S215-WS-2. 05 S215-HOLD-ACCESS-CODE 05 S215-HOLD-PREV-DATE 01 S215-ERROR-FLAG PIC 9(9). PIC 999V999. PIC X(3). PIC 999999. PIC X VALUE “N”. COPY S215-WS OF $DATA.ACCOUNT.WS.
Creating Services and Servers Coding Custom Services Figure 4-9 lists a portion of the COBOL code compile listing for a server that uses this service. Figure 4-9. Custom COBOL85 Server Sample Code (Page 1 of 2) WORKING-STORAGE SECTION. 01 S215-WS-1. 05 S215-TEMP-TOT 05 S215-TEMP-AVG 01 S215-WS-2. 05 S215-HOLD-ACCESS-CODE 05 S215-HOLD-PREV-DATE 01 S215-ERROR-FLAG * COPY S215-WS OF $DATA.ACCOUNT.WS. 01 S215-WS.
Creating Services and Servers Coding Custom Services Figure 4-9. Custom Server Sample Code (Page 2 of 2) ELSE MOVE MOVE MOVE MOVE MOVE ENDIF.
Creating Services and Servers Coding Custom Services Example of COBOL85 Service Code With Embedded SQL Commands This example of embedded SQL commands in service code retrieves one row from an SQL table if it finds an exact match for employee number. In this example, a single column, EMPNUM, is passed from the requester to the service: ?SECTION T9WS-SVC-SQL-001 * ?SECTION T9PR-SVC-SQL-001 * MOVE EMPNUM OF T9154-REQUEST TO EMPNUM OF EMPLOYEE-HOST. PERFORM 3010-GET-EMPNUM-INFO. . . . 3010-GET-EMPNUM-INFO.
Creating Services and Servers Coding Custom Services ELSE IF T9154-SQL-ERROR MOVE "Error occurred during query" TO T9154-ADVISORY-MSG-TEXT OF T9154-REPLY MOVE T9154-RETURN-ADVISORY-ONLY TO T9154-REPLY-FLAG ELSE MOVE "Error occurred during open" TO T9154-ADVISORY-MSG-TEXT OF T9154-REPLY MOVE T9154-RETURN-ADVISORY-ONLY TO T9154-REPLY-FLAG END-IF END-IF END-IF.
Creating Services and Servers Coding Custom Services Examples of C Service Code Using Common Service Utility Library Functions These code excerpts show examples of C service code that uses various functions provided in the common service utility library to access Enscribe files. Example 1: Read Approximate. ?section svc-001 /* Transaction logic module for service : SVC-001 List first by employee name on a nonunique alternate key.
Creating Services and Servers Coding Custom Services Example 2: Read Next Approximate. ?section svc-002 /* Transaction logic module for service : SVC-002 List next by employee name on a nonunique alternate key. */ %INVOKE "defines" <−− Macro invocation. void svc_002setup ( T9154_SERVICE_CONTROL *control ) { } void svc_002cleanup ( T9154_SERVICE_CONTROL *control ) { } void svc_002 ( T9154_SERVICE_REQUEST *request, T9154_SERVICE_REPLY *reply, T9154_SERVICE_CONTROL *control ) { short cc; reply->t9154_header.
Creating Services and Servers Coding Custom Services Example 3: Read Previous Approximate. ?section svc-003 /* Transaction logic module for service : SVC-003 List previous by employee name on a nonunique alternate key. */ %INVOKE "defines" <−− Macro invocation.
Creating Services and Servers Coding Custom Services Example 4: Insert. ?section svc-004 /* Transaction logic module for service : SVC-004 Insert employee record. */ void svc_004setup ( T9154_SERVICE_CONTROL *control ) { } void svc_004cleanup ( T9154_SERVICE_CONTROL *control ) { } void svc_004 ( T9154_SERVICE_REQUEST *request, T9154_SERVICE_REPLY *reply, T9154_SERVICE_CONTROL *control ) { short cc; reply->t9154_header.reply_code = REPLY_LONG; if ( lfwrite ( &control->file.
Creating Services and Servers Coding Custom Services Example 5: Delete. ?section svc-005 /* Transaction logic module for service : SVC-005 Delete employee record */ %INVOKE "defines" <−− Macro invocation. void svc_005setup ( T9154_SERVICE_CONTROL *control ) { } void svc_005cleanup ( T9154_SERVICE_CONTROL *control ) { } void svc_005 ( T9154_SERVICE_REQUEST *request, T9154_SERVICE_REPLY *reply, T9154_SERVICE_CONTROL *control ) { #include reply->t9154_header.
Creating Services and Servers Coding Custom Services Example 6: Update. ?section svc-006 /* Transaction logic module for service : SVC-006 Update employee record */ void svc_006setup ( T9154_SERVICE_CONTROL *control ) { } void svc_006cleanup ( T9154_SERVICE_CONTROL *control ) { } void svc_006 ( T9154_SERVICE_REQUEST *request, T9154_SERVICE_REPLY *reply, T9154_SERVICE_CONTROL *control ) { #include short cc; reply->t9154_header.reply_code = REPLY_SHORT; if ( lfseekkey ( &control->file.
Creating Services and Servers Coding Custom Services cc = ( lfread ( &control->file.employee_file, &reply->employee_rec, sizeof reply->employee_rec)); if (cc != LFE_OK) { %INVOKE "evaluate-read-error" return; } } Example 7: lfseekkey statement for a Read Generic. ... if ( lfseekkey ( &file, (short) 'LN', <−− 'LN', the keytag is case sensitive. LFSK_GENERIC, "Maxwell", 7, NULL, 0, 20 )) ... Example 8: lfseekkey statement for a Read Exact. ...
Creating Services and Servers Coding Custom Services Guidelines for Custom Source Files The following points are guidelines for using a Custom Source File: A Custom Source File with the required section headings must exist before a successful generation of a server containing this service can be completed.
Creating Services and Servers Coding Custom Services For COBOL services, the following Pathmaker variables can be used in the Custom Source File and do not need qualification: T9154-ADVISORY-MSG-SEVERITY T9154-ADVISORY-MSG-TEXT T9154-FILE-ERROR-MSG T9154-FILE-STAT T9154-FILE-STAT-REDEF T9154-FS-ERRORS T9154-FS-MESSAGES T9154-GUARDIAN-ERR T9154-REASON-CODE T9154-REPLY-FLAG T9154-REPLY-FLAG-VALUES T9154-TMF-ABORT-FLAG T9154-SQL-SUBSYSTEM-CODE T9154-SQL-SUBSYSTEM-ID For C services, the following Pathmaker v
Creating Services and Servers Coding Custom Services Invoking Macros From a Custom Source File The Pathmaker product supports the creation and use of shared code macros by providing the Pathmaker macro language (and its macro expansion facility) and the ability to register macros within a Pathmaker project. Macros exist as EDIT files containing source code. Creating and registering Pathmaker macros is described under “Preparing Shared Code for a Pathmaker Project” in Section 2 of this manual.
Creating Services and Servers Coding Custom Services Example of Invoking a Registered Macro Figure 4-10 shows an example of how you can use a registered macro in a COBOL custom source file. The macro being invoked appears in Section 2, Figure 2-2. The macro is used to check for the existence of data in either the DEPT table or the EMPNUM table, depending upon the value of the parameters passed to the macro. Figure 4-10.
Creating Services and Servers Coding Custom Services Additional Considerations for Coding NonStop SQL Services Coding custom services for a NonStop SQL Pathmaker application is much like coding services for an Enscribe Pathmaker application, except that you include embedded SQL code in the service.
Creating Services and Servers Coding Custom Services Figure 4-11. Generating INVOKE Statements for IPCs SQL Table Registration Screen =========================== Table Object Name Define Name PARTS =PARTS IPC Definition Screen =========================== Request Copy Of Reference Object PARTS Reply Reference Object Copy Of SQL table object name from the SQL Table Registration screen PARTS Server Generation Output of COBOL Compile DATA DIVISION.
Creating Services and Servers Coding Custom Services Sending Rows and Columns to Services Depending on the needs of the service, you might want to: Send an entire row of a table to a service Send a single column to a service Send selected columns from one or more tables to a service Sending an entire row to a service is the simplest approach. To send an entire row, you specify the table name on the IPC Definition screen of the service and the SEND Parameter Definition screen of the requester.
Creating Services and Servers Coding Custom Services Generating Host Variables The Pathmaker product uses the information you provide on the Logical File Entries screen to generate host variables. The Pathmaker product uses the names you enter in the Logical File Names column to create host variables. The Logical File Name can match the Table Object Name on the Logical File Entries screen.
Creating Services and Servers Coding Custom Services Using DEFINE Names The Pathmaker product uses the names you specify in the Define Name column to create DEFINEs in the server code. The Pathmaker product also creates DEFINE statements in the target application Pathway configuration file, PATHCNFG, with the DEFINE names that you supply. You can refer to these DEFINE names in your Custom Source File code; for example, you might use a DEFINE name in a DECLARE CURSOR statement.
Creating Services and Servers Coding Custom Services Notice that the DDL clauses for HEADING text contain a slash (/). The slash indicates to Pathmaker where you want the title for each column to be broken. Assume that you specified the name ORDERS-HOST (which is a logical file name that you entered on the Logical File Entries screen) as the host variable name for the ORDERS table and the name CUSTOMER-HOST as the host variable name for the CUSTOMER table.
Creating Services and Servers Coding Custom Services File Error Handling There are several ways that you can handle server errors within Pathmaker applications. You can: Do nothing and allow the default error handling within the generated server handle all file errors. Add code to your custom service that interprets the outcome of a file operation. Rewrite portions of the server skeleton to change the text or format of error messages.
Creating Services and Servers Coding Custom Services If you need to provide error handling routines, your service code should: 1. Check the file status at each file access. 2. Move the new message to T9154-ADVISORY-MSG-TEXT. To check the file status, you can use the Level 88 declarations generated by Pathmaker in your server. The following excerpt from generated server source code shows each of these declarations and their associated values: 01 T9154-EXTERNAL-GLOBAL-STORAGE IS EXTERNAL IS GLOBAL. ...
Creating Services and Servers Coding Custom Services File Error Handling in a C Custom Source File The common service utility library, PMSVCULC, contains functions to handle most file I/O operations. You can invoke these functions in a Custom Source File for a C service. When an I/O function detects an error, it automatically invokes the lfe_advisory function, also found in the PMSVCULC file. The lfe_advisory function places an appropriate message in the reply advisory field.
Creating Services and Servers Coding Custom Services Error Handling for COBOL Servers Using SQL Tables and Views The Pathmaker product provides a single format for messages returned by NonStop SQL or any of its subsystems. A subset of the NonStop SQL messages is documented in Table 4-6. You can get information about the remaining messages either by looking in the NonStop SQL Messages Manual or by using the ERROR command from SQLCI.
Creating Services and Servers Coding Custom Services SQL-subsystem-code is the subsystem error number. You can get more information about the specific error by looking in the appropriate subsystem’s error messages manual. filename is the name of the file on which NonStop SQL attempted to perform an operation. user-line-number is the line number in your server source code where SQL encountered the problem.
Creating Services and Servers Coding Custom Services Table 4-6. Common NonStop SQL Messages (Page 1 of 3) Error Number Severity 0 100 Warning -200 Error -206 Error -251 Error -8025 Error -8026 Error -8200 Error 8202 Warning -8222 Error -8227 Error -8228 Error -8230 Error -8233 Error 067868 Tandem Computers Incorporated Meaning Pathmaker Level 88 Operation successful. No rows selected or modified. There is no DEFINE for value.
Creating Services and Servers Coding Custom Services Table 4-6. Common NonStop SQL Messages (Page 2 of 3) 4–60 Error Number Severity Meaning Pathmaker Level 88 -8234 Error T9154-SQL-TABLEPROTECTED -8235 Error 8237 Warning -8300 Error -8310 Error -8311 Error -8402 Error -8405 Error -8406 Error Unable to escalate an OPEN for READ or WRITE access. The table for which the escalation was requested might have been opened READ-PROTECTED by another user.
Creating Services and Servers Coding Custom Services Table 4-6. Common NonStop SQL Messages (Page 3 of 3) Error Number Severity Meaning Pathmaker Level 88 -8423 Error -8424 Error T9154-SQL-MISSING INDICATOR T9154-SQL-NULL-NOTALLOWED -8425 Error -8426 Error No indicator variable was specified. An attempt was made to assign a null value to a field that does not allow null values. An invalid value for a datetime expression was encountered. The date, time, or interval value has incorrect syntax.
Creating Services and Servers Coding Custom Services 251, 214, 8025, 8026, 251, 230, 8025, 8027, 8202, 8222, 8202, 8222, 8227, 8228, 8230, 8227, 8228, 8230, 8233, 8237, 8402, 8233, 8237, 8402, 8403, 8403, 8405, 8405, 8406, 8406, 8407, 8407, 8408, 8410, 8408, 8410, 8411, 8411, 8423, 8423, 8424, 8424, 8425, 8425, 8426, 8426, SHRT_MIN, SHRT_MAX, }; 4–62 067868 Tandem Computers Incorporated "memory allocation error %s", "process error on %s", "SQL region was not SQL compiled", "p
Creating Services and Servers Generating NonStop SQL Statements Generating NonStop For custom services written in COBOL85 that access data in NonStop SQL tables, the SQL Statements Pathmaker product can be used to generate some SQL database access statements.
Creating Services and Servers Generating NonStop SQL Statements An area for you to specify an access path. An access path is required only for SELECT and FETCH operations. For a SELECT operation, the access path you specify must be unique. See “Defining Access Paths for NonStop SQL Tables” in Section 2 for more information. In addition, a default name of a Working-Storage host variable is provided (BeforeImage Host Variable). This host variable is used for holding a before-image of the row to be updated.
Creating Services and Servers Generating NonStop SQL Statements Check the value stored in T9154-CONCURRENCY-CHECK-RESULT to determine the result of a concurrency check. The possible values of this variable are: T9154-OPERATION-SUCCESSFUL T9154-OPERATION-SQL-ERROR T9154-ROW-NOT-FOUND T9154-ROW-CHANGED If the UPDATE operation fails with a OPERATION-SQL-ERROR, check the standard condition names to find out the cause of the error.
Creating Services and Servers Generating NonStop SQL Statements A SELECT operation selects a single row from one table, protection view, or shorthand view. A SELECT can only be generated on a unique access path. As with all SQL operations, you can use the standard Pathmaker condition names for SQL errors to check the status after the SELECT operation has completed.
Creating Services and Servers Generating NonStop SQL Statements Direction is ascending. If Start Position is Current or Next, the first row accessed is identified by the values in the host variables, if such a row exists. If the row does not exist within the Position Mode subset, the row with the next higher access path columns (for ascending) or next lower access path columns (for descending) is fetched.
Creating Services and Servers Defining a Custom Server Defining a Custom Server The Pathmaker product has three types of servers: Standard servers Servers provided to process requests by DB requesters Custom servers Servers that contain custom services Registered servers Servers created outside the Pathmaker environment but known to a Pathmaker project The only types of servers that you can define using the Pathmaker product are custom servers (servers made up of custom services) and registered serv
Creating Services and Servers Defining a Custom Server The Pathmaker full screen interface screens used to create custom servers are summarized in Table 4-7. Table 4-7. Pathmaker Screens for Creating Custom Servers Pathmaker Screen Description Server Definition Server Copy Service Assignment Used to define server attributes. Used to copy an existing server. Used to identify the services to be included in this server.
Creating Services and Servers Generating Custom Servers Generating Custom After you have defined a custom server, you can use the Pathmaker product to Servers generate source code for the server and compile the source code into object code. You can generate a server as soon as you have defined it, but you must regenerate it every time you make any change to it. During application testing, you might want to define a single service for each server.
Creating Services and Servers Generating Custom Servers If the Pathmaker product does not encounter any errors during generation or compilation, the message Generation successful is displayed in the Last Attempted Generation Message field the next time you list the Server Definition screen even if there were warnings issued. The server object is locked only at the beginning of server generation. You can use Enform to check the status of your server generation.
Creating Services and Servers Generating Custom Servers Figure 4-13. Generating and Compiling a Pathmaker Custom Server (NonStop SQL) SQL Catalog Server Skeleton Registered Macro Files (Optional) For Custom Servers Only Application Developer Pathmaker “Pathmaker, generate and compile this Server.
Creating Services and Servers Generating Custom Servers Figure 4-14 illustrates the generation and compilation of a Pathmaker COBOL85 custom server that will access only Enscribe files. Figure 4-14. Generating and Compiling a Pathmaker COBOL85 Custom Server (Enscribe) Server Skeleton Registered Macro Files (Optional) For Custom Servers Only Application Developer Pathmaker “Pathmaker, generate and compile this server.
Creating Services and Servers Registering Servers Not Created With Pathmaker Registering Servers By allowing you to create registered services and servers, the Pathmaker product Not Created With provides a way to enter information about Pathway servers that were not created Pathmaker using the Pathmaker product, and the files or tables that they access, into a Pathmaker catalog. Registered Pathmaker services and servers are just entries in a Pathmaker catalog.
Creating Services and Servers Registering Servers Not Created With Pathmaker The steps for creating a registered service are as follows: Defining a Registered Server Writing Requester Code to Access a Registered Service 1. Define and add a registered service to a Pathmaker project catalog using the Service Definition screen. On this screen, fill in the Service Name and TMF? fields, enter REG in the Service Type field, and then press F1 to add the service. 2.
Creating Services and Servers Registering Servers Not Created With Pathmaker 3. Generate and compile the requester. You can of course specify many USER actions for different functions keys, each of which has corresponding code in the Requester Copy Library to invoke different portions of the same server. Refer to Section 9, “Using a Requester Copy Library” for more information.
5 Creating Requesters This section presents an overview of requester development and provides detailed information about using the Pathmaker full screen interface to create requesters. A Pathmaker requester can be created using either PMADL or the full screen interface. No matter which tool you use, you need to be familiar with the types of information that must be provided to create a Pathmaker requester. This section provides that information.
Creating Requesters Requester Development Overview The Default Screen Part of defining a requester is specifying the screen attributes that the Pathmaker product will use to generate the layout of the default screen. This is the same screen layout that the end user will use to operate the requester, unless you change it. Information that the Pathmaker product uses to create a default screen comes from: The DDL dictionary Information that you have entered through Pathmaker screens.
Creating Requesters Requester Development Overview Coordinating IPC Messages and Parameters Two of the possible actions that can be associated with a particular function key in a Pathmaker requester are: SEND—To invoke a service CALL—To call another requester Before a fully functioning requester that has SENDs and CALLs can be completed, two things must be done using Pathmaker screens: Components of IPC request messages and reply messages between this requester and each service it invokes must be coordina
Creating Requesters Requester Development Overview Figure 5-1. Generating and Compiling a Pathmaker Requester Requester Skeleton Requester Copy Library (optional) Pathmaker T9154CPY Application Developer Requester Source Code ID Division Environment Division Project Catalog SCREEN COBOL Library Screen Section SCOBOLX Compiler 051 The requester skeleton is provided with the Pathmaker product and contains the code and commands that the Pathmaker product uses to generate a requester’s source code.
Creating Requesters Requester Development Overview Screen and Task Summaries The following pages contain three summaries that can be used during the development of Pathmaker requesters. The Pathmaker full screen interface screens used to create requesters are summarized in Table 5-1. Table 5-1.
Creating Requesters Requester Development Overview Table 5-2 is a check list that lists the screens and tasks for creating up to three requesters for a custom Pathmaker application. You can use copies of this check list to help you track the progress of requester development for a custom Pathmaker application. Table 5-2.
Creating Requesters Requester Development Overview Table 5-3 lists the screens and tasks for creating DB requesters and for completing a DB requester application. Table 5-3.
Creating Requesters Requester Definition Tasks Requester Definition The remainder of this section explains the details you need to understand when you Tasks use the Pathmaker product to create requesters. The topics include: Defining requesters—Lists and describes the basic steps you need to take to define a requester. If you want to see a detailed step-by-step example of requester definition, refer to Section 10.
Creating Requesters Requester Definition Tasks After defining the requester, you will go on to: 1. Enhance the appearance of the screen by using the Screen Painter (optional). 2. Integrate requesters and services. a. Define any parameters this requester will receive from another requester. b. Define any parameters this requester will send to or receive from services. 3. Generate the final version of the requester.
Creating Requesters Requester Definition Tasks Reference objects are used to create data fields for data entry and display. They are also used for sending messages to and receiving messages from services. A DDL definition or record for a reference object must be present in the DDL dictionary before you can add that reference object to a requester.
Creating Requesters Requester Definition Tasks DB requesters have several limitations.
Creating Requesters Requester Definition Tasks Figure 5-2. Recommended Use of REG Requesters New Logon Menu Registered Requesters Existing Application Root Menu Requesters Generated Using Pathmaker New Requesters Existing Application 052 REG requesters display the application screen that you specify in the SCREEN section of your SCREEN COBOL code. You should match the screen layout of a REG requester with the application screens you design using the Pathmaker product.
Creating Requesters Requester Definition Tasks After you add the REG requester to the project catalog, you must use the SCREEN COBOL Utility Program (SCUP) to move the requester’s compiled object code into the application’s POBJ files. You can invoke SCUP from the Utility Menu, a menu accessible from any Pathmaker screen. Refer to the Pathway SCREEN COBOL Reference Manual for instructions on using SCUP.
Creating Requesters Requester Definition Tasks You could also create different initial requesters to limit access to a series of requesters to a subset of users. You are responsible for writing code that ensures that the proper subset of users can run the initial requester. Figure 5-3 illustrates these uses of an initial requester. Figure 5-3.
Creating Requesters Controlling Default Screen Layout You can create an initial requester either with or without formal parameters. An initial requester without formal parameters might be the first requester for the entire application; therefore, the Pathmaker product creates a PROGRAM entry in the Pathway configuration for this application for each initial requester without formal parameters. In Pathway, PROGRAMs allow you to run your application from nondedicated terminals.
Creating Requesters Controlling Default Screen Layout The HEADING and VALUES clauses are fully described in the Data Definition Language (DDL) Reference Manual. The OCCURS and OCCURS DEPENDING ON clauses have some special considerations when you use them in Pathmaker application development: OCCURS and OCCURS DEPENDING ON clauses cannot be nested. A subordinate group or field can inherit OCCURS or OCCURS DEPENDING ON dimensions from a higher level declaration.
Creating Requesters Controlling Default Screen Layout Using the OCCURS clause creates an array structure. In the previous example, GROUP1 is an array structure that occurs three times. In some applications, you need to know where the cursor is within the list when you invoke a service. You can pass the current cursor position to a service by using either the @CURSOR-FIELD pseudofield or the @CURSOR-POSITION pseudofield.
Creating Requesters Controlling Default Screen Layout Attributes Affecting MENU and TRNS Requester Default Screens The attributes that affect MENU and TRNS requester default screens are described on the following pages. Displayed Fields. You can use the Display Field List screen to specify fields to be displayed on the default screen.
Creating Requesters Controlling Default Screen Layout Each of these screen formats for this Enscribe DDL definition is shown in the following examples: DEFINITION emp-def. 02 first-name 02 last-name 02 emp-num 02 dept END. PIC PIC PIC PIC X(20). X(25). 9(4). 9(5). RECORD emp-rec. FILE IS emp KEY-SEQUENCED. DEFINITION IS EMP-DEF. KEY IS emp-num DUPLICATES NOT ALLOWED. END.
Creating Requesters Controlling Default Screen Layout Headings. You can use the Requester Definition screen to specify how a heading will be displayed on the application screen. You can modify the text for a heading on the Display Detail screen, overriding the text specified in the DDL (if any), or you can specify heading text for the first time on the Display Detail screen.
Creating Requesters Controlling Default Screen Layout You can change the terminal type of an existing requester. If you change the terminal type, the Pathmaker product automatically remaps any function keys you assigned. Refer to “Creating Requesters for 3270 Terminals” later in this section for further information about equivalent function key assignments for 6520/6530 terminals and 3270 terminals.
Creating Requesters Controlling Default Screen Layout Figure 5-4.
Creating Requesters Controlling Default Screen Layout Figure 5-5.
Creating Requesters Controlling Default Screen Layout Attributes Affecting DB Requester Default Screens The attributes that affect DB requester default screens are described on the following pages. Displayed Fields. You can use the Display Field List screen to specify fields to be displayed on the default screen. The Pathmaker product automatically creates a Display Field List for DB requesters.
Creating Requesters Controlling Default Screen Layout Each of these screen formats for this Enscribe DDL definition is shown in the following examples: DEFINITION emp-def. 02 first-name 02 last-name 02 emp-num 02 dept END. PIC PIC PIC PIC X(20). X(25). 9(4). 9(5). RECORD emp-rec. FILE IS emp KEY-SEQUENCED. DEFINITION IS EMP-DEF. KEY IS emp-num DUPLICATES NOT ALLOWED. END.
Creating Requesters Controlling Default Screen Layout Compressed format is only visible on group definitions, records, or NonStop SQL tables. All of these structures are objects made up of blocks of subordinate objects. If you enter a series of elementary definitions into the Requester Context, compressed format will not appear to have an effect, because all of these items are at the same lexical level (the 01 level).
Creating Requesters Controlling Default Screen Layout Link Info. You can use the Record Instance Detail screen to specify linkage information (Link Info) for DB requesters. Link Info consists of a set of fields used to link a child record or table to a parent record or table. Notice that you use a bottom-up approach when you implement a parent-child relationship using the Pathmaker product: you use the Record Instance Detail screen of the child record to indicate the linkage between parent and child.
Creating Requesters Controlling Default Screen Layout Repetition refers to the number of repetitions of the current record or row to be displayed on the application screen. Specifying more than one repetition produces multiple instances of an entire reference object. This type of display cannot be produced by using the OCCURS clause in DDL because OCCURS cannot be specified at the record (01) level. The most common use for repetition is to create a requester that lists records or tables in the database.
Creating Requesters Controlling Default Screen Layout Within the Screen Painter, multiple occurrences of a reference object are referred to by the reference object name followed by a bracketed integer. In the previous example, three repetitions of RECORD-NAME would be referred to as: RECORD-NAME[1] RECORD-NAME[2] RECORD-NAME[3] This bracketed name appears as the data field label on the default screen for uncompressed and compressed format.
Creating Requesters Controlling Default Screen Layout Title. You can specify a requester title on the Requester Definition screen. You can specify a box title on the Record Instance Detail screen. Box titles apply only to DB requesters. You can use the requester title field on the Requester Definition screen to enter the text to be shown at the top of the default screen. The title can be any printable characters, up to 60 characters.
Creating Requesters Controlling Default Screen Layout The screens you can navigate to for a DB requester that change attributes for default screen displays are: Screen Attributes Record Instance Detail Screen format (COM, UNC, TAB) Headings (HEAD, NAME, NULL) Link Info Repetition Title Screen format (COM, UNC, TAB) Headings (HEAD, NAME, NULL) Terminal type Title Function keys and function key prompts Displayed fields Headings Video attributes Requester Definition Display Text Display Field List Displa
Creating Requesters Specifying CALL and SEND Parameters Specifying CALL and SEND Parameters After you have defined the requesters and coded the services for your application, you must integrate the requesters and services. To perform this step, you must define any parameters a requester will receive from another requester, define any parameters to be passed from a requester to another requester, and define any parameters sent from a requester to a service through an IPC message.
Creating Requesters Specifying CALL and SEND Parameters Requester Parameters You use the Requester Parameters screen to specify a list of formal parameters. Formal parameters are the parameters that this requester expects to receive from another requester. The generated application passes values to the formal parameters when another requester calls this one.
Creating Requesters Specifying CALL and SEND Parameters CALL Parameters You use the CALL parameters screen to specify the mapping between reference objects from this requester and reference objects in one of the requesters it is calling. The Pathmaker product supplies most of the information on this screen by matching the formal parameter list (Requester Parameters screen) of the called requester to reference objects in the requester context of this requester.
Creating Requesters Specifying CALL and SEND Parameters Figure 5-8.
Creating Requesters Specifying CALL and SEND Parameters Figure 5-9 shows a sample of the SCREEN COBOL code that the Pathmaker product produces for the calling requester and for the called requester. Figure 5-9. Sample SCREEN COBOL Code for Requester Calls REQ-1 SCREEN COBOL Excerpt WORKING-STORAGE SECTION. REQ-2 SCREEN COBOL Excerpt LINKAGE SECTION. 01 T9154-LINKAGE. 01 B-DEF 01 Z-DEF 01 K-DEF 01 L-DEF ••• PIC X(5). PIC 9(8). PIC X(3). PIC X(7). ••• 01 B-DEF 01 C-DEF PIC X(5). SCREEN SECTION.
Creating Requesters Specifying CALL and SEND Parameters Use of the SEND Parameter Definition screen results in the generation of SEND statements in the Procedure Division of the SCREEN COBOL code. The following objects can be sent to a service: DDL definitions that are part of the context of the requester. DDL records that are part of the context of the requester. NonStop SQL table objects that are part of the context of the requester.
Creating Requesters Specifying CALL and SEND Parameters The length and data type of each reference object (or field within a reference object) sent to a service must be the same as the corresponding formal parameter of the service; the formal parameters of the service are specified in the IPC Definition screen of the service. If any changes are made to the IPC Definition screen for a service, the SEND Parameter Definition screen for each requester function key that invokes the service must also be updated.
Creating Requesters Specifying CALL and SEND Parameters Figure 5-10 illustrates the Pathmaker screens used to map SEND parameters. Figure 5-10.
Creating Requesters Specifying CALL and SEND Parameters Figure 5-11 shows a sample of the SCREEN COBOL and COBOL code that the Pathmaker product produces to invoke a service. Figure 5-11. Sample SCREEN COBOL and COBOL Code for Invoking a Service REQ-1 SCREEN COBOL Excerpt WORKING-STORAGE SECTION. 01 B-DEF 01 Z-DEF 01 K-DEF 01 L-DEF PIC X(5). PIC 9(8). PIC X(3). PIC X(7). ••• Server COBOL Excerpt DATA DIVISION. FILE SECTION. FD T9154-MESSAGE-IN-FILE. 01 REQ-SERVICE-1. 02 T9154-REQUEST-HEADER.
Creating Requesters Generating Requesters Generating Requesters After you have defined a requester, you can use the Pathmaker product to generate SCREEN COBOL source code for it and compile the source code into SCREEN COBOL object code. To generate the simplest possible requester successfully, you must have specified a requester name and reference object and have added the requester to the project catalog.
Creating Requesters Generating Requesters If the Pathmaker product does not encounter any errors during generation or compilation, the message Generation successful is displayed in the Last Attempted Generation Message field the next time you visit the Requester Generation data screen. Files Used to Generate a Requester To generate the SCREEN COBOL source code for a requester, the Pathmaker product uses information from the project catalog and from the requester skeleton file.
Creating Requesters Generating Requesters Figure 5-12 illustrates the steps of requester generation and the files used at each step. Figure 5-12.
Creating Requesters Creating DB Requesters Creating DB Requesters DB requester applications provide a quick way of producing a simple application without writing any service or server code. You create a DB requester application by creating one or more DB requesters and designating which of the standard services are accessible from the requester. You can also create one or more MENU requesters for a DB requester application.
Creating Requesters Creating DB Requesters If there is more than one file in the context for this DB requester (that is, this is a multifile DB requester), and this file is a child, you also use the Record Instance Detail screen to specify linkage information. Enter the qualified name of the parent’s link field in the Parent field. Enter the elementary field name of the child’s link field in the Child field.
Creating Requesters Creating Requesters for 3270 Terminals Creating Requesters You can use the Pathmaker product to create applications for IBM 3270 terminals. If for 3270 Terminals you are creating an application for a 3270 terminal, you must specify the terminal type as 3270 on the Requester Definition screen. On the Function Key Assignment screen, you must indicate whether you are creating an application for a 12-function or 24-function keyboard.
Creating Requesters Creating Requesters for 3270 Terminals You can change the terminal type from 6520/6530 to 3270 or from 3270 to 6520/6530 for an existing requester. When you do, the Pathmaker product automatically remaps any function keys you assigned. Table 5-7 shows equivalent function key assignments for 6520/6530 terminals and 3270 terminals.
Creating Requesters Creating Requesters for Kanji Terminals Creating Requesters You can use the Pathmaker product to create applications for Kanji terminals. A for Kanji Terminals Pathmaker application can be run on any Kanji device supported by Pathway including: JET 6530 terminals Kanji PCs that can run PCT-J Fujitsu F9450 terminals or the IBM 5550 family of terminals All of these devices have mode keys that allow end users to enter ASCII characters, Kanji characters, or Katakana characters.
Creating Requesters Creating Requesters for Kanji Terminals You should help end users identify a data field that can accept only Kanji characters by providing an appropriate heading or help text for the data field. You can change the default screen picture for a PIC X data field on the Display Detail screen to one that mixes PIC N and other picture types. If you choose to use the Display Detail Screen or Screen Painter to shorten a PIC N field, you must shorten the field to an even number of spaces.
Creating Requesters Creating Requesters for Kanji Terminals (If you do not have write access to PATHTCP2, you must make a copy of PATHTCP2. Then, when adding the SET TCP program parameter to the PATHTCPS file for the target application, name the volume and subvolume where you copied PATHTCP2.) Considerations for the IBM 5550 Family of Terminals The IBM model 5551 terminal supports Kanji and is compatible with the 3270 family of terminals.
6 Using the Screen Painter The Screen Painter is the primary tool for creating an attractive application screen in the Pathmaker product. The Screen Painter is used for viewing and modifying the default screens that appear in your application program. After you have viewed the default screen in the Screen Painter, you can either modify it directly in the Screen Painter or modify it by changing the screen information in the Pathmaker product or through PMADL.
Using the Screen Painter Screen Painter Components Screen Elements A screen element can be a data or point field, a decoration, or a pseudofield. Each of these screen elements can have a starting location, length, or video attributes. These listed screen element attributes are stored in the Pathmaker project catalog. Each screen element is described in the following pages. Data Fields Data fields are screen elements used to display and accept the data that you enter.
Using the Screen Painter Screen Painter Components The current value of a displayed pseudofield appears when the application screen is displayed. One other pseudofield can be displayed on the application screen: @ADVISORY. @ADVISORY contains the most recent advisory message generated by the application. The Pathmaker product automatically includes @ADVISORY on your application screen. @ADVISORY can only be moved in the Screen Painter; it cannot be added or deleted.
Using the Screen Painter Basic Screen Painter Editing Functions Basic Screen Painter As discussed earlier in this manual, Tandem recommends that you use the Requester Editing Functions Definition series of screens to create a default screen that is as close as possible to the final version. You can then use the Screen Painter to enhance the default screen that the Pathmaker product generates.
Using the Screen Painter Basic Screen Painter Editing Functions Video Attributes Fields The video attributes fields have the following meanings: Bright Field Enter Y if you want the intensity of the display bright. Enter N if you want the intensity dim. Reversed Field Enter Y if you want the pseudofield to be displayed in reverse video (dark letters on a light background). Enter N if you want the screen element to be displayed normally (light letters on a dark background).
Using the Screen Painter Basic Screen Painter Editing Functions Field. Enter a fully qualified reference object field name in this Field. The Pathmaker product allows you to specify as many qualifying names as are necessary to identify a reference object uniquely. Wherever the Pathmaker product accepts a reference to an elementary field name, it provides a field large enough to hold an elementary name and one or more qualifying field names.
Using the Screen Painter Basic Screen Painter Editing Functions If a reference object has more than one repetition, follow the name with a subscript to show to which repetition the data field refers. A subscript is an unsigned number in square brackets ([]) between one and the number of repetitions of the object. Occurs.
Using the Screen Painter Basic Screen Painter Editing Functions When you move a segmented field using F8 and shifted F8, the Screen Painter does not alter the segments of the field. Each segment retains its previous length and position relative to the start of the field. Positioning Long Data Fields.
Using the Screen Painter Basic Screen Painter Editing Functions If you define a MENU requester that contains only one page of information, the Pathmaker product does not create a paging area for the default screen. You can create a paging area for this requester by using the procedure described in “Defining the Paging Area,” next in this subsection. If you deleted the paging area by using function key shifted F9, you can redefine another one by using this procedure.
Using the Screen Painter Basic Screen Painter Editing Functions If you redefine the paging area, the Screen Painter moves Data Field1 to maintain its relative position: Screen Title _______________________________ | | | Data Field1 _______ | | | |_______________________________| Advisory line | | v Paging area moved down one line When you move the area, the Screen Painter automatically moves all elements with the area if it can. If it cannot move all elements, the operation fails.
Using the Screen Painter Basic Screen Painter Editing Functions If you plan to use a point field name in a Requester Copy Library, you must add code to perform the Pathmaker paragraph 0900-BUILD-CURSOR-POSITION. Performing this paragraph sets the values of T9154-CURSOR-POSITION and T9154-CURSORFIELD.
Using the Screen Painter Basic Screen Painter Editing Functions The Pathmaker product declares a pseudofield in the Working-Storage Section of the generated requester if you use the pseudofield in the requester. Pseudofields that can be displayed on the application screen are added to the application screen from within the Screen Painter. Pseudofields that cannot be displayed on the application screen are added to the SEND Parameter Definition screen.
Using the Screen Painter Basic Screen Painter Editing Functions Deleting a Block of Screen Elements When you press shifted F12 to select an area for deletion, the Screen Painter marks the cursor position as one corner of the block. Now move the cursor to the opposite corner and press shifted F12 again: X = cursor position the first time you press shifted F12. Y = cursor position the second time you press shifted F12.
Using the Screen Painter Basic Screen Painter Editing Functions If the second cursor position is on a different line but in the same column, the Screen Painter draws a vertical line between and including the two positions: X | | | | | | Y Moving a Page Within the Paging Area Use function key F11 to move a page within the paging area. When you press F11 to move the currently shown page, the Screen Painter marks the page but does not delete it.
Using the Screen Painter Converting a Simulated Screen to an Actual Screen Converting a You can use one of two techniques to turn your simulation into a functioning Simulated Screen to application. You can: an Actual Screen Have the Pathmaker product re-create the screens Use the Screen Painter to turn screen decorations into functioning data fields If you decide to have the Pathmaker product re-create the screens, you must reenter screen enhancements by using the Screen Painter.
Using the Screen Painter Converting a Simulated Screen to an Actual Screen Turning Decorations Into Functioning Data Fields This procedure summarizes the steps for turning the prototype application into a functioning application by turning decorations that represent data fields into actual data fields. You must create the DDL source schema and compile the schema before performing these steps. To turn screen decorations into data fields, follow these steps: 1.
7 Finishing and Installing the Application Several Pathway command files must be created and a special service-to-serverclass mapping requester must be generated before a Pathway application created using the Pathmaker product can be run.
Finishing and Installing the Application Table 7-1 summarizes the Pathmaker full screen interface screens used to complete and install an application. Table 7-1. Pathmaker Screens for Completing and Installing an Application Pathmaker Screen Description Application Configuration Menu to navigate to the three screens listed below. Specify the server class name associated with a custom or registered server. Specify an active server class for each custom or registered service.
Finishing and Installing the Application If your Pathmaker project contains: Only DB requesters, you need only to specify information on the Pathmaker Application Installation screen prior to running PMPROJECT INSTALL to install the application. You do not need to use the Server Class Assignment screen or Server Class Mapping screen or to generate a mapping requester.
Finishing and Installing the Application Servers and Server Classes Servers and Server A Pathmaker server communicates with requesters and performs operations on the Classes database. A server must contain at least one service and can contain as many as 40 services. The Pathmaker product permits application developers to include services written for Enscribe files and services written for NonStop SQL tables in the same server.
Finishing and Installing the Application Servers and Server Classes Assigning an Active Server Class After you have assigned servers to server classes, you must designate an active server class for each service. A service can be included in many servers and a server can be included in many server classes; therefore, a service can be included in many server classes. The requester must know which server class to use for request messages; this server class is the active server class for the service.
Finishing and Installing the Application Generating the Mapping Requester Generating the When a requester invokes a service, SCREEN COBOL requires the SEND statement to Mapping Requester contain a server class name, or to contain a variable that can be resolved to a server class name. The relationship between services and server classes for a Pathmaker application is maintained in a special generated requester called the mapping requester.
Finishing and Installing the Application Generating the Mapping Requester The Pathmaker product assigns a unique name for the mapping requester based on the project name. The mapping requester name is: T9154-projectname-hashnum projectname is the first 20 characters of your project’s name. hashnum is a number assigned to the mapping requester name by the Pathmaker product.
Finishing and Installing the Application Installing an Application for Testing Installing an The Pathmaker product uses the information entered on the Application Installation Application for Testing screen and information from the catalog to build utility files to install the generated application for testing. To install an application for testing, complete the Application Installation screen, then exit from the Pathmaker full screen interface to the command interpreter.
Finishing and Installing the Application Installing an Application for Testing Table 7-2. Files Produced by PMPROJECT INSTALL (Page 1 of 2) File Name Description DUPCODE A File Utility Program (FUP) command file for duplicating the generated application’s requester object-code files, server object-code files, help database files, and SQL standard server object code and error message files from their test configuration location to the current default subvolume.
Finishing and Installing the Application Installing an Application for Testing Table 7-2. Files Produced by PMPROJECT INSTALL (Page 2 of 2) Note File Name Description SQLCODE A command interpreter command file for SQL compiling the generated application servers in the current, default subvolume. Registers servers in the current default SQL catalog. SQLCODE is normally used after using DUPCODE.
Finishing and Installing the Application Running a Pathmaker Application Running a Pathmaker To run the application, you must first cold start the application’s Pathway system. Application After the Pathway system is started, you can run the application by using PATHCOM. Assume that the PATHMON name that you specified on the Application Installation screen is $MINE and the name of the initial requester is MAIN-MENU.
Finishing and Installing the Application Installing an Application in the Production System Installing an To install an application in the production environment, you duplicate object files and Application in the startup files to the production system, alter the startup files as needed, create the Production System production SQL database (if necessary), then run the startup files. This process is described in the next two subsections.
Finishing and Installing the Application Installing an Application in the Production System Example of Installing a Production Application 4. Create an SQL catalog on the production system if one does not already exist. 5. Use the ALTER DEFINE =_DEFAULTS command from the command interpreter to set the default SQL catalog to the production SQL catalog. 6. Edit SQLCODE so that the physical file names refer to locations on the production subvolume.
Finishing and Installing the Application Installing an Application in the Production System 3. Create a catalog on the production system and create the database tables: 34> SQLCI >> CREATE CATALOG prnl; --- SQL operation complete. >> OBEY sqlddl; >> EXIT 4. Use the ALTER DEFINE command from the command interpreter to set the default SQL catalog to the production SQL catalog: 35> SET DEFMODE ON 36> ALTER DEFINE =_DEFAULTS, CATALOG product-sql-catalog 5.
Finishing and Installing the Application Installing an Application in the Production System RESET SERVER SET SERVER PROGRAM <-- Change to production $data.sales.HELPSRVO, HIGHPIN ON location of Help server. SET SERVER CPUS (0:1,2:3,4:5,6:7,8:9,10:11) SET SERVER HOMETERM $op <-- Change to production location of home terminal. SET SERVER MAXSERVERS 12, NUMSTATIC 1 SET SERVER LINKDEPTH 1, MAXLINKS 50 SET SERVER TMF ON, AUTORESTART 2 SET SERVER PARAM SESSION-3 <-- Change to production $data.
Finishing and Installing the Application Installing an Application in the Production System The following is an example of an edited PATHTCPS file that changes all references from testing system locations to production system locations: [ Application TCP definitions for the SESSION-3 project [ Generated by D20 PATHMAKER - May 20, 1993 at 15:52:45 ] RESET TCP SET TCP AUTORESTART 2 SET TCP INSPECT ON (FILE $op) <-- Change to home terminal for production system.
Finishing and Installing the Application Installing an Application in the Production System The following is an example of the PATHPRGS file created by PMPROJECT INSTALL: [ Application PROGRAM definitions for the SESSION-3 [ project [ Generated by D20 PATHMAKER - May 20, 1993 at 15:52:45 ] RESET PROGRAM SET PROGRAM PRINTER $s.#ap3 <-- Change to production system.
Finishing and Installing the Application Installing an Application in the Production System The following is an example of an edited PATHSVRS file that: Changes the SET SERVER DEFINE commands to refer to the physical location of the new database files. Changes all references from testing system locations to production system locations.
Finishing and Installing the Application Installing an Application in the Production System 8. Edit the PATHCOLD and PATHCOOL files to refer to production locations. For PATHCOLD: PUSH #ASSIGN PURGE $data.sales.PATHLOG CREATE $data.sales.PATHLOG, 4 PURGE $data.sales.POETLOG CREATE $data.sales.POETLOG, 4 PURGE $data.sales.PATHCTL ASSIGN PATHCTL, $data.sales.PATHCTL PATHMON /NAME $ap3, OUT $data.sales.PATHLOG, NOWAIT, TERM $op,CPU 0, DEFMODE ON/ PATHCOM /IN $data.sales.
Finishing and Installing the Application Merging Pathmaker Projects Merging Pathmaker You can develop a single Pathmaker application by first creating separate Pathmaker Projects projects, then merging them together. One advantage to developing portions of the application in separate projects is that programmers can develop and test their portion of the application independently.
Finishing and Installing the Application Merging Pathmaker Projects Creating the Pathmaker Projects When you create the set of Pathmaker projects, you should designate one project as the master project. In addition to the master project, you will create one or more subsidiary projects: The master project has a main menu that is the common link among all the projects. The main menu is an initial MENU requester that contains calls to requesters in other Pathmaker projects.
Finishing and Installing the Application Merging Pathmaker Projects Figure 7-3.
Finishing and Installing the Application Merging Pathmaker Projects Merging the Pathmaker Projects After you have finished developing the portions of the application, you are ready to merge the master and subsidiary projects. You will need to allocate a central subvolume for the application’s object files plus subvolumes for each subsidiary project’s help database. To merge the projects: 1. Use SCUP to merge all requester object code into one POBJ library (POBJCOD, POBJSYM, and POBJDIR). 2.
Finishing and Installing the Application Merging Pathmaker Projects Place the help database for the master project on the central subvolume for the application. Place the help databases for the subsidiary projects on unique subvolumes on the production system. The help database files are: HELPREQ HELPPOS HELPTXT HELPALT0 Use FUP ALTER to alter the file labels of the help database files so that they indicate the new location of the alternate key file.
Finishing and Installing the Application Merging Pathmaker Projects DUP DUP DUP DUP DUP DUP DUP DUP DUP DUP DUP DUP DUP DUP DUP DUP DUP DUP DUP DUP DUP $SYSTEM.PMKR.DBSERVER, $SYSTEM.PMKR.SQLGS, $SYSTEM.PMKR.TEXTFILE, $SYSTEM.PMKR.DTCMAPS, $SYSTEM.PMKR.HELPSRVO, $DEV.PROJA.ASRVOBJ1, $DEV.PROJB.BSRVOBJ1, $DEV.PROJC.CSRVOBJ1, $DEV.PROJC.CSRVOBJ2, $DEV.PROJA.HELPPOS, $DEV.PROJA.HELPREQ, $DEV.PROJA.HELPTXT, $DEV.PROJA.HELPALT0, $DEV.PROJB.HELPPOS, $DEV.PROJB.HELPREQ, $DEV.PROJB.HELPTXT, $DEV.PROJB.
Finishing and Installing the Application Merging Pathmaker Projects Assume the EDIT file is named FUPOBEY. To use the file, enter the following command at the command interpreter: 25> FUP / IN FUPOBEY / Note that you need only one help server (HELPSRVO), one Enscribe database server (DBSERVER), and one NonStop SQL database server (SQLGS) on the central subvolume. If you already copied these files onto the central subvolume, you can omit those commands.
Finishing and Installing the Application Merging Pathmaker Projects Preparing Command Files for the Merged Application Copy the following files for the master project to the central subvolume for the application on the production system: PATHCNFG PATHPRGS PATHSVRS PATHTCPS PATHUSER Copy the following files for each subsidiary project to the subvolume used for the project's help database files on the production system: PATHPRGS PATHSVRS PATHTCPS PATHUSER (If you have added any commands to the file.
Finishing and Installing the Application Merging Pathmaker Projects PATHCNFG Example. The following is an example of an edited PATHCNFG file used to merge three Pathmaker projects. [ Application PATHWAY configuration for the Project-A [ project [ Generated by D20 PATHMAKER - May 20, 1993 at 15:52:45 ] CMDVOL $data.sales OBEYVOL $data.sales <-- Change to production location of data files. <-- Change to production location of command files.
Finishing and Installing the Application Merging Pathmaker Projects RESET SERVER SET SERVER PROGRAM <-- Change to production \prod.$data.sales.MAPSRVO, HIGHPIN ON location of POET mapping server.(You can remove all statements for MAPSRVO if POET is not used.) SET SERVER CPUS (1:2,3:4,5:6,7:8,9:10,11:0) SET SERVER HOMETERM $op <-- Change to production location of home terminal. SET SERVER MAXSERVERS 12, NUMSTATIC 1 SET SERVER LINKDEPTH 1, MAXLINKS 5 SET SERVER TMF ON, AUTORESTART 2 SET SERVER ASSIGN *.
Finishing and Installing the Application Merging Pathmaker Projects Summary of Steps for Merging Pathmaker Projects The following list summarizes the steps for creating a single Pathmaker application using multiple Pathmaker projects: 1. Establish naming conventions for projects and objects within projects. 2. Create a master project: a. Add a main menu that calls root requesters in the subsidiary projects. b. Create other requesters and services for this portion of the application. c. 3.
8 Maintaining Pathmaker Applications After the application has been installed and tested, the need to change the application is inevitable. Requester and server programs might need to be added or modified, the active server class for a service remapped, or the help text rewritten. If you make major changes in the design of the requester and server modules, you should reinstall the entire application; however, there are many changes you can make without reinstalling the entire application.
Maintaining Pathmaker Applications Changing Screen Decorations or Screen Layout Changing Screen Changing screen decorations or the screen layout of your application screen is easy if Decorations or Screen you do not plan to alter every screen in your application. Tandem does not provide an Layout Enform query that reports on screen decorations; if the decoration you intend to change is on several screens, you must determine which requesters to update.
Maintaining Pathmaker Applications Changing Screen Decorations or Screen Layout To reassign the active server class for a service: 1. Run the Pathmaker full screen interface. The Pathmaker Main Menu appears. 2. Reassign the active server class. 3. Regenerate the mapping requester. 4. Move the SCREEN COBOL code to the production subvolume. a.
Maintaining Pathmaker Applications Repackaging Services Into Servers Repackaging Services The Pathmaker product helps you repackage existing services into existing servers or Into Servers into new servers. In either case, the exact repackaging steps depend on whether you want to move the service from one server to another server or simply add the service to another server without removing it from the previous server.
Maintaining Pathmaker Applications Repackaging Services Into Servers 8. Move the SCREEN COBOL code to the production subvolume. If the application no longer resides in the testing environment, use SCUP to copy the SCREEN COBOL code for the mapping requester to the application’s SCREEN COBOL object library files (POBJCOD, POBJDIR, and POBJSYM). See “Reassigning the Active Server Class for a Service” earlier in this section for instructions on using SCUP to move the mapping requester. 9.
Maintaining Pathmaker Applications Repackaging Services Into Servers 10. Regenerate Pathway command files. a. Rename your PATHCNFG file and either rename or purge the other generated application installation files. b. Exit from the Pathmaker full screen interface and regenerate the Pathway command files for the application.
Maintaining Pathmaker Applications Adding Help Text Adding Help Text The Pathmaker product helps you make your application easy to use by allowing you to provide help text throughout the interface. You can enter help text for function keys, screens, and data fields: Function key help text is entered through the Display Text screen in the Pathmaker full screen interface. Help text for the entire requester is entered through the Requester Description screen in the Pathmaker full screen interface.
Maintaining Pathmaker Applications Adding, Modifying, or Deleting Requesters 6. Move the help text files to the production subvolume. If the application is no longer in a testing environment, use FUP to move the files to the production help subvolume. The help text files are: HELPPOS HELPREQ HELPTXT HELPALT0 The four help text files include an alternate key file, HELPALT0.
Maintaining Pathmaker Applications Adding, Modifying, or Deleting Requesters Adding TRNS or MENU requesters You can add TRNS and MENU requesters to an installed application, as well as to an application still in the testing environment. This procedure assumes that any services this requester invokes have already been defined. The following procedure is one way to add a transaction or menu requester: 1. Run the Pathmaker full screen interface. The Pathmaker Main Menu appears. 2. Define the new requester.
Maintaining Pathmaker Applications Adding, Modifying, or Deleting Requesters You must alter the Pathway configuration file, PATHSVRS, when you add a DB requester. Rename your PATHSVRS file and either rename or purge the other application generated installation files. Then exit from the Pathmaker full screen interface and regenerate PATHSVRS. See Step 10 under “Packaging Services into New Servers” earlier in this section for more detailed information about regenerating PATHSVRS.
Maintaining Pathmaker Applications Adding, Modifying, or Deleting Requesters If you have added any help text, such as for a newly defined function key, you must use FUP to move the help files to the production help subvolume. Adding Initial Requesters You can add initial requesters to an installed application, as well as to an application still in the testing environment.
Maintaining Pathmaker Applications Adding, Modifying, or Deleting Requesters Requester features are Initial Values, Check Data, and Initial Requester. These features are specified on the Requester Definition screen. All of a requester’s context can be changed. This context includes the requester’s parameter list, the CALL and SEND parameters, and the reference objects for this requester.
Maintaining Pathmaker Applications Adding, Modifying, or Deleting Services Adding, Modifying, or The Pathmaker product helps you add, modify, or delete services from an installed Deleting Services application. Tandem provides three standard Enform queries that report useful information about services: query PM8, query PM9, and query PM17. Query PM8 lists requesters that call services. Query PM9 lists services that are used by requesters.
Maintaining Pathmaker Applications Adding, Modifying, or Deleting Services If the application no longer resides in the testing environment, use SCUP to copy the SCREEN COBOL code to the application’s SCREEN COBOL object library files (POBJCOD, POBJDIR, and POBJSYM). See “Changing Screen Decorations or Screen Layout” earlier in this section for instructions on using SCUP to copy specific requesters.
Maintaining Pathmaker Applications Adding, Modifying, or Deleting Services 2. Run the Pathmaker full screen interface. The Pathmaker Main Menu appears. 3. Regenerate all servers that include this service and, if necessary, update the IPC definition. 4. Add new logical file assignments, if necessary. 5. Exit from the Pathmaker full screen interface. 6. Move the server object code to the production subvolume. 7. If necessary, update the application’s Pathway configuration.
Maintaining Pathmaker Applications Modifying the Database Modifying the Database Changes to the database are probably the most difficult changes that you could make to an installed application, because a DDL definition or NonStop SQL table could be used in many places in the application. You should avoid making last minute changes to the database by careful planning in the design phase.
Maintaining Pathmaker Applications Modifying the Database 5. Regenerate the requester. Confirm that the entries on the Requester Generation Data screen are current and that Compile is Y. Press shifted F6 from the Requester Definition screen to generate the requester. You must regenerate each requester that uses the changed definition. 6. Update custom service code.
Maintaining Pathmaker Applications Modifying the Database To load the data into the restructured file, you must use an Enform FIND query to correctly load the new file. The Enform FIND query creates an unstructured file that you must FUP LOAD into the new file. In Enform, you must assign a unique name to the new file, and the definitions of the old file as well as of the new file must be available for Enform. The Enform User’s Guide describes how to use FIND.
9 Advanced Pathmaker Programming Topics This section covers several advanced Pathmaker programming topics. It is divided into four major sections: “Modifying Requesters,” “Modifying a Server Skeleton or Service Skeleton,” “Modifying the SQL Generation Macro,” and “Modifying Requester/Server Pairs.
Advanced Pathmaker Programming Topics Modifying Requesters You can edit the Environment Division and Working-Storage Section stored in the T9154CPY file. There is one T9154CPY file associated with each Pathmaker project. Changes to T9154CPY affect every requester generated for one Pathmaker project. You can copy and make minor edits to the requester skeleton stored on the same subvolume as the object files for this version of the Pathmaker product.
Advanced Pathmaker Programming Topics Modifying Requesters Using a Requester Copy Library If you want to add your own SCREEN COBOL code to the generated code of a specific requester or group of requesters, use a requester copy library. A requester copy library has sections in which you can specify SCREEN COBOL compiler commands, specify and initialize Working-Storage data items, and make security checks.
Advanced Pathmaker Programming Topics Modifying Requesters Caution Tandem reserves the right to change all other variables in the requester skeleton. If you refer to one of these variables in your own routines or execute sections of generated requester code, you might be required to modify the code you have written to accommodate the changes Tandem makes to the requester skeleton in future releases of the Pathmaker product. Each requester can use only one requester copy library.
Advanced Pathmaker Programming Topics Modifying Requesters Sections in a Requester Copy Library Table 9-2 lists each of the sections in a requester copy library and briefly describes how each section is used. Table 9-2.
Advanced Pathmaker Programming Topics Modifying Requesters Table 9-2. Requester Copy Library Sections (Page 2 of 3) Section Name ?SECTION USER-POST-INIT , TANDEM ?SECTION USER-PRE-PREV-PAGE ?SECTION USER-POST-PREV-PAGE ?SECTION USER-PRE-NEXT-PAGE ?SECTION USER-POST-NEXT-PAGE ?SECTION USER-PRE-F1 , TANDEM , TANDEM , TANDEM , TANDEM , TANDEM ?SECTION USER-POST-F1 , TANDEM . . . 9–6 Description 067868 Tandem Computers Incorporated Executed immediately after an initial action in a requester.
Advanced Pathmaker Programming Topics Modifying Requesters Table 9-2. Requester Copy Library Sections (Page 3 of 3) Section Name ?SECTION USER-PRE-SF16 ?SECTION USER-POST-SF16 ?SECTION USER-PRE-PA1 ?SECTION USER-POST-PA1 . . . ?SECTION USER-PRE-PF24 ?SECTION USER-POST-PF24 067868 Tandem Computers Incorporated Description , TANDEM , TANDEM , TANDEM , TANDEM The remaining sections are executed either immediately before or immediately after the specified function keys.
Advanced Pathmaker Programming Topics Modifying Requesters Using Pathmaker Variables and Paragraphs A subset of Pathmaker variables will not change from release to release; these variables can safely be used in the requester copy library to modify the requester that the Pathmaker product generates. The subset of Pathmaker variables that can be used to modify your requester are summarized in Table 9-3. More information about using these variables and paragraphs is presented later in this subsection.
Advanced Pathmaker Programming Topics Modifying Requesters The generated requester checks T9154-USER-ERROR-SW after every USER-PREfunction-key action to determine whether the action (CALL or SEND) should be completed. You can set T9154-USER-ERROR-SW in your ?SECTION USER-PREfunction-key code. The DDL code for these two switches is: 01 T9154-EXIT-PROGRAM-SW 88 T9154-EXIT-PROGRAM PIC X VALUE "N". VALUE "Y". 01 T9154-USER-ERROR-SW 88 T9154-USER-ERROR PIC X VALUE "N". VALUE "Y". Requester Linkage.
Advanced Pathmaker Programming Topics Modifying Requesters Here are guidelines for using the requester linkage: You can set variables in the request and reply header in either the requester copy library or the Custom Source File (for a service), as needed. T9154-PROJECT-NAME must contain the correct project name so that the generated application can locate the help database. T9154-PROJECT-NAME is automatically filled in by the initial requester, and you should not make changes to it in your program.
Advanced Pathmaker Programming Topics Modifying Requesters Note The structure of the request and reply headers for clients created with POET is different than the structure of request and reply headers for requesters generated using the Pathmaker product. A nonzero value in the T9154-REQUEST-CODE field indicates a SCREEN COBOL requester header; a zero value indicates a POET header. Refer to the POET Programming Manual for details about POET headers. T9154-PATHMON-NAME and T9154-SYSTEM-NAME.
Advanced Pathmaker Programming Topics Modifying Requesters Example of a Requester Copy Library Figure 9-1 is an example of one way you can modify your requester. This sample copy library fragment is for an application that processes accounts. For this application: Function key F4 invokes a service that reads an account record. Function key F5 invokes a service that updates an account record. UPDATE-COUNT is a display-only field that shows the number of updates executed in the current session. Figure 9-1.
Advanced Pathmaker Programming Topics Modifying Requesters Sending to Servers Over a Network Another example of using a requester copy library is to send a request over a network to a server on another node. You might want to send a request to a server on another node because the database file that the server accesses is located on that (remote) node. In the following discussion: Node refers to a system in a network of systems.
Advanced Pathmaker Programming Topics Modifying Requesters Files Used to Create a SEND to a Remote Node As mentioned in the previous paragraphs, you must create a requester copy library file on the home system and create or modify Pathway configuration files on the remote system if you want to send a request to a server on a remote node. These tasks must be done to invoke a server on a remote node correctly.
Advanced Pathmaker Programming Topics Modifying Requesters Example of Creating a SEND to a Remote Node Assume that you have created, installed, and tested a Pathmaker application that accesses an SQL database on the node \HOME. You want to put a server and the table that it accesses on the node \AWAY. Suppose you have already created a remote Pathway system on the node \AWAY. The PATHMON name for that Pathway system is $FAR. The server on \AWAY will be invoked when the end user presses F9.
Advanced Pathmaker Programming Topics Modifying Requesters 4.
Advanced Pathmaker Programming Topics Modifying Requesters Coding USER Actions Specifying a USER action on the Function Key Assignments screen tells the Pathmaker product not to execute any of the usual function key actions (such as SEND, CALL, or RETURN). You use a USER action when you want the application to execute only the SCREEN COBOL code that you supply in a requester copy library for a particular function key.
Advanced Pathmaker Programming Topics Modifying Requesters The end user can either fill in the data field next to F4 manually or press function key F5 to display acceptable values for the field. In this case, the list of acceptable values is small: either NAME, JCODE, or DEPT. For details on how to create a screen that displays lists, see “Creating Screens That Display Lists” later in this section.
Advanced Pathmaker Programming Topics Modifying Requesters The Display Detail screen specifies a screen field name (FIELD-1-FN) for the data entry field: D I S P L A Y D E T A I L ============================================================================== Requester Name: CYCLE-FIELD Reference Object: FIELD Field: FIELD Bright: Y Protected: N Reversed: N Tab If Full: Y Default (Y/N) Y Heading: Y Screen Picture: User Conversion: Screen Field Name: UnderLined: Y (Y/N) Blinking: N Hidden: N FIELD_____
Advanced Pathmaker Programming Topics Modifying Requesters The requester copy library: Creates and initializes an array to store the acceptable values for the field. Displays the first value in the array when the screen is first displayed. Displays the next acceptable value every time the end user presses function key F5. Notice that the code in the requester copy library displays only the field, not the entire screen, if the base screen has already been displayed.
Advanced Pathmaker Programming Topics Modifying Requesters The requester copy library has the following code: ?SECTION USER-COMPILER-CMDS , TANDEM ?SYMBOLS ?SECTION USER-WS , TANDEM * * Create an array to hold the list of acceptable values. * 01 FIELD-LIST-ARRAY. 02 LIST-INDEX PIC 9. 02 FIELD-LIST PIC X(6) OCCURS 3 TIMES. * ?SECTION USER-INIT-DATA , TANDEM * * Initialize the array. Display the first value (NAME) on * the application screen.
Advanced Pathmaker Programming Topics Modifying Requesters Creating User Conversion Routines A user conversion procedure is a Tandem Application Language (TAL) procedure for processing data passed between a requester (SCREEN COBOL program) and a terminal screen. A user conversion procedure lets you make your own validation checks or conversions of data.
Advanced Pathmaker Programming Topics Modifying Requesters Most programmers use a CASE statement in their user conversion procedure to select the code they want performed. The following is a pseudocode fragment that shows the overall structure of a TAL user conversion procedure for converting alphanumeric input: PROC USER^ALPHA^INPUT^CONVERSION (USERCODE, ERROR, INPUT, INPUT^LEN, INTERNAL, INTERNAL^LEN); INT INT STRING INT FIXED INT USERCODE; .ERROR; .INPUT; INPUT^LEN; .
Advanced Pathmaker Programming Topics Modifying Requesters Editing T9154CPY T9154CPY is a file that is created on the project subvolume when you first add your Pathmaker project. T9154CPY contains sections that are copied into the Environment and Working-Storage divisions of the requester. Changes to this file should be made by the project administrator, because values set here apply to all requesters within the project.
Advanced Pathmaker Programming Topics Modifying Requesters For example, for Tandem 6520 and 6530 terminals, the advisory line appears in reverse video when displaying an error. You might decide you prefer a blinking display for this line. To make this change, edit T9154CPY as shown in the following example: ?SECTION SPECIAL-NAMES-T16-6520, TANDEM . . . T9154-ADVICE-ATTN IS (NORMAL, REVERSE) <--- Default display: . normal brightness . in reverse video.
Advanced Pathmaker Programming Topics Modifying Requesters To change the display for error messages to blinking: ?SECTION SPECIAL-NAMES-T16-6520, TANDEM . . . T9154-ATTN IS (REVERSE, BLINK) <--- New display: . reverse video, . blinking. .
Advanced Pathmaker Programming Topics Modifying Requesters T9154-MAX-TIMEOUTS. You can change T9154-MAX-TIMEOUTS to increase the number of timeouts an application will permit. When the application exceeds the T9154-MAXTIMEOUTS limit, the application stops processing. The default value for T9154-MAX-TIMEOUTS is 0001 (one timeout). TMF RESTART Limit You can change T9154-MAX-TMF-RESTART to increase the number of times your application restarts a TMF transaction.
Advanced Pathmaker Programming Topics Modifying Requesters Messages in MESSAGE-FORMATS and UNDEFINED-MESSAGES The messages in the MESSAGE-FORMATS and UNDEFINED-MESSAGES sections are displayed on the ADVISORY line when appropriate. These messages can be rewritten or translated into other languages. Some of these messages are incomplete in the file and are filled in programmatically, usually with numeric values.
Advanced Pathmaker Programming Topics Modifying Requesters Messages for DB Requesters The messages for DB requesters are displayed on the ADVISORY line when appropriate. These messages can be rewritten or translated into other languages. Some of these messages are incomplete in the file and are filled in programmatically, usually with numeric values.
Advanced Pathmaker Programming Topics Modifying Requesters Modifying the Requester Skeleton The requester skeleton consists of two files: REQSKL A file that contains the requester skeleton; the requester skeleton serves as the framework for generated requesters. REQDBSKL A file that contains sections of requester skeleton code that only pertain to DB requesters; sections from REQDBSKL are copied into REQSKL when you generate a DB requester.
Advanced Pathmaker Programming Topics Modifying Requesters The following example illustrates a safe edit that you can make to the requester skeleton. In the Pathmaker product, you cause the current date to be displayed on the application screen by using the Screen Painter to add the @DATE pseudofield to the requester. You can reorder the way in which the date is displayed by editing the screen format for date in the requester skeleton’s Working-Storage Section: . . . 01 T9154-SCREEN-TIME-FORMAT.
Advanced Pathmaker Programming Topics Modifying a Server Skeleton or Service Skeleton Modifying a Server The Pathmaker server skeletons act as frameworks for generated servers. SERVSKL is Skeleton or Service the Pathmaker skeleton used to generate COBOL85 servers. This server skeleton file Skeleton consists of COBOL85 source text lines plus Pathmaker macro language command lines. CSERVSKL is the Pathmaker skeleton used to generate C servers.
Advanced Pathmaker Programming Topics Modifying a Server Skeleton or Service Skeleton Note If you do decide to modify a skeleton, maintenance will be much easier if you surround any changes with comments that are easy to find with the editor. For example, you could use: ! BEGIN CHANGE your-initials ! END CHANGE your-initials Adding SPECIAL-NAMES Entries for COBOL Servers You can insert your own SPECIAL-NAMES entries into the SPECIAL-NAMES paragraph of the COBOL85 server skeleton.
Advanced Pathmaker Programming Topics Modifying a Server Skeleton or Service Skeleton Rewriting Existing Enscribe Error Messages for COBOL Servers You can change the text of the error messages that are in the Working-Storage Section of the COBOL85 server skeleton if you follow these rules: Do not change the first two digits of the message. The first two digits contain the error number associated with the message. Do not change the group names T9154-FS-ERRORS or FILLER.
Advanced Pathmaker Programming Topics Modifying a Server Skeleton or Service Skeleton Reformatting Existing Enscribe Messages for COBOL Servers You can reformat any of the existing Enscribe messages as long as you do not change the size of the fields or any of the field names. The following example lists the portion of the Working-Storage Section that you would change to reformat a message: WORKING-STORAGE SECTION. . . . 02 T9154-FILE-ERROR-MSG.
Advanced Pathmaker Programming Topics Modifying a Server Skeleton or Service Skeleton Rewriting Existing Error Messages for C Servers in PMSVCULC You can change the text of the error messages used for C servers in the common service utility library file, PMSVCULC, if you do not change the file error codes of the error message.
Advanced Pathmaker Programming Topics Modifying a Server Skeleton or Service Skeleton Reformatting Existing Error Messages for C Servers in PMSVCULC You can reformat any of the existing error messages used for C servers in the common service utility library file, PMSVCULC, if you do not change the size of the fields or any of the field names. The following example lists the portion of the lfe_advisory function in the PMSVCULC file that you can change to reformat a message: . . .
Advanced Pathmaker Programming Topics Modifying a Server Skeleton or Service Skeleton Changing the Maximum Number of Requesting Processes In Pathmaker applications, the system file named $RECEIVE is the communication mechanism between a requester process and a server process. Both the COBOL server skeleton and the C server include code to define two tables used by $RECEIVE to list the requesting processes and the replies sent to the requesting processes.
Advanced Pathmaker Programming Topics Modifying a Server Skeleton or Service Skeleton If you do have an application that uses TMF protection for its services and you need to increase the value of MAXLINKS above the default (50), you can alter the OCCURS value for the Receive-Control table in the server skeleton. Note Tandem does not recommend that you alter the OCCURS value of the Receive-Control table for applications that do not use TMF.
Advanced Pathmaker Programming Topics Modifying a Server Skeleton or Service Skeleton Inserting Global COBOL Service Procedures You can insert your own global procedures into the Procedure Division of the COBOL85 server skeleton. The global procedures that you insert can later be called by any service in this server. Note You could use a registered macro to store the global procedures you want to add to the server skeleton.
Advanced Pathmaker Programming Topics Modifying a Server Skeleton or Service Skeleton For example, you could add a global procedure to convert dates. Assume you have stored the code for this global procedure in a file called $DATA.SALES.COPYLIB. Assume that the section name for this procedure is ?SECTION CONVERT-DATE. To add this global procedure to the server skeleton, add a copy statement at the appropriate spot in the server skeleton, as shown in the following example: T9154-WRT-$#Service-Short-Name$.
Advanced Pathmaker Programming Topics Modifying a Server Skeleton or Service Skeleton 03 FILLER 03 T9154-SQL-SUBSYSTEM-ID 03 FILLER 03 T9154-SQL-SUBSYSTEM-CODE 03 FILLER 03 T9154-SQL-PARAMS-BUFFER 03 FILLER 03 T9154-SQL-USER-LINE-NUMBER PIC X VALUE IS ",". PIC X VALUE IS SPACES. PIC X VALUE IS "-". PIC ZZZZZ9 VALUE IS ZEROS. PIC X(04) VALUE IS ",on:". PIC X(34) VALUE IS SPACES. PIC X(05) VALUE IS ",ln#:". PIC Z(6).ZZZ VALUE IS ZEROS.
Advanced Pathmaker Programming Topics Modifying a Server Skeleton or Service Skeleton Adding to the List of Level 88 Condition Clauses Status information in NonStop SQL is placed in a special data area called the SQL communication area (SQLCA). Application developers can use SQLCA to receive status information in host language programs after SQL statement execution. SQLCA includes an array that contains error codes for each subsystem.
Advanced Pathmaker Programming Topics Modifying a Server Skeleton or Service Skeleton * 88 T9154-SQL-UNABLE-TO-RECOMPILE VALUE IS -8026. The program needed to be SQL compiled but the NORECOMPILE option was set. * * * 88 T9154-SQL-OPEN-FAILED VALUE IS -8200. Failure in OPEN of a table or a protection view . The view might not exist, or there might have been a security violation. * * * 88 T9154-SQL-RECOMPILE-ATTEMPTED VALUE IS 8202. Label timestamp mismatch on file .
Advanced Pathmaker Programming Topics Modifying a Server Skeleton or Service Skeleton * 88 T9154-SQL-NODE-DOWN VALUE IS -8310. A node was not available to fetch required data. * 88 T9154-SQL-DISC-DOWN VALUE IS -8311. A disc was not available to fetch required data. * * 88 T9154-SQL-ARITHMETIC-OVERFLOW VALUE IS -8402. Overflow occurred during arithmetic computation or during INSERT or UPDATE of a numeric column. 88 T9154-SQL-INVALID-DATA * * * * VALUES ARE -8405 -8410.
Advanced Pathmaker Programming Topics Modifying a Server Skeleton or Service Skeleton Changing the Logic of the SQL Error Handling The following excerpts lists the portion of the COBOL server skeleton code that contains the logic for SQL error handling. Again, the code shown here is reformatted for reproduction in this manual. You can disable this portion of the COBOL server skeleton or rewrite the SQL-COBOL code to handle default error handling differently.
Advanced Pathmaker Programming Topics Modifying a Server Skeleton or Service Skeleton The COBOL server skeleton also contains code to set up the default error message: % if #Service-Uses-SQL = "Y" use lines until tag label-37 . . . T9154-EVALUATE-SQLCODE.
Advanced Pathmaker Programming Topics Modifying a Server Skeleton or Service Skeleton Changing the Text of the Error Messages The following excerpt lists the portion of the sql_advisory function that contains the messages used to report SQL errors. You can change the text of the error messages, but you should not change the associated error codes: void sql_advisory ( void ) . . .
Advanced Pathmaker Programming Topics Modifying a Server Skeleton or Service Skeleton 8425, 8425, 8426, 8426, SHRT_MIN, SHRT_MAX, "invalid date value was entered or computed", "incorrect syntax for date-time /interval value", "unrecoverable i/o error" }; You can also add defines for additional SQL run-time system error codes to the beginning of the PMSVCULC file.
Advanced Pathmaker Programming Topics Modifying a Server Skeleton or Service Skeleton Changing the Format of the Error Messages You can reformat any of the existing error messages used for processing SQL errors in C services if you do not change the size of the fields or any of the field names. The following excerpt lists the portion of the sql_advisory function that sets the format of the default message, slightly reformatted for reproduction in this manual.
Advanced Pathmaker Programming Topics Modifying a Server Skeleton or Service Skeleton Changing the Logic of Error Handling The following excerpt lists the portion of the sql_advisory function that contains the logic for SQL error handling. Again, the code shown here is reformatted for reproduction in this manual. You can disable this portion of the sql_advisory function or rewrite the code to handle default error handling differently.
Advanced Pathmaker Programming Topics Modifying the SQL Generation Macro Modifying the SQL Generation Macro The Pathmaker product provides an SQL Generation Macro that acts as a framework for generated NonStop SQL data manipulation statements for COBOL85 services. This macro consists of NonStop SQL source text lines for COBOL85 plus Pathmaker macro language command lines.
Advanced Pathmaker Programming Topics Modifying the SQL Generation Macro Changes you can make to the SQL generation macro include: Modifying the syntax of generated SQL statements. For example, you can change the INSERT statement for a relative file to use the APPEND option instead of the ANYWHERE option as follows: SQL-INSERT. . . . % if #Access-Method = "Relative" use 1 lines ANYWHERE <- Change to APPEND END-EXEC.
Advanced Pathmaker Programming Topics Modifying Requester/Server Pairs Modifying Some modifications require adding code both to a requester copy library and to the Requester/Server Pairs service Custom Source File. This subsection discusses some of the most common reasons that you might want to modify a requester/server pair.
Advanced Pathmaker Programming Topics Modifying Requester/Server Pairs @LOGICAL-TERMINAL Contains the logical terminal name. You can add @LOGICAL-TERMINAL to the application screen by using the Screen Painter. @PAGE-COUNT Contains the number of pages in the current requester’s screen. @PAGE-COUNT is always part of the screen when you create an application screen, but you can delete it and add it back later. @PHYSICAL-TERMINAL Contains the physical terminal name.
Advanced Pathmaker Programming Topics Modifying Requester/Server Pairs The following paragraphs show the DDL pictures of each of the pseudofields. The Pathmaker product places the picture clause for @ADVISORY in the IPC message header. The picture clause for @ADVISORY is: 04 T9154-ADVISORY-MSG-TEXT PIC X(76). The Pathmaker product places the picture clauses for the remaining pseudofields in the Working Storage of the requester source code.
Advanced Pathmaker Programming Topics Modifying Requester/Server Pairs The following structures are only generated in the requester source code if you display the corresponding pseudofield on the application screen or send the pseudofield to a service: LOGICAL-TERMINAL-NAME TERMINAL-FILENAME T9154-DATE T9154-TIME The generated requester initializes T9154-CURSOR-POSITION and T9154CURSOR-FIELD when it executes the 0900-BUILD-CURSOR-POSITION paragraph.
Advanced Pathmaker Programming Topics Modifying Requester/Server Pairs You use @CURSOR-FIELD when you want to send the SCREEN COBOL screen field name of the current cursor position to the service. You use @CURSOR-POSITION when you want to send the Working-Storage name of the current cursor position to the service. You could use @CURSOR-FIELD (or @CURSOR-POSITION) with a point field to detect the cursor position by a list of protected fields.
Advanced Pathmaker Programming Topics Modifying Requester/Server Pairs If you need to know the cursor position before sending a request to the service, or if you have used an OCCURS clause to list multiple instances of a single data item, you can use the Pathmaker paragraph 0900-BUILD-CURSOR-POSITION. You can also use @CURSOR-POSITION with a point field to detect the cursor position by a list of protected fields. @LOGICAL-TERMINAL. The @LOGICAL-TERMINAL pseudofield contains the logical terminal name.
Advanced Pathmaker Programming Topics Modifying Requester/Server Pairs The Custom Source File should contain code that moves a value to T9154-REASONCODE, depending on the error: ?SECTION T9PR-UPDATE-TABLE . . . if customer ID is invalid MOVE 1 TO T9154-REASON-CODE OF T9154-REPLY. if order ID is invalid MOVE 2 TO T9154-REASON-CODE OF T9154-REPLY. if any other problem MOVE 3 TO T9154-REASON-CODE OF T9154-REPLY. . . .
Advanced Pathmaker Programming Topics Modifying Requester/Server Pairs “Creating a NonStop SQL Pathmaker Application” in Section 10 is another example of creating a screen that displays lists. This example includes step-by-step instructions that explain how to create the screen and its corresponding services. In the Section 10 example, you create a values list screen to display the values stored in a NonStop SQL table, ORDERS. The Orders List screen displays a subset of the columns in the ORDERS table.
Advanced Pathmaker Programming Topics Modifying Requester/Server Pairs Coding a Select-and-Return Function Some applications need to allow the end user to select a value from a list of values and return the value to the previous screen. The Pathmaker values list screens, such as the Requester Values List screen, provide this type of function.
Advanced Pathmaker Programming Topics Modifying Requester/Server Pairs To add a select-and-return function to this sample application, you should modify SQL-ORDERS-LIST to: 1. Add a return action (RETN) to function key F10. 2. Add the requester copy library. The SCREEN COBOL code for F10 in the requester copy library for SQL-ORDERS-LIST should: a. Find the current cursor position. Because you are not sending a request to a service, you must use 0900-BUILD-CURSOR-POSITION to find the cursor position.
10 Sample Pathmaker Sessions This section contains three sample sessions of application development using the Pathmaker product. The first session creates an application that uses the Pathmaker database (DB) requester facility. To create a simple application using only DB requesters, you need only to define the DDL, create the requesters, configure the Pathway environment, and install the application. The second session creates a custom application that uses a transaction (TRNS) requester.
Sample Pathmaker Sessions Creating a Simple Application Figure 10-1. Screens for a Simple Pathmaker Application MENU-SCREEN DEPT-SCREEN EMPLOYEE-SCREEN Single file access to DEPT Multiple File Access to EMPLOYEE and DEPT using Link Field of DEPT-NUM 101 To create this application the following aids are provided: A list of steps that you need to take to create your application. These steps are shown on the following pages.
Sample Pathmaker Sessions Creating a Simple Application To copy the DDL source file from the Pathmaker release subvolume, enter the following commands at the TACL prompt (replace XX with your initials): 21> VOLUME XXs1pm 22> FUP DUP $release-vol.release-subvol.DDLFILE, * XXs1pm is the work subvolume for this sample session. $release-vol.release-subvol is the volume and subvolume on which the Pathmaker object files are installed.
Sample Pathmaker Sessions Creating a Simple Application g. Review list of DEPT fields to be displayed on default screen (optional). h. View function key assignments. i. Specify function key prompts to be displayed on screen. j. View default screen using Screen Painter (optional). k. Generate requester code. 4. Define MENU-SCREEN DB requester: a. Enter basic requester information. b. Write requester help text. c. Assign function keys. d. Specify function key prompts to be displayed on screen.
Sample Pathmaker Sessions Creating a Simple Application Figure 10-2.
Sample Pathmaker Sessions Creating a Simple Application d. View function key assignments. The function key assignments that you see on this screen are the default function key assignments for DB requesters. Position the cursor on SEND T9154-READ-FIRST and press F11 to reach the Display Text screen. e. Specify function key prompt text to be displayed on the screen and help text for each function key. (Default text is provided in the Prompt Text field for each function key for a DB requester.) f.
Sample Pathmaker Sessions Creating a Simple Application When you are finished using the Screen Painter, press F16 to return to the Requester Definition screen. From the Requester Definition screen, press shifted F6 to begin generating this requester. Figure 10-3.
Sample Pathmaker Sessions Creating a Simple Application Figure 10-4.
Sample Pathmaker Sessions Creating a Simple Application d. On the Record Instance Detail screen, review the information on how EMPLOYEE will be displayed. All Standard Database Services are set to Y except Nonindex Reads. Autofill equal to Y means that any Value statements associated with the EMPLOYEE record in the DDL will be automatically displayed on the Employee Information screen. The remaining fields equal to Y indicate that the end user can delete, insert, read, or update EMPLOYEE records.
Sample Pathmaker Sessions Creating a Simple Application Figure 10-5.
Sample Pathmaker Sessions Creating a Simple Application h. View function key assignments. The function key assignments that you see on this screen are the default function key assignments for DB requesters. Position the cursor on SEND T9154-READ-FIRST and press F11 to reach the Display Text screen. i. Using the Display Text screen, specify function key prompts to be displayed on the Employee Information screen.
Sample Pathmaker Sessions Creating a Simple Application Figure 10-6.
Sample Pathmaker Sessions Creating a Simple Application Figure 10-7.
Sample Pathmaker Sessions Creating a Simple Application Figure 10-8.
Sample Pathmaker Sessions Creating a Simple Application Figure 10-9. Application Screen Viewed Through Screen Painter P E R S O N N E L I N F O R M A T I O N M E N U ============================================================================== F3 F5 F7 SF16 - Help Department Screen Employee Screen Quit Program ============================================================================== PAINTER F3-Undo F4-Field F7-Video F8-Move/Delete SF8-Retrieve Edit BLOCK e.
Sample Pathmaker Sessions Creating a Simple Application 5. Enter the application installation information: a. From the Application Configuration menu, press F3 to reach the Application Installation screen. b. Enter configuration information, including appropriate disk volume, printer, and a PATHMON name for the application Pathway system.
Sample Pathmaker Sessions Creating a Simple Application 9. Use PATHCOM to run the application: 29> PATHCOM $pathmon-process; RUN MENU-SCREEN $pathmon-process is the PATHMON Process you named in Step 5. You can enter department records using the Department screen and employee records using the Employee screen.
Sample Pathmaker Sessions Creating a Custom Application Creating a Custom The second sample session creates an application that manipulates order entry Application information. The application uses two files: a parts information file, PARTS, and an order information file, ORDERS. The user interface consists of three screens: A menu screen, MAIN-MENU A parts information screen, ENTER-PARTS An order information screen, ORDER-TAKER Figure 10-10 is a diagram of the three screens used in this application.
Sample Pathmaker Sessions Creating a Custom Application The menu screen, MAIN-MENU, is a menu requester that provides access to the parts information screen and the order information screen. The parts information screen is a DB requester named ENTER-PARTS, which uses standard services to enter parts records into the parts information file. You can also use this screen to update or delete parts records.
Sample Pathmaker Sessions Creating a Custom Application To copy the source files from the Pathmaker release subvolume, enter the following commands at the TACL prompt (replace XX with your initials): VOLUME XXs2pm FUP DUP $release-vol.release-subvol.DDLSRC, * FUP DUP $release-vol.release-subvol.SERVCOD1, * FUP DUP $release-vol.release-subvol.SERVCOD2, * FUP DUP $release-vol.release-subvol.EXMPLCPY, * 21> 22> 23> 24> 25> XXs2pm is the work subvolume for this sample session. $release-vol.
Sample Pathmaker Sessions Creating a Custom Application c. Assign function keys. d. Specify function key prompts to be displayed on screen. e. Enter all reference objects in the requester context. f. Review list of fields to be displayed on the default screen. g. Enhance appearance of the screen using the Screen Painter. h. Specify SEND parameters. i. 6. Generate requester. Define ENTER-PARTS requester: a. Enter basic requester information. b. Write requester help text. c.
Sample Pathmaker Sessions Creating a Custom Application Application Creation Steps The following pages describe the Pathmaker screens you must complete and the steps outside of the Pathmaker environment that you must take to create, install, and run the application: 1. Load the DDL dictionary for this project. From the Pathmaker Main Menu for session 2, press F1 to invoke DDL.
Sample Pathmaker Sessions Creating a Custom Application 3. Define PLACE-ORDER service. a. Enter basic service information. On the first page of the Service Definition screen, enter the service name (PLACE-ORDER), Service Type (Custom), Language (COBOL), and a service description. Enter Y if you want the service to be audited by TMF. Enter N in the Embedded SQL field. Enter the name of the Custom Source File, XXs2pm.SERVCOD2 (replace XX with your initials). Press F1 to add the service.
Sample Pathmaker Sessions Creating a Custom Application b. Package the services into the server. On the Service Assignment screen, enter the service names CHECK-ORDER and PLACE-ORDER in the Service Names column. Press F2 to update the screen. Press F16 to return to the Server Definition screen. c. Generate the server. From the Server Definition screen, press shifted F6 to begin generating the server. Press shifted F16 to return to the Pathmaker Main Menu.
Sample Pathmaker Sessions Creating a Custom Application Enter the text that you want displayed as the F4 function key’s prompt (Place order) on the application screen. Change Displayed to Y, enter the help text (for example, “Place an order. You must check the order (F2) before you can place it.”). Press F2 to update the Display Text screen. Press F5 (twice) to display function key F16. Enter the text that you want displayed as the F16 function key’s prompt (Return) on the application screen.
Sample Pathmaker Sessions Creating a Custom Application Figure 10-11.
Sample Pathmaker Sessions Creating a Custom Application Figure 10-12.
Sample Pathmaker Sessions Creating a Custom Application Figure 10-13.
Sample Pathmaker Sessions Creating a Custom Application 6. Define ENTER-PARTS requester. a. Enter basic requester information. Press the clear key to clear any previously entered information. Press shifted F15 to show the default values for the Requester Definition screen. Enter the requester name (ENTER-PARTS) and the title (P A R T S I N F O R M A T I O N). Change Requester Type to DB. Change Initial Values and Check Data to Y. Enter PART-REC in the Single Reference Object field.
Sample Pathmaker Sessions Creating a Custom Application When you have finished updating the Display Text screen for each of these function keys, press F16 (twice) to return to the Requester Definition screen. Position the cursor on PART-REC in the Single Reference Object field and press shifted F11 to reach the Display Field List screen. f. Update the list of fields to be displayed on the default screen. Position the cursor on PART-TIMESTAMP-DATE and press shifted F2 to delete it from the display list.
Sample Pathmaker Sessions Creating a Custom Application c. Assign function keys. Enter CALL ORDER-TAKER on the line associated with function key F5 and CALL ENTER-PARTS on the line associated with function key F6. Press F2 to update the screen. Position the cursor on CALL ORDER-TAKER and press F11 to reach the Display Text screen. d. On the Display Text screen, specify the function key prompts to be displayed on the application screen.
Sample Pathmaker Sessions Creating a Custom Application 8. Simulate screen navigation (optional). a. On the Pathmaker Main Menu, enter the name of the application Main Menu requester (MAIN-MENU) in the Simulation field and press F8 to simulate the user interface. b. When you are finished simulating the interface, press F16, shifted F16, or ROLL DOWN to return to the Pathmaker Main Menu. 9. Assign the server to a server class. a.
Sample Pathmaker Sessions Creating a Custom Application c. Press shifted F16 to return to the Pathmaker Main Menu. Check to make sure that the generation and compilation of the server and the generation and compilation of all requesters, including the mapping requester, were successful. Press shifted F16 to exit from the Pathmaker full screen interface. 12. Use PMPROJECT INSTALL to install the application. In this sample session, the project name is XX-SESSION-2, where XX is your initials.
Sample Pathmaker Sessions Creating a NonStop SQL Pathmaker Application Creating a The third sample session creates an application that manipulates order entry NonStop SQL information contained in a NonStop SQL database. This application uses two tables: a Pathmaker Application parts information table, PARTS, and an order information table, ORDERS.
Sample Pathmaker Sessions Creating a NonStop SQL Pathmaker Application The menu screen, SQL-MAIN-MENU, is a MENU requester that provides access to the parts information screen and the order information screen. The parts information screen, SQL-ENTER-PARTS, is a DB requester that uses standard services to enter parts rows into the parts information table. You can also use this screen to update or delete parts rows.
Sample Pathmaker Sessions Creating a NonStop SQL Pathmaker Application $release-vol.release-subvol is the volume and subvolume on which the Pathmaker object files are installed. (You might want to print out these files so you can refer to them while you are creating the application.) To add the project, enter the following command at the TACL prompt (replace XX with your initials): 24> PMPROJECT ADD XX-SESSION-3 XX-SESSION-3 is your Pathmaker project name.
Sample Pathmaker Sessions Creating a NonStop SQL Pathmaker Application b. Define IPC messages. c. 8. Specify the host variable name. Define PROCESS-ORDER server. a. Enter basic server information. b. Package services into server. c. 9. Generate server. Define SQL-ORDERS-LIST requester. a. Enter basic requester information. b. Write requester help text. c. Assign function keys. d. Specify function key prompts to be displayed on default screen. e.
Sample Pathmaker Sessions Creating a NonStop SQL Pathmaker Application 12. Define SQL-MAIN-MENU requester. a. Enter basic requester information. b. Write requester help text. c. Assign function keys. d. Specify function key prompts to be displayed on screen. e. View default screen using the Screen Painter. f. Generate requester. 13. Simulate screen navigation (optional). 14. Assign a server class to the server to. 15. Generate mapping requester. 16. Enter application installation information. 17.
Sample Pathmaker Sessions Creating a NonStop SQL Pathmaker Application 3. Load the project’s DDL dictionary with information for the values list screen: From the Pathmaker Utility Menu, press F5 to access DDL, then enter the following commands (replacing XX with your initials): !?SOURCE XXs3pm.ipcddl !EXIT XXs3pm is the subvolume where you copied IPCDDL. From the Utility Menu, press F16 to return to the Pathmaker Main Menu. 4.
Sample Pathmaker Sessions Creating a NonStop SQL Pathmaker Application c. Specify the host variable names. Enter ORDERS-HOST and PARTS-HOST in the Logical File Name column, enter ORDERS and PARTS in the DDL Record/Table Object Name column, and leave the Open Mode column blank. Press F2 to update the screen. Press F16 to return to the Service Definition screen. 6. Define SQL-ORDERS-LIST-FIRST service: a. Enter the basic service information.
Sample Pathmaker Sessions Creating a NonStop SQL Pathmaker Application b. Define the IPC messages. Enter the name ORDER-LIST-CONTEXT in the Request Reference Object column. Enter the name ORDER-LIST-CONTEXT in the Reply Reference Object column. Press F2 to update the screen. Press F16 to return to the Service Definition screen. From the Service Definition screen, press F7 to reach the Logical File Entries screen. c. Specify the host variable name.
Sample Pathmaker Sessions Creating a NonStop SQL Pathmaker Application 9. Define SQL-ORDERS-LIST requester. a. Enter the basic requester information. Press the clear key to clear any previously entered information. Press shifted F15 to show the default values for the Requester Definition screen. Enter the requester name (SQL-ORDERS-LIST) and the title (O R D E R S L I S T S C R E E N). Requester Type is TRNS. Change Screen Format to TAB. Enter ORDER-LIST-CONTEXT in the Single Reference Object field.
Sample Pathmaker Sessions Creating a NonStop SQL Pathmaker Application Figure 10-15. Display Field List Screen D I S P L A Y F I E L D L I S T ============================================================================== Requester Name: SQL-ORDERS-LIST Reference Object: ORDER-LIST-CONTEXT As Copy of: Elementary Field Name REFERENCE-NUMBER.REFERENCE-DATE______________________________ REFERENCE-NUMBER.
Sample Pathmaker Sessions Creating a NonStop SQL Pathmaker Application Figure 10-16.
Sample Pathmaker Sessions Creating a NonStop SQL Pathmaker Application Figure 10-17.
Sample Pathmaker Sessions Creating a NonStop SQL Pathmaker Application Figure 10-18.
Sample Pathmaker Sessions Creating a NonStop SQL Pathmaker Application 10. Define SQL-ORDER-TAKER requester. a. Enter the basic requester information. Press the clear key to clear any previously entered information. Press shifted F15 to show the default values for the Requester Definition screen. Enter the requester name (SQL-ORDER-TAKER ) and the title (O R D E R I N G I N F O R M A T I O N). Requester Type is TRNS. Change Screen Format to COM.
Sample Pathmaker Sessions Creating a NonStop SQL Pathmaker Application e. Enter all reference objects in the requester context. On the Requester Context screen, enter the following SQL table object names in the Reference Object column: PARTS, ORDERS. Press F2 to update the screen. Position the cursor on PARTS and press shifted F11 to reach the Display Field List screen. f. Update the list of fields to be displayed on the default screen. Press shifted F10 (twice) to delete all the entries on this screen.
Sample Pathmaker Sessions Creating a NonStop SQL Pathmaker Application Figure 10-20.
Sample Pathmaker Sessions Creating a NonStop SQL Pathmaker Application Figure 10-21.
Sample Pathmaker Sessions Creating a NonStop SQL Pathmaker Application Figure 10-22.
Sample Pathmaker Sessions Creating a NonStop SQL Pathmaker Application 11. Define SQL-ENTER-PARTS requester. a. Enter the basic requester information. Press the clear key to clear any previously entered information. Press shifted F15 to show the default values for the Requester Definition screen. Enter the requester name (SQL-ENTER-PARTS ) and the title (P A R T S I N F O R M A T I O N). Change Requester Type to DB. Change Initial Values and Check Data to Y .
Sample Pathmaker Sessions Creating a NonStop SQL Pathmaker Application When you have finished updating the Display Text screen for each of these function keys, press F16 (twice) to return to the Requester Definition screen. Press shifted F11 to reach the Display Field List screen. e. Update the list of fields to be displayed on the default screen. Put the cursor on PART_TIMESTAMP_DATE and press shifted F2 to delete it from the display list.
Sample Pathmaker Sessions Creating a NonStop SQL Pathmaker Application Press F16 to return to the Requester Definition screen. From the Requester Definition screen, press shifted F6 to begin generating this requester. You can check on the status of the generation later by returning to the Requester Generation Data screen for this requester. 12. Define SQL-MAIN-MENU requester. a. Enter the basic requester information. Press the clear key to clear any previously entered information.
Sample Pathmaker Sessions Creating a NonStop SQL Pathmaker Application Press F16 from the Display Text screen to return to the Function Key Assignments screen. Press F16 from the Function Key Assignments screen to return to the Requester Definition screen. e. View the default screen by using the Screen Painter. Press F13 from the Requester Definition screen to view the application screen. Press F16 to return to the Requester Definition screen. f. Generate the requester.
Sample Pathmaker Sessions Creating a NonStop SQL Pathmaker Application Press F16 to return to the Application Configuration Menu. From the Application Configuration Menu, press F3 to reach the Application Installation screen. 16. Enter the application installation information. Enter configuration information including appropriate disk volume, printer, and a PATHMON name for the application Pathway system.
Appendix A Reference Summary This appendix contains task summaries, screen lists, and a three-page Pathmaker screen map. Copy the contents of this appendix and use it as a reference during a Pathmaker application development effort.
Reference Summary Figure A-1.
Reference Summary Figure A-1.
Reference Summary Figure A-1. Pathmaker Screen Map (Page 3 of 3) F5 F7 F8 F10 F11 F13 Server Definition Macro Registration Simulation Application Configuration Process Configuration User Supplied F6 SF1 F6 Server Copy Service Assignment Macro Syntax SF13 F15 Utility Menu Help You can reach these screens from any Pathmaker screen.
Reference Summary Table A-1.
Reference Summary Table A-2. Pathmaker Screens for Defining Data Pathmaker Screen Description SQL Table Registration Used to identify the NonStop SQL tables that will be accessed by an application and to assign a define name and a Pathmaker name to each table. Lists all SQL tables for this project. Used to define, change, or delete an access path for one NonStop SQL table. Lists access paths for this table.
Reference Summary Table A-4. Pathmaker Informational Screens Pathmaker Screen Description Function Key Path Access Path Value List Lists the names and descriptions of access paths defined for the current table. Lists the names and descriptions of macros that have been registered for this project. Lists all Pathmaker projects for this system and release. Lists all elementary and group fields that make up one reference object.
Reference Summary Table A-5. Summary of Standard Services Description READ FIRST Retrieves the first record(s) in a file, sorted by the key field indicated by the cursor, regardless of the value on the screen. Use F5 to continue reading. F4 (PF4) READ NEXT Retrieves the next record(s) in sequence according to the operation in progress. Retrieves the first record(s) whose key value is greater than, or equal to, that of the value entered. Use F5 to continue reading.
Reference Summary Table A-6.
Reference Summary Table A-7. Pathmaker Screens for Creating Custom Services Function Key Path Minimum Times Normally Used Required ? The first page is used to define service attributes. The second page is used to define generation options for C services. The generation and compilation of a C service can be initiated on this screen. Used to copy an existing service. Used to define IPC request message this service expects to receive and IPC reply message this service expects to send back.
Reference Summary Table A-8. Pathmaker Common Service Utility Library (Page 1 of 5) Function Name Description Parameters Description Return Value cobstr_to_cstr Converts a COBOL-style character string to a Cstyle character string. char *outbuff Pointer to char Address of result returned if not truncated; NULL if truncated. size_t inlen Pointer to null-terminated string converted from ‘inbuff’. Maximum size of out buffer. Pointer to fixed-length, blankpadded string to convert into ‘outbuff’.
Reference Summary Table A-8. Pathmaker Common Service Utility Library (Page 2 of 5) Function Name Description Parameters Description Return Value svc_advisory Stores an advisory message in the reply advisory fields of the current service. short severity Severity of the advisory message. Void char *text Stores an advisory message in the reply advisory message buffer of the current service describing the last error encountered by a logical file.
Reference Summary Table A-8. Pathmaker Common Service Utility Library (Page 3 of 5) Function Name Description Parameters Description Return Value lfseekkey Positions a structured logical file by key field value and length. LOGICAL_FILE *file Pointer to the logical file to position. short keytag Identifier of the comparison key field in the file. Positioning mode that selects and orders the records retrieved from the file using one of the LFSK constants from the header file.
Reference Summary Table A-8. Pathmaker Common Service Utility Library (Page 4 of 5) Function Name Description Parameters Description Return Value lfreadlock Reads and locks the next record in the current access path. LOGICAL_FILE *file Pointer to the logical file to read. void *buffer Pointer to the buffer that receives the record. size_t bufflen Maximum size of the receiving buffer. LOGICAL_FILE *file Pointer to the logical file to read.
Reference Summary Table A-8. Pathmaker Common Service Utility Library (Page 5 of 5) Function Name Description Parameters Description Return Value lfunlockfile Unlocks all records in a logical file. LOGICAL_FILE *file Pointer to the logical file to unlock. lfrwrite Writes a new record to a logical file. LOGICAL_FILE *file Pointer to the logical file to write. void *buffer Pointer to the record to write.
Reference Summary Table A-9. Pathmaker Screens for Creating Custom Servers Pathmaker Screen Description Server Definition Server Copy Service Assignment Used to define server attributes. Used to copy an existing server. Used to identify the services to be included in this server. Function Key Path Minimum Times Normally Used Required ? F5 F5, Shifted F1 F5, F6 Once per server Once per server Once per server Yes No Yes Table A-10.
Reference Summary Table A-11. Pathmaker Screens for Creating Requesters Function Key Path Minimum Times Normally Used Required ? F2 Once per requester Yes F2, Shifted F1 F2, F8 Once per requester Once per requester No No F2, F10 Once per requester Used to define what subset of the context should appear on the default screen and the physical arrangement of items. Used to define video attributes, heading, picture, and help text for each screen field.
Reference Summary Table A-12.
Reference Summary Table A-13.
Reference Summary Table A-14. Pathmaker Screens for Completing and Installing an Application Pathmaker Screen Description Application Configuration Menu to navigate to the three screens listed below. Specify the server class name associated with a custom or registered server. Specify an active server class for each custom or registered service.
Appendix B How to Operate a DB Requester Application This appendix provides a detailed explanation of how to operate a Pathmaker application created with DB requesters and standard services. This information is of interest to end users of such applications. For the purpose of simplification, this appendix will refer only to NonStop SQL terminologies. If the operation of the standard services differs significantly between NonStop SQL tables and Enscribe files, it will be specifically noted.
How to Operate a DB Requester Application Reading Rows READ FIRST (F4) If the end user wants to retrieve the first row (or rows) in the table ordered by a selected key column, a READ FIRST operation is requested. When the end user positions the cursor in a primary key column and presses F4, the first row that is actually stored in the table is retrieved regardless of the value currently in the primary key column on the screen.
How to Operate a DB Requester Application Reading Rows READ APPROXIMATE (F6) To read the first row(s) in sequence whose key value is equal to or greater than that of a key value entered on the screen, the end user requests a READ APPROXIMATE operation.
How to Operate a DB Requester Application Reading Rows READ APPROXIMATE Operation for a Nested Box For a nested box, a READ APPROXIMATE operation can be performed only if a key column appears in the box. (If a key column does not appear and a READ APPROXIMATE operation is requested, the application performs a READ FIRST operation.) If a key column appears, the end user must do the following to request a READ APPROXIMATE operation: READ EXACT (F7) 1. Read or insert a row into the parent box. 2.
How to Operate a DB Requester Application Reading Rows READ EXACT Operation for a Nested Box If a key column appears within a nested box, the end user must do the following to request a READ EXACT operation: 1. Read or insert a row in the parent box. 2. Enter the entire value in the key column(s). 3. Press F7.
How to Operate a DB Requester Application Reading Rows If the employee table contains records for employee numbers 0 through 123, the application returns the row listed in Table B-1, depending upon the value entered and the compare length specified. Table B-1.
How to Operate a DB Requester Application Inserting Rows Inserting Rows A new row can be inserted into (that is, added to) a table by entering the appropriate values on the screen and requesting an insert operation. Two insert operations are available: INSERT—To insert a single row at a time. INSERT BOX—To insert all entered rows within one box at one time. When an INSERT operation is requested, the cursor must be positioned within the row to be inserted.
How to Operate a DB Requester Application Inserting Rows Figure B-1. Inserting a Record in a Nested Box STEP 1: Enter values in the fields of the parent box. BRANCHNAME San Francisco__ MANAGER 23___ * PRIMKEY REGNUM _1 BRANCHNUM _2 EMPNUM ______ EMPNAME ____________________ JOB ___________ AGE __ SALARY _______.00 VACATION ____ STEP 2: Press F10 to insert the record in the parent box. STEP 3: Enter values in the fields of the nested box.
How to Operate a DB Requester Application Inserting Rows INSERT BOX (Shifted F10) To insert several rows from one box at a time, the end user must request an INSERT BOX operation. Before requesting the INSERT BOX operation, values must be entered in the required columns of at least one repetition. When the application successfully completes the INSERT BOX operation, it displays a message indicating the number of rows inserted.
How to Operate a DB Requester Application Inserting Rows Figure B-2. Example of INSERT BOX Operation for Multiple Repetitions in a Single Box STEP 1: Enter values in the record fields. * EMP +EMPLOYEE NO. NAME +DEPT JOB AGE SALARY VAC 323_ Joe Smith__________ 2_ 3_ Manager___ 37 4000.00 12 239_ James King____ ____ 2_ 3_ Salesrep___ 39 2500.00 9_ 245_ Sally Jones____ ____ 2_ 3_ Programmer 29 3900.00 13 ____ __________________ __ __ __________ __ ____.
How to Operate a DB Requester Application Inserting Rows Figure B-3 illustrates an INSERT BOX operation for an application that displays several boxes. Figure B-3. INSERT BOX Operation for a Nested Box STEP 1: Enter values in the fields of the parent box. BRANCHNAME San Jose______ * PRIMKEY REGNUM __ BRANCHNUM __ MANAGER ____ EMP EMPLOYEE JOB NO. NAME DESCRIPTION ____ _________________ ________ AGE SALARY VAC __ ____.00 __ ____ _________________ ________ __ ____.
How to Operate a DB Requester Application Deleting Rows Deleting Rows Only those rows that are currently displayed on the screen can be deleted. To retrieve rows to be deleted, any suitable read operation can be used. After retrieving a row(s), the end user can request the following delete operations: DELETE—To delete a single row. DELETE BOX—To delete all rows within one box. When a DELETE operation is requested, the cursor must be positioned within the row to be deleted.
How to Operate a DB Requester Application Deleting Rows For applications that access NonStop SQL tables, if an error is encountered during a DELETE BOX operation, all columns in error are highlighted and the application displays the message associated with the first column in error in the message area. The application will delete all rows that are error free. The effects of a DELETE BOX operation can be reversed by requesting an UNDO (shifted F13) operation immediately after the DELETE BOX operation.
How to Operate a DB Requester Application Updating Rows Updating Rows Only rows that are currently displayed on the screen can be updated. To retrieve a row(s) to be updated, the end user can use any suitable read operation. After retrieving the row(s), the following update operations can be requested: UPDATE—To update a single row at a time. UPDATE BOX—To update all rows in one box at a time. When an UPDATE operation is requested, the cursor must be positioned within the row being updated.
How to Operate a DB Requester Application Updating Rows If the application displays this prompt, the end user must enter either the character Y (to continue) or the character N (to stop), and then press F1. If a Y is entered, the application continues the UPDATE BOX operation beginning with the record that directly follows the record in error. If an N is entered, the application stops the UPDATE BOX operation.
How to Operate a DB Requester Application Undoing an INSERT, DELETE, or UPDATE (Shifted F13) Undoing an INSERT, The effects of an INSERT, DELETE, or UPDATE operation can be reversed by DELETE, or UPDATE requesting an UNDO operation. An UNDO operation can be requested by pressing (Shifted F13) shifted F13. Undoing a DELETE Operation To undo a DELETE operation, the application must insert the deleted row(s).
How to Operate a DB Requester Application Operator Display and Error Messages Operator Display and The application displays messages in the message area of the screen.
How to Operate a DB Requester Application Terminal Function Keys Terminal Function To perform operations with a DB requester Pathmaker application, the terminal Keys function keys, located across the top of the keyboard, are used. Entries in the function key field identify the function keys for the T16-652x and T16-653x terminals. The comparable program function and attention keys for IBM-327x terminals appear in parentheses.
How to Operate a DB Requester Application Terminal Function Keys Table B-2 lists the function keys and their specific operations for DB requester application. Table B-2. Standard Services Summary Standard Service Default Function Key Operation READ FIRST F4 (PF4) Retrieve the first record(s) in a file, sorted by the key field indicated by the cursor, regardless of the value on the screen. Then, use F5 to continue reading.
Appendix C Defining Data for a NonStop SQL Pathmaker Application NonStop SQL is a relational database management system that uses the industry standard SQL language to define and manipulate data. You can use the Pathmaker product to create an application that manipulates data in a NonStop SQL database. The topic of defining data for a Pathmaker application that accesses data in a NonStop SQL database is discussed in Section 2 of this manual.
Defining Data for a NonStop SQL Pathmaker Application Using Null Values In contrast, this definition uses the NOT NULL clause: CREATE TABLE employee (name CHAR(20) NOT NULL); For this version of the definition, the Pathmaker product will generate the following COBOL output in the requester context portion of the requester source code WorkingStorage Section: 01 EMPLOYEE. 02 NAME General Guidelines for Using Null Values PIC X(20) VALUE SPACE.
Defining Data for a NonStop SQL Pathmaker Application Using Null Values For items declared as alphanumeric, the data type remains the same. For example: CREATE TABLE employee (name PIC X(20)); would be generated in COBOL as: 01 EMPLOYEE. 02 NAME. 03 INDICATOR 03 VALU PIC S9(4) COMP VALUE 0. PIC X(20) VALUE SPACE. You would not get a compiler error, but your program would not perform correctly if you tried to move an alphanumeric value to NAME OF EMPLOYEE.
Defining Data for a NonStop SQL Pathmaker Application Using Null Values Using Null Values in Database Requesters This subsection focuses on two topics: Restrictions on using null values in a DB requester Displaying null values on a DB requester screen If you choose to use a DB requester to perform operations on a database that contains null values, you should read “Restrictions on Using Null Values” carefully. While Pathmaker DB requesters can read null values, they cannot insert or update null values.
Defining Data for a NonStop SQL Pathmaker Application Using Null Values Suppose that the table contains the following data, inserted by NonStop SQL outside of the Pathmaker environment.
Defining Data for a NonStop SQL Pathmaker Application Using Null Values Example 1: Operation : READ FIRST Cursor on : SPOUSENAME Repetition count : 4 In this READ FIRST, all the rows of the table are returned, ordered by SPOUSENAME.
Defining Data for a NonStop SQL Pathmaker Application Using Null Values Changing the Display Character for Null Values Table C-1 shows the default values that appear on a DB requester application screen when you attempt to display a null value. Table C-1.
Defining Data for a NonStop SQL Pathmaker Application Using Null Values Using Null Values in Transaction Requesters Transaction (TRNS) requesters do not have the same limitations on using null values that DB requesters have. In both cases, the service manipulates the null indicator, not the requester. Because you write the services for a TRNS requester, you have access to the null indicator (INDICATOR) in your Custom Source File code. Therefore, you can read and alter the indicator’s value.
Defining Data for a NonStop SQL Pathmaker Application Using Clustering Keys Using Clustering Keys A clustering key is a group of columns that forms a nonunique key for a keysequenced table. To define a clustering key, you specify one or more columns in the CLUSTERING KEY clause of the CREATE TABLE statement and, optionally, a sort order for each column. You use a clustering key instead of using a primary key for a key-sequenced table.
Defining Data for a NonStop SQL Pathmaker Application Using Date and Time Data Types Using Date and Time Date and time data types are supported only in DDL. To use date and time data types Data Types in programs written in programming languages such as COBOL and C, equivalent data types must be used. The Pathmaker product treats date and time data types as character fields.
Defining Data for a NonStop SQL Pathmaker Application Using Date and Time Data Types The Pathmaker product treats each DATETIME option and each INTERVAL option as a distinct data type.
Index 0300-DISPLAY-SCREEN 9-8 0900-BUILD-CURSOR-POSITION generating 6-11, 9-57 point fields and 6-10 using 9-8, 9-59 3270 terminal creating requesters for 5-46, 5-48 sample TRNS requester for 5-47 6520/6530 terminals, function key mapping to 3270 5-46, 5-48 A Access fields See also Access paths NonStop SQL DB requesters and 3-31 rules for determining efficient 3-32 Access paths adding 2-40 attributes of 2-38/39 default 2-39 description of 2-38 screens used to define 2-41 Active server classes 7-5 ADD PROGRA
Index Application (continued) creating database for 7-9 design specification 2-3 development bottom-up 3-4 management of 1-4 order of tasks 3-4 overview 3-1 preparation 1-1, 3-2 prerequisites 1-3, 3-1 task summary 1-3 top-down 3-6 files for starting 7-10 help text 8-7 installation See Installation installed adding new services to 8-14 adding requesters to 8-8 deleting services from 8-15 modifying 8-14/18 maintenance 8-1 moving with DUPCODE 7-9 NonStop SQL 10-34 Pathmaker screens for completing and installi
Index At sign (@) 6-12 Attribute ADVISORY line 9-24 attention 9-25 effect on default screen layout 5-17 modifying from the Screen Painter 6-4 video 2-28, 6-4 Auditing designating for a service 2-5 requirement for Pathmaker catalogs 2-22 server classes for standard servers 8-10 B B/A column See Before/After column Backslash (\) 2-17 See also Slash (/) Before/After column sending before- or after-image 5-38 using 5-34 BINARY data types 2-33 Blinking, setting video attribute 6-5 Box child 3-25 definition of 3
Index C C language custom server MAKE utility support 4-17 structure of 4-11 custom service common service utility library 4-15, 4-37, 4-45 custom source file 4-23, 4-37 data definition requirement 2-24 file error handling 4-56 generated source file 4-15 generation phases 4-15 MAKE utility support 4-17 required variables in custom source file 4-29 SQL error handling 4-61 structure of 4-15 CALL, with function keys 5-3 CALL Parameter Definition screen guidelines 5-34 order of completion 5-33 CALL parameters
Index Child box 3-25 efficient access fields and 3-32 field 5-27 record linking to parent 5-27 repetition and 5-28 specifying 5-27 Client/Transaction Server application development 1-6 Clustering keys 3-30, C-9 COBCHECK command 2-35 COBOL custom server 4-4 custom service custom source file 4-21, 4-32 custom source file example with SQL 4-35 Enscribe file opens 4-10 generating SQL statements with 4-63 required variables in custom source file 4-29 structure of 4-8 Working-Storage restriction 4-10 records 4-4
Index Compilation requester 5-3 SQL 7-14 Compile field 5-41 Complex application 10-18 servers See Custom servers COMPLEX data type 2-33 Composite keys 5-27 Compressed format effect on DB requester screens 5-24 effect on TRNS and MENU screens 5-18 visible, when 5-19 Concurrency check results 4-65 Configuration for registered service 4-76 Configuration information, PATHCTL and 7-11 Configuring applications (PATHCNFG) 7-10 Constraints 2-28 Conversion routines 2-44 CONVERT utility, limitations of 2-29 Cool sta
Index Cursors 0900-BUILD-CURSOR-POSITION and 6-10 position, sending to services 5-37 T9154-CURSOR-POSITION and 9-57 using for select-and-return 9-62 Custom application components 3-15 creating 10-18 overview 3-15 Custom servers C language MAKE utility support 4-17 structure of 4-11 check list 4-69 COBOL 4-4 defining 4-68 description of 4-3 file error handling 4-54 generation guidelines for C 4-71 input files 4-71 modifying skeleton used for 2-20 phases 4-70 status 4-71 screens for defining 4-69 steps for c
Index Custom services (continued) defining 4-18 description of 4-3 design 2-5 end of file processing 4-30 error 4-30 file error handling 4-54 generation 2-20 invoking macros with 4-46 maximum in server (40) 2-6 NonStop SQL considerations 4-48 generating host variables 4-51 null values and C-8 sending rows or columns to service 4-50 packaging into new servers 8-5 reassigning active server class of 8-2 repackaging into server 8-4 reply message 4-31 returning information to 9-10 screens for defining 4-20 SEND
Index Custom Source File (continued) requester copy library and 9-54 server generation and 4-71 using DEFINE names in 4-52 D Data declarations 2-37 describing to NonStop SQL Pathmaker applications 2-37 Pathmaker 2-31 description in a design specification 2-3 screens used to define 2-41 values, controlling in a column 2-28 Data definition for a Pathmaker project 2-24 Enscribe 2-25 NonStop SQL 2-27 requirement for C custom services 2-24 Data field adding help text for 8-7 adding or modifying 6-5, 6-8 alignin
Index Data File Subvolume 10-16 Data type date and time 2-29, C-10/11 invalid in Pathmaker 2-33 null values and C-2/4 Data-Field partial screen names, rules for 6-6 objects, entering with repetition 6-7 using 6-5 Database creating 2-31 design 2-12 Enscribe, creating 2-31, 7-10 modifying 8-16 NonStop SQL creating 2-31 DB requesters and 5-11 simulation and design 2-12 type accessed by a service 2-5 Database requester See DB requester Date and time data types 2-29, C-10/11 Date, sending to services 5-37 DATET
Index DB requester (continued) maximum record length (4000) 3-18, 5-44 messages, changing 9-24 multifile applications and 3-24 link field 3-25 restrictions for using NonStop SQL 3-30 screen layout options 3-26 multiple repetitions and 5-11 NonStop SQL additional considerations 3-31 clustering keys and C-9 date and time data types C-10 efficient access fields and 3-32 moving 7-14 null values and C-4 recompiling the standard server 7-9 restrictions 3-22, 3-25, 3-30 restrictions for joining 5-45 tables and re
Index DDL (continued) definitions and records, naming rules 2-15 dictionary 2-31, 2-32 Display Detail screen and 2-28 enhancements for Pathmaker 2-32 Enscribe definitions, modifying in an application 8-16 maximum record length for DB requesters 5-44 OCCURS DEPENDING ON clause 5-44 records, modifying in a database 8-17 sending to services 5-37 guidelines for a Pathmaker project 2-32 invalid data types in Pathmaker 2-33 maximum record length for DB requesters 3-18 NonStop SQL date and time data types C-10 nu
Index Debugging requesters 8-11 servers 8-14 @LOGICAL-TERMINAL and 9-59 Declarative Section 4-54 Decorations assigning video attributes to 6-5 changing in installed applications 8-2 Screen Painter and 6-2 turning into data fields 6-15, 6-16 using the Data-Field partial screen and 6-6 using to align data-field segments 6-7 Default error messages DB requester, changing display of 9-24 DB requester, changing format of 9-28 SQL, changing format of 9-41, 9-47 program name 7-11 Default screen definition of 6-1 l
Index Design Pathmaker application 2-3 requester 2-9 screen 2-9 server and server class 2-7 specification 2-3 Directly contained programs 4-8 Disk file name 2-17 Display Detail screen creating user conversion procedures and 9-23 DDL and 2-28 default screen layout 5-20 Headings field 5-26 headings on MENU and TRNS screens 5-20 NonStop SQL and 2-28 Screen Painter and 6-4 screen picture and 6-8 Display Field List screen effect on DB requester screens 5-24 effect on MENU and TRNS screen layout 5-18 INDICATOR f
Index E EDIT command 2-35 EDIT-PIC clause description of 2-33 effect on default screen 5-15 long data fields and 6-8 Efficient access field 3-31 Elementary field reference field names and 9-58 resolving ambiguity with 6-6 name, DDL 9-4, 9-21 End user terminal type 2-10 Enform accessing from Pathmaker full screen interface 2-23 assessing changes to application 8-2 deleting requesters and 8-12 queries 1-4, 8-2/16 Enscribe creating a database with 2-31, 7-10 data definition for a Pathmaker project 2-25 DDL, H
Index Error handling (continued) T9154-REASON-CODE and 9-59 @PHYSICAL-TERMINAL and reporting errors 9-59 Error messages changing display of 9-24 DB requesters, changing default format of 9-28 Enscribe file errors 4-55 rewriting or reformatting 9-33 in server skeletons 9-32 NonStop SQL 4-57/58 reformatting 9-35, 9-37 returned in requester copy library 9-12 rewriting 9-34, 9-35, 9-36 EXMPLCPY 10-19 F FETCH statement 4-66 Field See also Data field See also Qualified field names efficient access NonStop SQL DB
Index File (continued) restrictions on linking 5-27 set and service grouping 2-7 unstructured, DB requesters and 3-19, 5-44, 5-45 FIND query 8-17 FLOAT data type 2-33 Formal parameters 5-33, 5-34 Format, screen See Screen, format Full screen interface accessing other processes from 2-23 function keys 3-10, 3-12 informational screens 3-14 Main Menu 3-11 operating 3-8 work subvolume 3-11 Fully qualified name 6-6 Function key adding help text for 8-7 assignments for 3270 terminals 5-46, 5-48 CALL and SEND act
Index Generated SQL operations DELETE statement 4-65 description of 4-63 FETCH statement 4-66 INSERT statement 4-65 SELECT statement 4-65 UPDATE statement 4-64 Generation C services, phases of 4-15 custom server 4-70, 4-71 requester files used for 5-42 input file modification 2-19 Pathmaker and 5-3 phases of 5-41 server code, files and 2-20 Global procedures in server skeletons 9-32 Grouping services 2-7 H HEAD headings option effect on DB requester screens 5-26 effect on TRNS and MENU screens 5-20 HEADING
Index Help database files FUP commands for moving 8-8 list of 8-8 merging Pathmaker projects and 7-23 project names and 9-10 getting and giving 2-11 online 8-7 requester 8-7 server merging Pathmaker projects and 7-23 provided by Pathmaker 8-7 text 8-7 HELP clause 2-33 HELP TEXT statement 2-28 HELPPOS, merging projects and 7-24 HELPREQ, merging projects and 7-24 HELPSRV0, merging Pathmaker projects and 7-23 HELPTXT, merging projects and 7-24 HELPTXT0, merging projects and 7-24 HELPUTIL, modifying existing o
Index Initial requester adding to installed applications 8-11 default program name 7-11 formal parameters and 5-14 program definitions for 7-10 programs available 7-11 REG requesters and 5-12 RUN PROGRAM command and 5-14 T9154-PROJECT-NAME and 9-10 using 5-13 INSERT statement 4-65 Inspect, using to debug generated servers 8-14 Installation applications Pathmaker screens and 7-2 production environment 7-12, 7-13 for application testing 7-8 Pathmaker 2-3 subvolume 9-30 Installed applications See Application
Index IPC creating reference objects for 5-10 Display Field List and 5-18 messages coordinating 5-3 request and reply headers 9-9 SEND parameter definition and 5-36 structure for columns that allow nulls C-1 OCCURS and screen layout 5-16 IPC Definition screen changing 5-38 INVOKE (SQL) statements and 4-48 logical file name and avoiding ambiguity 4-48 SEND Parameter Definition screen and 5-38 IPCDDL 10-35 J Join field example of 5-45 group data items and 5-45 link field and 3-25 specifying 5-27 K Key-sequen
Index L Level 88 adding to list of SQL messages 9-41 declarations for SQL messages 4-58 Limitations DB requester file types 5-44, 5-45 null values in a DB requester C-4 project size 2-21 Lines, drawing in the Screen Painter 6-13 Link field 3-25 Link Info fields 5-27 Linkage requester See Requester linkage Section (SCREEN COBOL) 5-33 Linking files 5-27 records effect on DB requester screens 5-27 example of 5-45 restrictions on 3-25, 5-45 tables indexed reads with 3-30 restrictions 5-27 List screen creating
Index LOGICAL-TERMINAL-NAME using in a requester copy library 9-8 @LOGICAL-TERMINAL and 9-55 Logon screen 5-15 Long data fields positioning in the Screen Painter 6-8 tabular format and 5-28 M Macro definition of 2-42 example of 2-44, 4-47 guidelines 2-43 invoking 2-43, 4-46 language, INVOKE statements 4-46 modifying for SQL statement generation 9-52 naming rules 2-14 required section names 4-46 screens used to register 2-43 server generation and 4-71 using 2-20, 4-46 Main Menu full screen interface 3-11 Ma
Index MENU requester adding data fields to 5-11 adding to installed applications 8-9 appearance of 5-21 default screen 5-18 guidelines 5-11 parameter passing 5-11 screen layout 5-22 services and 5-11 summary 5-10 Merging applications with Pathmaker 5-12 Pathmaker projects 7-20 MESSAGE-FORMATS in T9154CPY 9-28 Messages advisory 6-3 changing display of 9-24 changing standard formats for 9-24 error See Error messages for DB requesters 9-29 Modifying data fields in Screen Painter 6-8 database in installed appl
Index Multifile DB requester link field 3-25 null values and C-4 Pathmaker applications and 3-24 restrictions for NonStop SQL 3-30 Multiple Pathmaker projects, merging 7-20 MUST BE clause constraints and 2-28 CONVERT utility (NonStop SQL) and 2-29 description of 2-33 TAL user conversion procedures and 9-22 N NAME headings option effect on DB requester screens 5-26 effect on MENU and TRNS screens 5-20 Names list of objects needing 2-12 qualified field, entering in Screen Painter 6-6 rules for DDL definition
Index NEXT PAGE, logical screen and 6-3 Nines (9s), null values and C-7 NO HEADING clause 2-28 Node 9-13 Nonindex reads 3-31, C-5 NonStop SQL access paths 2-38 adding 2-40 attributes 2-38 default 2-39 Efficient attribute 2-38 screens used to define 2-41 Unique attribute 2-39 accessing Enscribe files and 2-5 application creating 10-34 moving 7-10 changes without regenerating DB requester 5-11 COBOL records and IPC requests and replies 4-48 COBOL service code 4-35 column inheritance 2-29 column passing 2-29
Index NonStop SQL (continued) generation macro, modifying 9-52 HEADING clause and 2-28 HELP TEXT statement 2-28 installed applications 8-16 invalid data types in Pathmaker 2-33 keys 3-19, 3-20 messages, Level 88 declarations for 4-58 NO HEADING clause and 2-28 Pathmaker and C-1 READ APPROXIMATE limitation 3-20 registering tables 2-37 restrictions 3-22, 4-48 sending rows and columns to service 4-50 standard server access limit for 3-30 cached queries and 2-21 number of tables 2-21 SQLGS 8-10 statements for
Index Null values DB requesters and C-4 definition of C-1 guidelines C-2 how displayed in a DB requester C-7 TRNS requesters and C-8 using in NonStop SQL Pathmaker C-1 NULLCHARACTER, null value display and C-7 NULLNUMERIC, null value display and C-7 Numeric contraints 9-22 data, null values and C-2, C-3, C-7 variables in requester copy libraries 9-4, 9-21 O Objects Pathmaker, naming rules 2-14 request and reply 4-48 Occurrences adjusting row and column 6-7 declaring 5-15 Display Field List screen and 5-18,
Index OCCURS DEPENDING ON clause effect on default screen 5-15 guidelines 5-16 in Pathmaker 3-18, 5-44 inheritance of dimensions 5-16 nesting and 5-16 Online help adding for NonStop SQL Pathmaker 2-28 adding new 8-7 getting and giving 2-11 HELP clause in Enscribe DDL 2-33 HELP TEXT statement in NonStop SQL 2-28 point fields and 6-10 Operation Attributes screen 4-64 Ordering (ascending or descending), efficient queries and 3-32 OUT command 2-35 OUTPUT UPDATE statement 2-35 P PA keys, Pathmaker applications
Index Parameters CALL See CALL parameters coordinating 5-3 formal See Requester parameters passing and REG requesters 5-12 requester 5-33 SEND See SEND parameters Parent box 3-25 efficient access fields and 3-32 field, specifying name of 5-27 record linking to child 5-27 repetition and 5-28 specifying 5-27 Partitions, clustering keys and C-9 PATHCNFG editing for production system 7-14 file 7-9 generating DEFINE names for 4-52 merging Pathmaker projects and 7-23 null value display and C-7 reconfiguring for
Index Pathmaker application custom, creating 3-15 DB requester, creating 3-17, 3-18 definition language (PMADL) 1-5 design 2-3 development 1-1/6, 3-1/6 example 10-17 prototype 2-4 screens 7-2 types 3-3, 3-15, 3-17 catalog 2-22 catalog reports 1-4 data definition Enscribe 2-25 NonStop SQL 2-27 requirement for C services 2-24 tasks 2-24 describing data to 2-31 full screen interface accessing other processes from 2-23 function keys 3-10, 3-12 informational screens 3-14 Main Menu 3-11 operating 3-8 work subvol
Index Pathmaker (continued) project See Project releases, controlling 1-5 reports 1-4 sample sessions 10-1 screens data 2-41 installation 7-2 shared code 2-42 simulation 2-11 syntax based interface (PMADL) 1-5 utilities 1-5 variables 9-8 versions, controlling 1-5 PATHPRGS file 7-9 PATHSVRS file 7-9 PATHTCPS file 7-9 PATHUSER file 7-9 Pathway configuration files for testing 7-9 files for configuring applications 7-10 system 9-13 Pathway Open Environment Toolkit See POET Performance clustering keys and C-9 p
Index PM4 8-8 PM6 8-12 PM7 8-12 PM8 8-13 PM9 8-13, 8-15 PM12 8-7 PM13 8-7 PM14 8-7 PM16 8-16 PM17 8-13 PM18 8-2 PM19 8-2, 8-4 PM22 8-16 PMADL interface 1-5 PMPROJECT ADD 2-21 ALTER command 2-22 utility 7-8, 7-9 POBJ, moving by using SCUP 8-3 POET relationship to Pathmaker 1-6 using Pathmaker with 4-2 Point fields defining or modifying 6-10/11 definition of 6-2 getting names of 6-11 partial screen 6-10 using 6-10, 9-59 Positioning long data fields in Screen Painter 6-8 PREV PAGE, logical screen and 6-3 Prim
Index Process configuration attributes 2-22 Production applications, installing 7-12 Program definitions for initial requesters 7-10 PROGRAM-ID 5-12 Project accessing 3-8 adding 2-21 attributes, modifying 2-22 catalog auditing requirement 2-22 ownership 2-22 requester generation and 5-42 server generation and 4-71 choosing how many 2-21 creating and customizing 2-21 data definition 2-24 Enscribe 2-25 NonStop SQL 2-27 describing data to 2-31 error 14 3-9 loading from existing project 2-22 merging 7-20, 7-23
Index Pseudofield at sign (@) and 6-12 current value, when displayed 6-12 DDL pictures of 9-55 defining or modifying 6-11/12 list and description of 9-54 list of displayable 6-11 Partial screen 6-11 Screen Painter and 6-2 sending to services 5-37 video attributes and 6-12 Q Qualified field names parent field and 5-27 resolving ambiguity 6-6 Queries Enform 1-4 on SQL tables, DB requesters and 3-31 PM 8-2/16 Question mark (?) C-7 R Read DB requesters and reading tables 3-31 indexed, joining 3-30 nonindex 3-3
Index Record Instance Detail screen description of 10-9 Headings field default value 5-26 effect on DB requester screens 5-26 Screen Format field 5-24 Records displaying lists of See List screens group data items and 3-25, 5-45 maximum length for DB requesters in (4000) 3-18, 5-44 modifying 8-17 REDEFINES clause 2-33 Reference field name 9-58 Reference Field Value List screen qualified field names and 6-6 viewing from Screen Painter 6-8 Reference object assigning repetition to 5-27 definition of 5-9 enteri
Index Registered macros definition of 2-42 example 2-44, 4-47 guidelines 2-43 invoking 2-43 required section names 4-46 screens used 2-43 using 4-46 Registered requester 5-10, 5-11, 5-12 Registered server benefits of 4-74 creating 4-2 defining 4-75 definition of 2-6 Registered service application configuration for 4-76 benefits of 4-74 creating 4-2 defining 4-74 writing requester code to access 4-75 Relative file common service utility library functions for 4-45 DB requesters and 3-19, 5-44 T9154-RELATIVE-
Index Reply from service 4-29, 4-30 screen display and 5-16 table, changing the size of 9-32, 9-38 reply->header.advisory_severity 4-31 reply->header.advisory_text 4-31 reply->header.reason_code 4-31 reply->header.reply_code 4-29 reply->header.tmf_abort_flag 4-31 REPLY-LONG 4-29 REPLY-SHORT 4-29 Reports, Pathmaker Enform queries 1-4 REQDBSKL file relationship to REQSKL 9-30 skeleton file 2-19 summary 9-2 REQSKL file editing 9-30 skeleton file 2-19 summary 9-2 Request and reply headers 9-9 request->header.
Index Requester (continued) defining 5-1, 5-8 deleting from installed applications 8-12 description in a design specification 2-4 design overview 2-9 development overview 5-1 dummy 7-21 files used to modify 9-2 generating and compiling SCREEN COBOL code and 5-3 generation 2-19, 5-41/43 initial adding to installed applications 8-11 description of 5-13 formal parameters and 5-14 REG requesters and 5-12 RUN PROGRAM command and 5-14 using 5-13 linkage discription of 9-9 guidelines 9-10 Linkage Section (SCREEN
Index Requester (continued) skeleton changes you can make to 9-30 DEFINE name for 9-30 description 5-4 requester generation and 5-42 task overview 5-8 terminal type 2-10 title 5-21, 5-30 TRNS 5-10 types effect on MENU and TRNS screens 5-21 list of 5-9 overview 2-10 summary 5-10 user conversion routines 2-44 using SCUP to select a version 8-11 @CURSOR-POSITION and 5-17 Requester copy library creating 9-3 database integrity check 9-12 error handling 9-8 exiting 9-8 function keys 9-7 guidelines 9-3 modifying
Index Requester Definition screen (continued) terminal type effect on DB requester screens 5-29, 5-30 effect on TRNS and MENU screens 5-20 Title field 5-21 Requester Generation Data screen compiling requesters and 5-41 specifying a requester copy library 9-3 Requester Parameters screen 5-33 Requester Value List screen 7-6 RESTART limit (TMF) 9-24 Restarts, TMF 9-27 Restrictions See also Limitations for repetition 5-28 null values in a DB requester C-4 on linking files and tables 5-27 Reversed, setting vide
Index Screen (continued) default 5-2, 6-1 defining for a requester 5-1 designing IPC replies for 5-16 displaying lists See List screens elements assigning video attributes to 6-4 definition of 6-1 deleting a block of 6-13 modifying the paging area and 6-9 moving a block of 6-13 moving or deleting a single 6-14 field name Display Detail screen and 2-28 sending to services 5-37 T9154-CURSOR-FIELD, when initialized 9-57 using 9-60 fields, USER actions and 9-17 format compressed 5-18 controlling TRNS and MENU
Index SCREEN COBOL code 5-34 copying requester object code files with 8-14 generating and compiling source code with 5-3 simplified code for requester calls 5-36 requester parameters 5-33 SCREEN COBOL Utility Program See SCUP Screen Format field effect on DB requester screens 5-24 effect on MENU and TRNS screens 5-18 Screen Painter aligning data-field segments in 6-7 assigning video attributes with 6-4/5 basic components of 6-1 basic editing functions of 6-4 defining or modifying data fields 6-5 paging are
Index SCUP ALTER command 8-11 COPY command 8-14 copying all Screen COBOL files with 8-9 merging Pathmaker projects and 7-23 moving mapping requester with 8-3 moving SCREEN COBOL code with 8-2 REG requesters and 5-13 Section names in a requester copy library 9-3 Security screen 2-9 technique for assuring 5-15 @PHYSICAL-TERMINAL and 9-59 Segmented data fields creating 6-2 how to control position 6-8 SELECT statement 4-65 Select-and-return function 9-62 SEND, with function keys 5-3 SEND parameters guidelines
Index Server class See also Mapping requester active, designating 7-5 assigning 7-4 definition of 7-4 design considerations 2-7 mapping diagram 7-5 mapping services to 2-6 naming rules 2-14 reassigning active 8-2 custom adding new services to 8-14 C 4-11 checklist 4-69 COBOL 4-4 defining 4-68 errors and 4-54 generation 4-71 overview 4-3 using INSPECT to debug 8-14 debugging 8-14 definition of 2-5 description in a design specification 2-4 design overview 2-5 general See Standard servers generation 2-20 mast
Index Server (continued) skeleton changing 9-32 default file name 9-32 modifying for C NonStop SQL applications 9-47 modifying for COBOL NonStop SQL applications 9-41 overview 9-32 Pathmaker and 4-71 standard 4-1, 5-10 See also DB requester SENDs and 5-11 types 4-1, 4-3 Server Class Assignment screen 7-2 Server Class Mapping screen 7-2 Server Definition screen 9-32 Server object code files 7-23 Service C data definition requirement 2-24 custom adding, modifying, or deleting 8-13/15 C 4-15, 4-17 check list
Index Service (continued) naming, rules for 2-14, 2-21 number per project 2-21 packaging 2-7, 8-5 reassigning active server class 8-2 registered 4-2, 4-74 repackaging into servers 8-4 SEND objects 5-37 server class mapping diagram 7-5 standard 4-1, 5-10, 5-11 See also DB requester TMF use 2-5 types 4-1, 4-3 Service Not Implemented message 5-38 SERVSKL skeleton file 2-20 SESSION-1 10-3 SESSION-2 10-20 SET Pathway MAXEXTERNALTCPS command 9-13 SET PROGRAM command 8-11 SET SERVER command 9-38 SET SERVER PARAM
Index Slash (/) See also Backslash (\) effect on tabular screen titles 5-20 HEADING clause and 4-53 Source code for requesters 5-3 Source command 2-35 SPECIAL-NAMES adding 9-24 in server skeletons 9-32 SQL Generation Macro 9-52 SQL Operations screen 4-63 SQL Table Registration screen 4-52 SQL-COBOL service code 4-35 SQL-SERVER-nnn 8-10 SQLCA 9-43 SQLCODE field in SQLCA 9-43 file compiling the standard server and 7-14 creating a remote server 9-14 description of 7-9 installing production application and 7-1
Index Standard server See also DB requester DB requesters and 3-17, 5-10 definition of 2-6 Enscribe name of (DBSERVER) 8-10 merging Pathmaker projects and 7-23 NonStop SQL access limit 3-30 cached queries and 2-21 moving 7-14 name of (SQLGS) 7-14 number of tables limited to 2-21 recompiling 7-9, 7-26 restrictions for 3-30 tables and records in 5-11 object file names 4-2 overview 4-1 SENDs and 5-11 server class names 4-2 server classes for 8-10 TMF and 8-10 types of 8-10 Standards establishing naming conven
Index T T9154-ACCEPT-TIMEOUT 9-26 T9154-ADVICE-ATTN 9-24 T9154-ADVICE-NORMAL 9-24 T9154-ADVISORY-MSG-SEVERITY 4-31 T9154-ADVISORY-MSG-TEXT COBOL structure of 9-10 description of 4-31 in requester copy library 9-8, 9-12 @ADVISORY and 9-55 T9154-ATTN 9-25 T9154-BASE-DISPLAYED 9-8 T9154-CURRENT-PAGE using in a requester copy library 9-8 @CURRENT-PAGE and 9-55 T9154-CURSOR-FIELD using in a requester copy library 9-8 @CURSOR-FIELD and 9-55 T9154-CURSOR-POSITION using in a requester copy library 9-8 @CURSORY-POS
Index T9154-PATHMON-NAME 9-8, 9-13 T9154-PROJECT-NAME 9-9, 9-10 T9154-REASON-CODE COBOL structure of 9-10 description of 4-31 example of using 9-59 T9154-RELATIVE-KEY 4-45 T9154-REPLY-CODE 9-10 T9154-REPLY-HEADER 9-10 T9154-REQUEST-CODE 4-30 T9154-REQUEST-HEADER 9-10 T9154-RETURN-ADVISORY-ONLY 4-29 T9154-RETURN-SERVICE-REPLY 4-29 T9154-ROW-CHANGED 4-65 T9154-ROW-NOT-FOUND 4-65 T9154-SQL-ERROR 4-58, 9-43 T9154-SQL-errors and warnings 4-60, 4-61 T9154-SQL-WARNING 4-58, 9-43 T9154-SYSTEM-NAME 9-8, 9-11, 9-13
Index Tables creating a screen that shows data as 5-18 displaying lists of rows with See List screens modifying 8-18 passing columns from 2-29 registration 2-37 restrictions on linking 3-25, 5-27, 5-45 Tabular format creating screens for tables 2-29, 2-30, 4-52 effect on DB requester screens 5-24 on TRNS and MENU screens 5-18 repetition and 5-28 use of slash (/) 5-20 TAL routines for converting data fields 9-22 user conversion routines 2-44 Terminal end user 2-10 name 5-37 type default 5-29 effect on DB re
Index TMF causing an abort or end transaction in a service 4-31 designating auditing for a service 2-5 Pathmaker catalog auditing requirement for 2-22 Reply table and 9-38 RESTART Limit, changing 9-27 server class for standard servers 8-10 TMF-DB-SERVER server class 8-10 Transaction Application Language See TAL Transaction Copy Library null values and C-8 requester linkage and 9-10 Transaction Monitoring Facility See TMF Transaction requester See TRNS requester TRNS requester adding to installed applicatio
Index UPSHIFT clause 2-28, 2-33 USER actions example of 9-17 requester copy libraries and 9-3 User Conversion field 9-23 User conversion procedures adding 9-22 summary 9-2 User conversion routines 2-44 User exits See User conversion procedures User ID 9-10 User interface planning and design 2-9 User-supplied functions 2-23 USERCODE variable 9-22 Utilities PMPROJECT, installing projects 7-8, 7-9 using 1-5 Utility Menu screen 8-2 V VALU, null values and C-1 VALUE clause 2-33, 5-15 Values controlling values a
Index View protection primary key or unique index and 3-30 rules for efficient queries 3-31 shorthand, restrictions for 3-30 Virtual page in Screen Painter 6-3 Volume naming rules 2-17 W Work subvolume full screen interface 3-11 naming rules 2-13 possible contents of 2-13 Working-Storage null values and C-1 pseudofield declaration and 6-12 T9154CPY and 9-24 Special characters $RECEIVE 9-38 * (asterisk) clustering keys and C-9 efficient access fields and 3-31 on DB requester screens 5-30 qualified names in
Index ?DDL command 2-35 ?DICT command 2-34 ?EDIT command 2-35 ?OUT command 2-35 ?SECTION USER-PRE-INIT 9-8 ?SECTION USER-SECURITY 9-8 ?SOURCE command 2-35 @ (at sign) 6-12 @ADVISORY DDL picture of 9-55 definition of 9-54 Screen Painter and 6-3, 6-11 sending to services 5-37 @CURRENT-PAGE DDL picture of 9-55 definition of 9-54 Screen Painter and 6-2, 6-11 sending to services 5-37 @CURSOR-FIELD contrasted to @CURSOR-POSITION 9-57 DDL picture of 9-55 definition of 9-54 OCCURS clause and 5-17 point fields and
Index @LOGICAL-TERMINAL DDL picture of 9-55 debugging 9-59 definition of 9-55 Pathway terminal name and 5-37 Screen Painter and 6-2, 6-11 sending to services 5-37 using 9-59 @PAGE-COUNT DDL picture of 9-55 definition of 9-55 Screen Painter and 6-2, 6-11 sending to services 5-37 @PHYSICAL-TERMINAL DDL picture of 9-55 definition of 9-55 Pathway terminal/program object name and 5-37 sending to services 5-37 using 9-59 @TIME DDL picture of 9-55 definition of 9-55 Screen Painter and 6-2, 6-11 sending to service