Information Management Technology Library PS TEXT FORMAT Reference Manual ™ Abstract Part Number This manual explains in detail the commands and advanced features of the PS TEXT FORMAT formatter product.
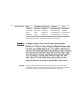
Document History Edition Part Number Product Version First Edition Second Edition Update 1 Third Edition 82384 A00 82478 A00 82243 11387 TFORM B20 TFORM B30 TFORM C00 TFORM C10 OS Version GUARDIAN 90 B20 GUARDIAN 90 B30 GUARDIAN 90 C00 GUARDIAN 90 C10 Date October 1985 April 1986 November 1987 March 1989 New editions incorporate any updates issued since the previous edition. Copyright All rights reserved.
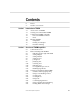
Contents ix xv Section 1 Introduction to TFORM 1-1 1-1 1-2 1-2 1-4 1-5 1-5 1-8 1-8 Section 2 Preface Notation Conventions An Overview of TFORM Creating a Document With TFORM Constructing TFORM commands Parts of a TFORM command Units Running TFORM Using RUN Printing Your Output Default Formatting Overview of TFORM Capabilities 2-1 2-2 2-2 2-4 2-5 2-6 2-8 2-9 2-10 2-10 2-12 2-13 2-15 2-15 2-18 2-21 2-23 2-24 2-25 2-26 2-26 Command Overview Basic Formatting With TFORM Indicating Form Length and Width Se
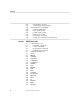
Contents 2-27 2-28 2-30 2-30 2-30 2-31 2-31 2-31 2-32 Section 3 TFORM Commands 3-1 3-1 3-3 3-4 3-5 3-6 3-6 3-9 3-11 3-13 3-16 3-18 3-21 3-26 3-29 3-30 3-31 3-37 3-41 3-46 3-50 3-55 3-58 3-62 3-64 iv Customizing Your Text Controlling the Printed Output Advanced Features of TFORM Sourcing in Other Files Using Auxiliary Files Conditional Processing Repetitive Processing Generating Form Letters Creating Your Own Macros and Functions Command Overview Formatting Commands Control Commands Programmatic Comman
Contents 3-71 3-83 3-94 3-98 3-102 3-103 3-105 3-108 3-118 3-131 3-135 3-137 3-151 3-153 3-154 3-156 3-161 Section 4 LEVEL LIST LOOP MACRO Macro Invocation Command NEW PAGE PRINT SET SOURCE SPACE STYLE Temporary Indentation (TI) TIME TITLE TODAY VERBATIM Escape Sequences 4-1 4-2 4-2 4-2 4-3 4-5 4-5 4-6 4-6 4-7 4-7 4-8 4-8 4-9 4-11 Metacharacters Comment Metacharacter Discretionary Hyphen Tabulation Symbol Backspace Symbol Rendition Controls Boldface Type Changing Fonts Overstruck Type Shadow Type Subsc
Contents Section 5 Expressions 5-1 5-2 5-3 5-3 5-3 5-5 5-5 5-13 5-13 5-13 5-14 5-15 5-15 5-16 5-16 5-17 5-18 5-19 5-20 5-20 5-20 5-21 5-22 5-22 5-22 5-23 5-23 5-24 5-24 vi Introduction Primary Expressions Complex Expressions Expression Types Examples of Expressions Variables System Variables Operands Operators Unary Operators Binary Operators Logical Operators Comparing Operand Types Evaluation of Expressions Functions ABS Function ALIGN Function ARG Function CHR Function DEFINE Function FIND Function J
Contents 5-25 5-25 5-26 5-27 5-28 5-28 Section 6 ROMAN Function SELECT Function STRING Function TRANSLATE Function UPPER Function WIDTH Function System Parameters 6-2 6-3 6-5 6-6 6-7 6-8 6-9 COPIES DEVICE^TYPE FORM HOLD PRINTER^TYPE REPORT^NAME SPOOLOUT Appendixes A-1 B-1 C-1 D-1 E-1 F-1 G-1 H-1 Syntax Summary TFORM Messages Limits and Defaults Comparison of TGAL and TFORM TFORMCVT: Converting From TGAL to TFORM Moving Between TFORM and T-TEXT Examples of Function and Macro Constructs Font Character
Contents Tables 1-4 1-9 3-76 3-79 3-81 5-4 5-6 5-9 5-10 5-11 5-14 5-14 5-15 A-12 A-17 A-20 A-21 A-22 D-1 H-2 H-5 H-8 H-11 H-13 viii Table 1-1. Table 1-2. Table 3-1. Table 3-2. Table 3-3. Table 5-1. Table 5-2. Table 5-3. Table 5-4. Table 5-5. Table 5-6. Table 5-7. Table 5-8. Table A-1. Table A-2. Table A-3. Table A-4. Table A-5. Table D-1. Table H-1. Table H-2. Table H-3. Table H-4. Table H-5.
Preface PS TEXT FORMAT (or TFORM) is a command-oriented text formatter. TFORM operates in two ways: in a sheltered environment under the control of the T-TEXT text editor, or as an independent text formatter. This manual describes the second use of TFORM as a stand-alone formatter. (See the T-TEXT User’s Manual for more information about TFORM in the T-TEXT environment.) You use TFORM to control the margins, indentation, headers, footers, and page numbers of documents that you produce.
Preface Who Should Use This manual assumes that you are familiar with some type of formatter and This Book have read or glanced at the PS TEXT FORMAT Quick Start and the PS TEXT EDIT and PS TEXT FORMAT User’s Guide before using this manual. Note If you are unfamiliar with using a formatter, then you should first read the PS TEXT FORMAT Quick Start and the PS TEXT EDIT and PS TEXT FORMAT User’s Guide before attempting to use this manual to learn TFORM.
Preface Section 5, “Expressions,” describes the constants, variables, operators, and functions you can use to examine, evaluate, and convert various kinds of data and to perform computations. Section 6, “System Parameters,” contains a description of each system parameter, set by the command interpreter’s PARAM command, that affect the environment and activities of TFORM. Appendix A, “Syntax Summary,” lists the syntax descriptions of all TFORM commands, escape sequences, expressions, and functions.
Preface Two reference cards are available for the PS TEXT FORMAT Reference Manual. One describes TFORM commands and functions; the other compares TGAL and TFORM commands. Both are intended as condensed summaries of information that is presented in greater detail in the manual. What’s New in This Manual This edition of the reference manual includes information about new features of and enhancements to TFORM. The update package (part number 82243) is also included in this version of this manual.
Preface Where to Go for Some of the information covered in the PS TEXT FORMAT Reference Manual More Information is also presented in the PS TEXT FORMAT Quick Start, the PS TEXT EDIT and PS TEXT FORMAT User’s Guide, and in the material displayed by the HELP command. Two reference cards available for TFORM are: PS TEXT FORMAT Reference Card TGAL to TFORM Reference Card You can use TFORM to format files created with any of these three Tandem editors: EDIT, PS TEXT EDIT, and T-TEXT.
Preface xiv 11387 Tandem Computers Incorporated
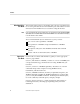
Notation Conventions You must enter commands in a certain form so that TFORM understands them. This form is called syntax. To help you learn to use the TFORM commands, this manual and the TFORM HELP facility adopt certain conventions for representing syntax. Upper- and lowercase letters have specific meanings, and certain other symbols are also used to explain how to enter the command. Spaces and commas separate the parts of the commands (command name, options, and keywords).
Notation Conventions Notation Meaning Punctuation Parentheses, commas, semicolons, and other symbols not described above must be entered precisely as shown. Quotation marks around any symbol indicate that it is not a syntax descriptor but a required character, and you must enter it as shown. char is a single character that can be entered from the terminal keyboard. exp is an expression of numeric, character, or Boolean type.
1 Introduction to TFORM An Overview of TFORM PS TEXT FORMAT (we’ll use the more familiar name of TFORM throughout this manual) is a text formatter. You use it to convert documents stored as files on disc (files usually created by a text editor) into usable form on paper.
Introduction to TFORM 2. You type TFORM commands in your document along with the rest of the text. These commands tell TFORM how you want the printed file to look. You usually enter TFORM commands on lines above the text that you want TFORM to act upon. TFORM distinguishes commands from your text by specific characters in the command line. 3. You run TFORM with that document file and give TFORM a print location to which to send the formatted document.
Introduction to TFORM You can put multiple commands in a line, separated by semicolons. If you do this, only the first command on the line is preceded by a trigger; don’t put triggers before the subsequent commands in the line. Note An exception to this general rule is the COMMENT command. If you include a COMMENT command on a line with other commands, it must be the last command on the line: TFORM views everything to the right of a comment as commentary and does not print it.
Introduction to TFORM Units Some commands accept units of measurement. You can use a number of different units: characters, centimeters, decipoints, inches, lines, millimeters, picas, or points. You specify them as CHARS, CM , DECIPOINTS , INCHES, LINES, MM, PICAS, or POINTS (you can abbreviate any unit name with its first two or more characters). Whatever unit you use, TFORM stores it in the form of decipoints. Table 1-1 is a conversion list for the various measurements.
Introduction to TFORM Running TFORM Using RUN Once you have completed your document and added all your TFORM commands, you are ready to run TFORM and print your document. You start TFORM with an implied RUN command from your command interpreter, specifying your document file as the input file and a print location as the output file. TFORM processes the input file, creates the formatted output file, and sends it to the specified print location.
Introduction to TFORM TFORM / [ IN infile ][, OUT outfile ] / \command [;...] text infile is the primary input file, an edit-format document file. If you omit the IN parameter, TFORM accepts input from your terminal keyboard. outfile is the file, device, or process (usually the spooler) to which TFORM sends your document. If you omit the OUT parameter, TFORM sends its output to your terminal screen. command is a TFORM command to be executed before any commands in the input file.
Introduction to TFORM You can’t mix commands and text in the RUN command. If you start with one or more commands and follow them with text, TFORM issues an error message because the text doesn’t resemble any recognizable command (if it does, you might be in even deeper trouble). If you start with text and follow it with commands, TFORM thinks the commands are just more text. When you use an edit file name as the outfile in your RUN command, TFORM first checks to see if that file name already exists.
Introduction to TFORM Printing Your Output The TFORM output usually goes through the spooler, which is a system program that receives output and stores it on disc until the print location you have designated becomes available. By sending it to the spooler, you have a chance to preview the formatted file with PERUSE (another process you invoke from the command interpreter) and to make any amendments, adjustments, or corrections before printing the document.
Introduction to TFORM Table 1-2. TFORM Formatting Defaults Feature Default Value Form length Form width Top margin Bottom margin Left margin Right margin Horizontal pitch Vertical pitch Interline spacing Line justification Line joining Headers Footers Page numbers Hyphenation 11 inches 8.5 inches 0.5 inch 0.5 inch 0.75 inch 0.
Introduction to TFORM Figure 1-1.
2 Overview of TFORM Capabilities Command Overview The TFORM command set is designed to meet the needs of a broad range of users. You can think of it as having several layers of capability. At its core are the commands to handle the basic formatting that every document requires (and that every user uses). Beyond that are the commands that only more specialized documents require (and that only more sophisticated users are likely to have need of).
Overview of TFORM Capabilities The following paragraphs attempt only a brief survey of the capabilities of TFORM. They take a closer look at the core features than at the advanced. For a full description of the commands touched on here, refer to Section 3. Basic Formatting The first thing you need to learn is how to control the basic structure of With TFORM your page with TFORM. Figure 2-1 identifies the elements of page layout that TFORM recognizes and allows you to affect.
Overview of TFORM Capabilities Figure 2-1. TFORM Page Layout Form Width Use PRINT OFFSET to shift the entire formatted page to the right or left Top Margin Print Offset Left Header Margin First Header . . . HEADER REGION nth Header Right Header Margin Header Gap Left Margin TEXT REGION Right Margin Form Length The text area adjusts to accommodate the number of headers and footers Footer Gap Use INDENT LEFT or INDENT RIGHT to temporarily adjust your margins Left Footer Margin First Footer .
Overview of TFORM Capabilities You can abbreviate these commands or express the measurements in other units if you choose. Each of the following sets of command examples, for instance, are equivalent to the previous ones: \STY FOR WID 7; STY FOR LEN 9 Notice that you can combine two or more commands on a command line if you separate them with semicolons. \STYLE FORM WIDTH 42 PICAS \STYLE FORM LENGTH 648 POINTS When you don’t explicitly indicate a unit of measurement with STYLE FORM, TFORM assumes inches.
Overview of TFORM Capabilities Setting Headers A header is a line of text that prints across the top of each page of your document. Generally, you use headers (or running heads, as they’re sometimes called) to display information about the document to which a page belongs or about the content of the page. To set up a header, you use the HEADER command, enclosing in quotation marks the text that you want to print.
Overview of TFORM Capabilities TFORM also lets you vary the placement of your header from page to page. Suppose you plan to print your document using both sides of the paper and then binding it like a book. You’d probably want your headers to appear in the outer corners for highest visibility. Thus, on the left-facing (or evennumbered) pages, you’d want the header to be left-justified; and on the right-facing (or odd-numbered pages), you’d want the header to be rightjustified.
Overview of TFORM Capabilities More About Headers and Footers When establishing headers and footers, remember: TFORM lets you define up to ten headers and ten footers; ordinarily you won’t want more than one or two of each. If you plan to use more than one header or footer per page, you must identify them in your commands as HEADER 1, HEADER 2, FOOTER 1, FOOTER 2, and so on.
Overview of TFORM Capabilities Joining Text Once you’ve established your margins, you can allow TFORM to decide where lines should end to best fill the available space. If you tell TFORM to join all lines automatically, you don’t have to worry about whether the lines of text as you type them are too long or too short.
Overview of TFORM Capabilities Justifying Text TFORM also lets you justify your text. If you want both the right and left ends of formatted lines to align on their respective margins, use the SET command to tell TFORM: \SET JUSTIFY ON When TFORM has completed regular formatting of a line, it starts adding extra space—alternating left and right sides of the line and working inward from the ends—until the line just fills the line width determined by whatever margins are in effect.
Overview of TFORM Capabilities Centering Text If you want to center text on a page, use the CENTER command. To center five lines of text, for example, type the following command on the line just before the lines you want centered: \CENTER 5 You can also tell TFORM to center all following lines until it sees a blank line, a command line, or until you turn centering off.
Overview of TFORM Capabilities Unless you explicitly indicate a direction of indentation, TFORM assumes you mean LEFT. If you want to indent from the right or on both sides, use INDENT RIGHT or INDENT BOTH and the number of characters. Unless you explicitly indicate a unit of measurement, TFORM assumes you mean characters.
Overview of TFORM Capabilities There is a one-character difference between setting a margin and indenting. A margin setting of 10 starts you at position 10; when you indent 10 spaces, you begin typing at position 11. When you use a form of INDENT like INDENT 5 3, indicating a specific number of lines to indent, TFORM indents whatever text you’ve typed on that number of input lines.
Overview of TFORM Capabilities Handling Page Breaks There are two ways of handling page breaks with TFORM: you can let TFORM make page breaks arbitrarily or you can tell TFORM whenever you want to start a new page. As TFORM formats, it keeps track of the number of lines remaining in the text region of the current page. In the absence of any instruction from you, TFORM automatically stops formatting text when no more free lines are left, prints the page footer (if any), and advances to the next page.
Overview of TFORM Capabilities You can also tell TFORM to keep all following lines together until it sees a blank line, a command line, or until you turn KEEP off. The forms of the KEEP command that you use in these cases are, respectively: \KEEP BLANK \KEEP COMMAND \KEEP ON \KEEP OFF Tips Since the STYLE command sets up page-formatting conditions that typically remain in effect throughout a document, put all your STYLE commands at the beginning of your input file before any text.
Overview of TFORM Capabilities TFORM lets you put notes in your input file that it does not construe as text when formatting. To do this, use the COMMENT command, following it on the same line with whatever text you want. You can use this feature for such things as file history, reminders to yourself about how you’ve set up the file, or instructions for someone else about how the file should be handled.
Overview of TFORM Capabilities Sentence styling controls the number of spaces following the end of a sentence. Paragraph styling involves the gap between paragraphs, indentation of the first line of a paragraph, and protection from stranded single words or lines at the beginning or end of a page. Note For these STYLE commands to have much effect, you must turn on joining with SET JOIN ON. Without joining, TFORM leaves your text basically as it finds it in your file.
Overview of TFORM Capabilities Paragraph Indentation Suppose you want to indent the first line in every paragraph five characters. You do this with the STYLE PARAGRAPHS INDENT command: \STYLE PARAGRAPHS INDENT 5 If you don’t give a unit of measurement, TFORM assumes you mean characters.
Overview of TFORM Capabilities The STYLE PARAGRAPH TOP command works the same way STYLE PARAGRAPH BOTTOM does.
Overview of TFORM Capabilities For lower-level headings, you simply add the text on the command line, placing the text in quotation marks like the level 0 head. Here are several examples: \LEVEL 1 "Globe Trotting on a Shoestring" \LEVEL 4 "Vacationing in Morocco" \LEVEL 5 "Stretching Your Travel Dollars: Marrekech" These examples show the simplest way to use the LEVEL command to create headings. Each of the levels of heads have preset defaults that TFORM uses to style the headings.
Overview of TFORM Capabilities Heading Style Specifications To control the style in which TFORM prints section headings, use the LEVEL STYLE command. LEVEL STYLE 0 takes care of level 0 headings, LEVEL STYLE 1 is for level 1 headings, and so on. You can print your headings in boldface, with numbers, underscored, centered, or with combinations of these features. However, for the LEVEL STYLE command to work properly, you must enter one of these three options: LEFT, CENTER, or RIGHT.
Overview of TFORM Capabilities Creating a Table of Contents When you use LEVEL commands, TFORM stores each heading you enter with the LEVEL int command (LEVEL 1 “title”, LEVEL 2 “title”, and so on). Unless you force a partial table of contents, TFORM automatically generates a table of contents for each section, using all the stored heads, at the end of its processing run.
Overview of TFORM Capabilities The following examples show how to put together a number of basic lists. 1. Here’s how to create a bulleted list: \BEGIN LIST BULLET \ITEM This is the first item. \ITEM This is the second item. . . . \END LIST When TFORM formats your output, it looks like this: • This is the first item. • This is the second item. If you simply type BEGIN LIST, you’ll get a bulleted list by default. 2.
Overview of TFORM Capabilities The letters used for the labels are lowercase by default. If you want to use capital letters, add the keyword UPPER to the BEGIN LIST ALPHABETIC command. If your alphabetic list contains more than 26 items, TFORM automatically begins doubling the letters, using “aa.” and so on for the labels following “z.” 4. To create a Roman-numeral list, simply change your BEGIN LIST command to BEGIN LIST ROMAN. Again, the rest stays the same.
Overview of TFORM Capabilities To close off your box, type: \SET BOX OFF If TFORM comes to the end of the page before reaching the SET BOX OFF command, it closes off the box at the bottom of the page and starts a new box at the top of the next.
Overview of TFORM Capabilities To use the tabs you set, insert the character “ \>” before the text that you want moved over to a tab position. So, for example, if you are setting up a three-column table, the input file would begin like this: \Level 1 "Summary of Vacation and Sick Days--Hours Accrued" \SET TABS ON 10, 40, 50 \>Employee Name \>Vacation \>Sick \>Albert, Dan \>30 \>48 \>Alfaro, Victor \>106 \>55 \>Ataka, Cynthia \>86 \>63 . . .
Overview of TFORM Capabilities To turn off automatic hyphenation, simply type: \SET HYPHENS OFF Using Sequential Line Numbering If you want TFORM to print sequential line numbers in your right margin, starting at 1 where the command occurs in the text, then starting over with 1 at the top of the next page, type: \SET SEQUENCING ON Six characters must be available in the right margin of your page form for the sequencing to work.
Overview of TFORM Capabilities Customizing Your Text To achieve such effects as boldface, overstrike, subscript, underline, and so on—where the text requiring the special treatment is not necessarily keyed to whole lines—TFORM provides a number of special control commands called escape sequences.
Overview of TFORM Capabilities 4. If you want to create a superscript or a subscript, type: \UP ( your text \) or: \DOWN ( your text \) TFORM prints superscript or subscript text one-half line above or below the current line, respectively. These commands only work on certain printers. If your printer can’t handle superscripts or subscripts, TFORM issues a warning message and prints the text normally.
Overview of TFORM Capabilities Page Control You use the PRINT PAGES command to print specific pages, or a range of pages, in your document. For example, if you want to print page 18, type: \PRINT PAGES 18 If you want to print a range of pages, type: \PRINT PAGES 19/27 To print separate groups of pages, type: \PRINT PAGES 6, 12/29, 33, 35 You can put this command in your file, but the more useful place for it is following the RUN command you use to send your document to the printer (see Section 1).
Overview of TFORM Capabilities TFORM single-spaces text by default, but you can control the interline spacing with the SET SPACING command. If, for example, you want to double-space your text, simply type: \SET SPACING 2 You can also use 1.5, 3, and so on all the way up to 32. If you type SET SPACING without any number, you will automatically get single-spacing (with extra space for subscripts and superscripts if your printer has this capability).
Overview of TFORM Capabilities The FILE command contains a FILE OPEN command, for which you must specify READ or WRITE; a FILE READ command; a FILE WRITE command; and a FILE CLOSE command. When TFORM is finished with your file, it closes all files you opened.
Overview of TFORM Capabilities Creating Your Own Macros and Functions You can create your own macros with the MACRO construct, a series of commands and text that work together somewhat like a subroutine. The lines between the MACRO BEGIN command and the corresponding ENDMACRO command define the actions of the macro; these actions can be almost anything you want within the TFORM environment. You can also create your own functions with the FUNCTION construct.
3 TFORM Commands Command Overview Formatting Commands This brief overview of the commands available in TFORM presents the commands categorized by type of command and briefly summarizes the commands in each category. Formatting commands directly control the appearance of the output. BREAK forces a line break at the point where it appears; TFORM suspends joining and doesn’t justify the line preceding the BREAK command.
Introduction to TFORM 3–2 KEEP makes sure that input lines within its scope stay together on the same page. NEW starts a new page; you can specify that the next page is to be odd or even (ejects a blank page if necessary). PAGE sets the page number, turns page numbering on and off. SET switches various internal TFORM flags on and off to control formatting aspects such as boxes, joining, justification, change marks, and hyphenation.
Introduction to TFORM Control Commands Control commands indirectly influence the output by affecting the action of the formatting commands and the parameters they work with; these commands also affect the execution and environment of TFORM. ASSIGN computes a value from an expression and assigns that value to a variable. COMMENT allows you to insert explanatory comments into your document without affecting formatting.
Introduction to TFORM Programmatic Commands You can use programmatic commands to create program-like constructs for performing conditional, repetitive, or parameter-driven processing. Programmatic commands are a little different than the other commands. They cannot be abbreviated like the previous types of commands, and they cannot be combined with other commands (except with COMMENT); each must be on a line by itself.
Introduction to TFORM Standard Macro Summary These six standard macro packages are supplied with TFORM and perform formatting and control activities. Their invocations are identical in form to TFORM commands, and are treated as such for purposes of description here. HELP presents the syntax of all the TFORM commands. HELP is both a teaching aid to those learning TFORM and a memory aid for experienced TFORM users.
Introduction to TFORM Command The following pages describe, in alphabetical order, all the TFORM Descriptions commands and provide a syntax summary, examples, command options and their explanations, and tips for each command. ASSIGN You use the ASSIGN command to associate a variable name with an expression. TFORM examines the expression (doing any necessary computations) to evaluate it to a single value, then stores the value in the variable name.
Introduction to TFORM How to Use ASSIGN You use the ASSIGN command to store either a numeric or string value in a variable that you name. When you use the variable name later in your document, TFORM inserts the value of the variable where you call it. Variables you create with the ASSIGN command can be easily updated. For example, say your document is draft version 3.1, and you refer to this version number several times in your text.
Introduction to TFORM Tips If the value of the expression is a character string, the variable, after the assignment, is a string variable. If the expression has a numeric or Boolean value, the variable is of numeric type after the assignment. Once the type of a variable has been established, you can’t use it in a place where an entity of a different type is required. You can, however, change its type by assigning another value to it.
Introduction to TFORM BREAK The BREAK command specifies a mandatory line break. You can use it to override joining and/or justification for columnar work or paragraph breaks.
Introduction to TFORM How to Use BREAK If you are using the SET JOIN ON command, TFORM determines where to break the lines of your text, using the line length you provide in your STYLE commands. You can override the automatic joining feature with the BREAK command to tell TFORM where to break lines or paragraphs in particular places.
Introduction to TFORM CENTER The CENTER command centers one or more lines of the printed page between the current left and right margins.
Introduction to TFORM How to Use CENTER The different options of the CENTER command are described in the following paragraphs. CENTER int CENTER int centers the input following this command for as many lines as you specify. If no integer is specified, TFORM centers only the next line following the command line. CENTER ON CENTER ON centers lines until TFORM finds a CENTER OFF command. CENTER OFF CENTER OFF tells TFORM to turn off the centering feature.
Introduction to TFORM CHANGES The CHANGES command marks one or more lines of the printed page with change characters in the margin. The default change mark is a vertical line (|), but you can change it to another character with the DEFINE command if you wish.
Introduction to TFORM How to Use CHANGES The different options of the CHANGES command are described in the following paragraphs. CHANGES int CHANGES int marks the input following this command for as many lines as you specify. If no integer is specified, TFORM marks only the next line following the command line. CHANGES ON CHANGES ON marks lines until TFORM finds a CHANGES OFF command. CHANGES OFF CHANGES OFF tells TFORM to turn off the tagging feature.
Introduction to TFORM Tips If you enter a CHANGES OFF command without a preceding CHANGES ON command, TFORM issues an error message. TFORM places change marks in the right margin, whether on a righthand page or a left-hand page. A change character appears one space to the right of the right end of the line it marks (either the actual right margin of the page or the adjusted right margin—changed by the INDENT command, for example—whichever is farther to the right).
Introduction to TFORM COMMENT The COMMENT command allows insertion of explanatory text in the input file. The comments you enter don’t appear in the printed document. What to Enter \ COMMENT ! [ text ] Examples: \COMMENT Figure 13-3 is included to illustrate underlining. \INDENT ON +5; \! COMMENT Added indent is for the boxed note. I set next text wide on purpose; be sure to keep \JOIN OFF . . .described in Chapter 8. \! Double-check this reference.
Introduction to TFORM When you combine the COMMENT version on a command line and the command comes after one or more commands, follow the rules of putting multiple commands on a line the trigger character only appears in the first column of the line, and semicolons separate the succeeding commands.
Introduction to TFORM CONTENTS The CONTENTS command saves strings you include in it for printing in the table of contents. You can also use this command to force printing of a partial table of contents at the point where you enter the command. What to Enter \CONTENTS [ title ] title is a one-, two-, or three-field entity, depending on how you enter it.
Introduction to TFORM How to Use CONTENTS As shown in the preceding examples, you can enter any combination of one, two, or three fields in your title and separate them by the title field delimiter—a vertical bar (|), or any other character you define—to produce left-justified, centered, or right-justified titles on the printed page.
Introduction to TFORM Tips You can put any information in CONTENTS fields that you want, but for a useful table of contents entry you must usually include the page number symbol () in one of the fields if you want TFORM to include the page number on which that entry appears. When TFORM finds the CONTENTS command with such a symbol, it fills in the current page number for you.
Introduction to TFORM DEFINE The DEFINE command defines the characters used to draw boxes, mark changes, delineate title fields, overstrike other characters, and fill lines in the table of contents. You can also use it to change the trigger character.
Introduction to TFORM Examples: \DEFINE BOX CORNERS TOP LEFT "$" \DEFINE OVERSTRIKE "=" \DEF TITLE FIELD " " \DEF TRIG "@" How to Use DEFINE The different options of the DEFINE command are described separately in the following paragraphs. DEFINE BOX Option DEFINE BOX commands specify the characters used to create boxes. You can customize the appearance of your boxes down to a single corner. DEFINE BOX TOP This command defines the character used to create the top edge of a box.
Introduction to TFORM DEFINE BOX SIDES This command names the character used to create the sides of a box. If you specify SIDES without the LEFT or RIGHT modifiers, the character you specify is used for both sides. Conversely, you can make the sides different by specifying one character with a DEFINE BOX SIDES LEFT and another character with the RIGHT modifier. The default is a vertical line (|). DEFINE BOX CORNERS This command defines the characters that will appear in the corners of your boxes.
Introduction to TFORM DEFINE OVERSTRIKE Option DEFINE OVERSTRIKE names the character to be printed over other characters by the \OVERSTRIKE escape sequence. Any printable character is acceptable. The default is a hyphen (-). DEFINE TITLE Options This option defines the characters used by TFORM when it formats the different fields of a title. DEFINE TITLE FIELD DEFINE TITLE FIELD establishes the character used to separate the three fields of a title.
Introduction to TFORM Tips Although TFORM allows considerable freedom in redefining its control characters, you should choose characters that are useful. A comma, for example, is a poor choice as a trigger character because you use it frequently in text. Any DEFINE command that contains no replacement character or string resets that character to its default. For example, if your command is simply DEFINE BOX CORNERS TOP, TFORM resets both top corner box characters to a hyphen.
Introduction to TFORM ENV You can use the ENV command to ontrol the environment (the system, volume, and subvolume) in which TFORM operates. You can change any or all of the default system, volume, or subvolume names TFORM normally uses when it qualifies a file name you specify. What to Enter SYSTEM \system-name \ENV VOLUME $[volume-name $volume-name.] subvol-name ˚ Examples: \ENV SYSTEM \PRISM \ENV VOL $PURPLE \ENV VOLUME $PURPLE.
Introduction to TFORM How to Use ENV When you specify a file name with one of the FILE commands or a SOURCE command and do not fully qualify it (provide the system name, volume name, and subvolume name as well), TFORM automatically expands the file name so it contains all four parts of a fully qualified GUARDIAN 90 file name. By default, TFORM uses the names of the default environment—the system, volume, and subvolume in effect when you invoked TFORM—to expand a simple file name.
Introduction to TFORM Tips When an ENV command contains a name, that name (system, disc volume, or subvolume) must appear in a valid format and must identify a currently available system, volume, or subvolume. The defaults for the ENV command are the system, volume, and subvolume in use when you invoked TFORM. The ENV command can be especially useful when you use the SOURCE command to read in a file from another location.
Introduction to TFORM ERROR You can use the ERROR command to write an error message for a usersupplied macro, function, or construct. What to Enter \ERROR string Examples: \ERROR "This printer requires a different DEVICE ^TYPE." \ERROR "I couldn't find the requested file.
Introduction to TFORM EXIT The EXIT command stops TFORM. What to Enter \EXIT How to Use EXIT You are most likely to enter the EXIT command from the keyboard when you are using TFORM interactively (control-Y has the same effect). You can also include the command in a file if you want to stop formatting before reaching the end of the file (if, for example, you included a number of lines of file-history information at the end and didn’t want to precede each line with a COMMENT command).
Introduction to TFORM FILE The FILE command lets you manipulate from one to eight auxiliary edit files. You can read from a maximum of four files (reading from a nameand-address file, for example, to produce customized form letters) and you can write to a maximum of four files (writing out to a file you’ve created for collecting index entries, for example). What to Enter READ APPEND OPEN file-name WRITE [ PURGE ] \FILE READ { filename | * } var [ ‚var ] ...
Introduction to TFORM Examples: \FILE OPEN MYTEXT WRITE APPEND \FILE READ CLIENTS Title, First_Name, Last_Name, Address \FILE WRITE INDEX "FILE Command, \(sys_pagenumber\)" \FILE WRITE * "I can send this line verbatim to the printer." How to Use FILE The different options of the FILE command are described in the following paragraphs. FILE OPEN Options FILE OPEN opens a file for either reading or writing.
Introduction to TFORM FILE OPEN filename WRITE PURGE This command opens the specified file as a write-only file. If the named file doesn’t exist, TFORM creates it. If it does exist, TFORM purges it and opens a new file with that name. FILE READ Option FILE READ reads data from the specified file, assigning the contents of one record to each variable listed in the READ command.
Introduction to TFORM FILE WRITE Option FILE WRITE outputs the value of each expression listed in the command to a separate record (one EDIT line) in the specified file, converting numeric values to strings before writing them. FILE WRITE filename exp This command writes one output record (one EDIT line) to the named file for each expression in the output list. If an expression has a numeric value, TFORM converts it to a string before writing it.
Introduction to TFORM FILE CLOSE Option You use the FILE CLOSE filename command to close the named auxiliary file. You must issue separate FILE CLOSE commands for each file you have opened. If the file was opened for writing, TFORM writes an end-of-file mark before closing the file. If the file wasn’t open, TFORM ignores the command.
Introduction to TFORM Tips Four read files and four write files are the maximum number of auxiliary files that can be open at one time. With any FILE OPEN command, if four files are already open for reading or writing, TFORM issues an error message and ignores the command. If you fail to supply a FILE CLOSE command, TFORM closes all files that are open when it terminates. You can add a simple IF construct to your file that will check for any FILE command errors.
Introduction to TFORM FOOTER The FOOTER command describes the structure and content of the footer line or lines that may appear at the bottom of a page. You can have as many as ten footers on a page (or as few as none, which is the default), and you can define different footers for odd-numbered pages, even-numbered pages, and the first page of a document.
Introduction to TFORM Examples: \FOOTER FIRST " ** PRELIMINARY *** CONFIDENTIAL ** " \FOOTER NOW "|THIS INSERT PAGE 13A FOLLOWS PAGE 13|" \FOOTER 2 ALL ODD"|Writer E. B. Roberts|page #" \FOO EVEN "page #|Version 2, \sys_date\)|" How to Use FOOTER FOOTER FIRST Option FIRST defines a footer that is to appear only on page number 1 of the document (if the first page number is 27, for example, that might be the first page but it’s not the FIRST page).
Introduction to TFORM Keyword NOW NOW specifies that the footer is to appear on the current page. If you omit it, TFORM waits until the start of the next page to begin using the specified footer. TFORM considers the start of a page to be the first text it sees after reaching a page boundary. You can use the keyword NOW with any of the options described here. Note Certain commands, such as SPACE and TITLE, produce text that is, TFORM sees a SPACE or TITLE command as text on a page.
Introduction to TFORM Although you don’t have to number footers consecutively, TFORM does print them in numeric order (if you define footers 1 and 3, for example, TFORM prints footer 3 right below footer 1). If you want a blank footer, you must explicitly define it (for example, FOOTER 2 “ || “). If you enter a FOOTER command with no title TFORM eliminates that footer line, freeing up more space for text.
Introduction to TFORM FUNCTION TFORM supplies users with a set of functions for evaluating expressions. However, if you want to create your own function, you can use the set of commands in the FUNCTION construct. As with a TFORM-supplied function, you can use your function as part of an expression. When you call the function in your text, it evaluates the expression, which returns a value, which in turn is inserted into your text at that point. A function is a group of commands that you define as a unit.
Introduction to TFORM How to Use the FUNCTION Construct The FUNCTION construct is similar to the MACRO construct. Both resemble subroutines; that is, they can accept and process arguments. The FUNCTION construct, however, defines an expression and returns its value. In addition, FUNCTION constructs cannot produce any lines of text. The different commands of the FUNCTION construct are described in the following paragraphs. FUNCTION function-name BEGIN This command defines a function with that given name.
Introduction to TFORM FUNCTION function-name BEGIN LOCAL The keyword LOCAL in a FUNCTION BEGIN command specifies that all of the variable names following it on a command line represent entities that are used only within the range of the function. The range of a function begins with the FUNCTION BEGIN command and ends with the ENDFUNCTION command, and it includes the ranges of any other functions that the current function might invoke.
Introduction to TFORM ENDFUNCTION function-name This command defines the end of the function named in the FUNCTION BEGIN command. It must be entered on its own line. Using the function name is optional; however, if the name is specified, it must match the name given in the FUNCTION function-name BEGIN (or APPEND) command. FUNCTION function-name DELETE This command deletes the function with the specified name. You would probably use this command to make way for another function with the same name.
Introduction to TFORM Tips You neither abbreviate FUNCTION, RETURN, or ENDFUNCTION commands nor combine them with other commands; each must be on a line of its own. Unlike macros, functions cannot create text lines and cannot produce side effects such as turning the JOIN command ON or OFF. You can put FUNCTION constructs anywhere you want in your document, but you should group them together in one place. If you put them in a separate file and read them in, several different documents can share them.
Introduction to TFORM HEADER The HEADER command describes the structure and content of the header line or lines that may appear at the top of a page. You can have as many as ten headers on a page (or as few as none, which is the default). You can define different headers for odd-numbered pages, even-numbered pages, and the first page of a document.
Introduction to TFORM Examples: \HEADER FIRST "|*** THIS IS THE FINAL DRAFT ***|" \HEADER NOW "INSERT THIS PAGE AFTER PAGE 27" \HEADER ALL ODD "Page #||INTERNAL DRAFT" \HEA EVEN "COMMENTS DUE JUNE 20th||" How to Use HEADER The different options of the HEADER command are described in the following paragraphs.
Introduction to TFORM Keyword NOW NOW specifies that the header is to appear on the current page. If you omit it, TFORM waits until the start of the next page to begin using the specified header. TFORM considers the start of a page to be You can use the keyword NOW with any of the options described previously. Note Certain commands, such as SPACE and TITLE, produce text.
Introduction to TFORM If you want a blank header, you must explicitly define it (for example, HEADER 2 “ || “). If you enter a HEADER command with no title, TFORM eliminates the header line, freeing up more room for text.
Introduction to TFORM HELP The HELP command provides new and experienced users with detailed assistance on several TFORM topics. These topics include the syntax of all the TFORM commands, a summary table describing operators, and short definitions of functions and system variables. What to Enter \HELP The HELP Facility Use the HELP facility interactively. Type TFORM, press RETURN, then type \HELP at the “?” prompt.
Introduction to TFORM Examples: \HELP FOOTER \HELP SYN CONV \HELP ALL \HELP SYS PRINT FLAGS How to Use HELP The HELP command is a little different from most other commands, in that you use HELP interactively (that is, you type TFORM at your command interpreter to get a TFORM prompt, then ask TFORM for the HELP facility) rather than use the HELP command in your file. The HELP facility is designed to be used online as a reference when you need a quick review.
Introduction to TFORM HELP ESCAPES This command displays the syntax and use of TFORM escape sequences (these sequences include metacharacters, rendition controls, and indirection). When you tell TFORM to print a portion of text in boldface or to overstrike a sentence, you must use an escape sequence to set up such a request. Section 4 describes escape sequences in more detail. HELP OPERATORS This command displays a table that summarizes the type, operation, operand, and result relevant to each operator.
Introduction to TFORM HELP SYSTEM SET FLAGS This command presents the user with a chart listing the characters of SYS_SETFLAGS, a string containing 14 characters that represent flags set by the SET command. You can use the variable SYS_SETFLAGS to determine if a particular SET command option is ON or OFF. HELP SYSTEM VARIABLES This command presents short definitions of system variables that TFORM creates and maintains. You can use these variables in expressions. System variables are described in Section 5.
Introduction to TFORM You can evaluate the strings of the SYS_CHARS, SYS_SETFLAGS, and SYS_PRINTFLAGS variables by using the STRING function. For example STRING(SYS_SETFLAGS,8,8) will evaluate whether the option represented by the eighth character of the SYS_SETFLAGS string—text joining by SET JOIN—is “1” or “0” (ON or OFF). To evaluate more than one character of the string, you can specify a range of characters.
Introduction to TFORM IF An IF construct allows you to do conditional operations and formatting. You build an IF construct with the following options IF a condition is true, do something. ORIF the first condition is false and another is true, do something else. ELSE if none of the above are true, do something else entirely. Finally, an ENDIF terminates the construct. What to Enter \IF exp . . . commands and/or text . . . [ \ORIF exp ] . . . commands and/or text . . . [ \ELSE ] . . . commands and/or text .
Introduction to TFORM Example \IF title="Ms." Career women such as yourself recognize the value of a dollar, \ORIF title="Dr." Professional people such as yourself are aware of the money situation, \ELSE \ IF title="Mr." \ ASSIGN people "men" \ ORIF title="Mrs." \ ASSIGN people "women" \ ELSE \ ASSIGN people "folk" \ ENDIF Hard-working \(people\) like you know what it takes to make a buck, \ENDIF so we're sure you'll be interested in hearing about our new investment plan.
Introduction to TFORM If the expression is false, TFORM bypasses the lines that follow; it does, however, look to see if any of them are the corresponding ORIF or ELSE command that provides an alternate course of action. If TFORM finds an ORIF command, and the preceding IF or ORIF was false, it evaluates that command’s expression to see if it should take an alternate path of action; it takes that path or bypasses it, depending on the expression’s value, just as with the initial IF command.
Introduction to TFORM INDENT You can use the INDENT command to temporarily change the left or right margin, or both margins, from the locations defined by the most recent STYLE MARGIN commands or other INDENT command. You can move the margins inward toward the center or outward toward the edge of the paper.
Introduction to TFORM Examples: \INDENT 3 LEFT 5 \INDENT ON BOTH -2 PICA \INDENT BLANK RIGHT 10 \IND OFF LEFT How to Use INDENT INDENT by itself, with no options or keywords at all, cancels all indentation and returns both margins to their most recent STYLE MARGIN settings. The different options of the INDENT command are described separately in the following paragraphs. INDENT int This command indents the next int input lines. INDENT with no value for int indents the next input line only.
Introduction to TFORM Keywords LEFT, RIGHT, and BOTH You can further modify the INDENT commands with the keywords LEFT, RIGHT, and BOTH. These keywords specify which margin you want indented. If you do not specify any of them, TFORM assumes you mean LEFT. Values num and units You need to include a value for num when you want to indent from the margin. The value of num tells TFORM how many units to indent.
Introduction to TFORM Tips You must include num in INDENT commands that initiate indentation so TFORM knows how much it’s supposed to indent, but you do not need to include num in an INDENT OFF command. If you do, TFORM turns off indentation and issues an error message as well (“TOKENS AFTER COMMAND IGNORED”). Simply delete the num value if you receive such an error message. If you enter an INDENT OFF command without a preceding INDENT ON command, TFORM issues an error message.
Introduction to TFORM KEEP The KEEP command prevents TFORM from adding a page break in the middle of text you want kept together. TFORM checks to see if there’s enough room on the current page for the specified text input lines; if there isn’t, TFORM forces a page break and begins printing the text on the next page.
Introduction to TFORM KEEP BLANK This command keeps together all input lines between it and the next blank line. KEEP COMMAND KEEP COMMAND keeps together all input lines between it and the next command line. Tips The maximum number of lines that TFORM can keep together is one page (the exact number depends on how you have defined your page). TFORM treats any excess lines as though they weren’t included in the KEEP command’s scope.
Introduction to TFORM LETTER The LETTER macro package generates customized form letters. The package consists of two macros the LETTER macro, which does the mailing list processing, and the ADDRESS macro, which takes care of dating and addressing each letter. What to Enter \LETTER body-file list-file [date [top-space [addr-lines] ]] body-file is the GUARDIAN 90 file name of the file that contains the body of the letter.
Introduction to TFORM addr-lines is an integer that specifies the minimum number of lines to be used for the inside address. LETTER inserts blank lines following addresses that contain fewer lines than this number. If you omit this parameter, LETTER simply copies the address line for line and does not lengthen it by inserting filler lines. However, one blank line always separates the address from the salutation. Note Note the three options that follow the list-file argument of the LETTER command.
Introduction to TFORM How to Use LETTER You include the LETTER command in the RUN command that starts TFORM. Note that you specify no IN file 1 TFORM / OUT $S.#device/\LETTER body-file list-file; EXIT 1 You must include the backslash preceding the LETTER command You must do two things to use the LETTER macro 1.
Introduction to TFORM When LETTER has processed the last set of data in the list file, TFORM stops. (If you omit the EXIT command in the RUN command line, TFORM enters the interactive mode at this point and gives you a “?” prompt. You can then enter the EXIT command or a control-Y to end the TFORM run.) The syntax for the list file template block is displayed below < address-var > [ pattern ] [ < salutation-var > ] [ < var > ] . . .
Introduction to TFORM var represents variables inserted into the body file. The angle brackets are required. block-separator is one or more characters (not in quotes, unless you intend to use quotes wherever the block separator appears) that marks the end of each data block in the list file; it also marks the end of the template block. It must be different from the pattern, and must not contain a “<” character.
Introduction to TFORM LETTER appends numbers to the address variable name to identify the individual lines of an address. If you use ADDRESS as the name, for example, you can access individual address lines as variables anywhere in the body of the letter by referring to \(ADDRESS1\), \(ADDRESS2\), and so on. Data blocks can contain varying numbers of address lines, but never less than one. If you want, that one line can be a blank line. This would tell TFORM to simply omit printing any inside address.
Introduction to TFORM The letter body file contains the TFORM commands that control the formatting of the actual text of the letter, and it also contains variables (enclosed in indirection escape sequences) that the list file uses when it systematically inserts in the values for each. The list file that works with the preceding body file looks like this 1
= 2 // 3 Throckmorton P.Introduction to TFORM LEVEL LEVEL commands are actually invocations of the TFORM-supplied LEVEL macro package, which you use to generate section headings for your document. What to Enter 0 title [int] FORMAT int BEFORE int AFTER int PAGE ODD EVEN STYLE int \LEVEL CONTENTS LEFT CENTER RIGHT BOLD NUMBER ... UNDERLINE UPSHIFT ON | OFF int INDENT int1 int2 ... int11 LINES int1 int2 ...
Introduction to TFORM string is one or more characters enclosed in quotation marks. int1 int2 ... int11 are the 11 integers that represent the 11 possible section levels in the table of contents int1 represents the level 0 title, int2 represents the level 1 title, and so on. var1 is a variable name you choose. When defined by a LEVEL REFERENCE command, TFORM saves the current section number in this variable and you can insert the saved number later in your document. var2 is a variable name you choose.
Introduction to TFORM How to Use LEVEL The following paragraphs describe the different options of the LEVEL command. Specifying the Levels of Headings. You use the following command options to specify the level of a heading. TFORM offers eleven levels of headings; level 0, the highest level, has a different form than the lower-level headings. LEVEL 0 title This command defines a major section or chapter.
Introduction to TFORM TFORM saves the section designator in the system variable SYS_SECTION_NUM, where you can access it. TFORM saves the section title in the system variable SYS_LEVEL0_TITLE. Here are two ways in which you can use these values \HEADER 1 "||\\(sys_level0_title\\)" \FOOTER "||\\(sys_section_num\\)-#" Use of the “\\(exp\\)” double indirection escape sequence is described in detail in Section 4. LEVEL int string A LEVEL int command defines a level 1 through level 10 section heading.
Introduction to TFORM LEVEL FORMAT int LEVEL FORMAT int defines the format in which you want TFORM to print the section title for a level int section. BEFORE int The BEFORE int modifier specifies the number of blank lines you want TFORM to provide before printing the section title. If the section happens to fall at a page break, TFORM doesn’t provide those lines (thus avoiding excessive white space at the top of a page).
Introduction to TFORM PAGE EVEN This command works exactly as the PAGE ODD command, except that the EVEN argument causes TFORM to start a new page on an even page. If you fail to specify one or more format modifiers in a LEVEL FORMAT command, or omit the command entirely for a given level, TFORM uses appropriate default values. The defaults are summarized in Table 3-1. Table 3-1.
Introduction to TFORM LEVEL STYLE Options The LEVEL STYLE commands control the style in which TFORM prints section headings. LEVEL STYLE int LEVEL STYLE int defines the style in which you want TFORM to print the section title for a level int section. You must enter either the LEFT, CENTER, or RIGHT modifier. LEVEL STYLE int LEFT The LEFT modifier tells TFORM to print the section title leftjustified. LEVEL STYLE int CENTER The CENTER modifier tells TFORM to print the section title centered on the page.
Introduction to TFORM LEVEL STYLE int RIGHT The RIGHT modifier tells TFORM to print the section title rightjustified. LEVEL STYLE Keywords The BOLD, NUMBER, UNDERLINE, and UPSHIFT keywords determine whether the title appears in boldface, numbered, underlined, or in all capital letters, respectively. You can specify any combination of these keywords, such as UPSHIFT UNDERLINE or BOLD UPSHIFT, to produce your title in the style you prefer.
Introduction to TFORM Table 3-2. LEVEL STYLE Default Values Level Style 0 1 2 3 4-10 (all fields) CENTER BOLD UPSHIFT UNDERLINE LEFT NUMBER BOLD UPSHIFT UNDERLINE LEFT NUMBER BOLD UPSHIFT LEFT NUMBER BOLD LEFT NUMBER Note that the defaults for levels 4 through 10 are the same. You can set them to different values by modifying the LEVEL STYLE command for the level you want to use. If you want to reset the values of all LEVEL STYLE commands to their defaults, you can type LEVEL STYLE.
Introduction to TFORM LEVEL CONTENTS int This command specifies the lowest-level section that is to be included in the table of contents. If int is 2, for example, level 3 through level 10 titles don’t appear in the table. LEVEL CONTENTS INDENT int This command specifies the indentation in characters for each section level in the table. You can enter up to 11 values in this command to define the indentation for all included levels. TFORM measures all indentation from the left margin.
Introduction to TFORM Table 3-3.
Introduction to TFORM Tips The LEVEL CONTENTS OFF command turns off data collection by issuing a LEVEL CONTENTS –1 command, which simply makes all levels of headings ineligible for inclusion in the table of contents. If you subsequently issue a LEVEL CONTENTS int command with a higher number, you turn data collection back on again.
Introduction to TFORM LIST LIST commands are invocations of the LIST macro package. They allow you to produce lists of various kinds. A list is a series of items (words, phrases, sentences, or paragraphs) linked together by a common ordering format. A list can be nested within another list of the same or a different type. TFORM provides ways for generating alphabetically ordered lists, numerically sequenced lists, bulleted lists, and lists in other formats that you define.
Introduction to TFORM exp must have an integer value. string must be one or more characters enclosed in quotation marks. Examples: \BEGIN LIST PACIFIC_ISLANDS ALPHABETIC \BEGIN LIST ROMAN UPPER GAP 2 1 \BEGIN LIST STYLE "CATEGORY \\(sys_lnum\\)" WIDTH 13 WIDTH is defined as 13 characters to accommodate the label plus 2 blank spaces that will separate the label from the item body. 1 TFORM uses the variable \(sys_lnum\) to increment by 1 the number portion of this label every time it is called.
Introduction to TFORM How to Use LIST Each item in a list has two parts the label and the body of the item. The label is defined by the type of list; for example, the label can be a bullet, a numeral, or one or more words. The label sits to the left of the body of the item, which is indented from the left margin by the width of the label (though you can change this label width). The body is generally descriptive text, but you can set up the body of the item any way you want.
Introduction to TFORM The following paragraphs describe the different options of the BEGIN LIST, END LIST, and ITEM commands of the LIST macro package. BEGIN LIST The BEGIN LIST command defines the ordering format of the list and optionally assigns a name to the list for documentation convenience. (When you have numerous lists, and especially when lists are nested, names can be helpful in keeping track of individual lists).
Introduction to TFORM BEGIN LIST ALPHABETIC BEGIN LIST ALPHABETIC and BEGIN LIST ALPHABETIC LOWER have the same effect They define an alphabetic list with lowercase letters as labels. TFORM prints a label of the form “a. “ for the first list item, “b. “ for the next item, and so on (not including quotation marks). TFORM indents each list item by 4 spaces. BEGIN LIST ALPHABETIC UPPER produces an alphabetic list with uppercase letters.
Introduction to TFORM BEGIN LIST ROMAN BEGIN LIST ROMAN and BEGIN LIST ROMAN UPPER have the same effect TFORM puts a 7-character label in front of each item, indenting the body of the item accordingly. The labels are of the form “I.”, “II.”, “III.”, and so on (not including quotation marks). Note that the Roman numerals expand to the left in the label area, remaining fixed in relation to the text that follows. BEGIN LIST ROMAN LOWER defines a list of the same form, but with lowercase Roman numerals.
Introduction to TFORM For example, to create a list with numbering incremented by a factor other than 1, your commands would be similar to these \BEGIN LIST STYLE 10*SYS_LNUM \ITEM body of item for point 10 \ITEM body of item for point 20 \ITEM body of item for point 30 TFORM multiplies the variable by 10 and creates customized numeric labels for your list.
Introduction to TFORM TFORM uses the value in each ITEM command and substitutes it in turn for the SYS_LDESC in the BEGIN LIST STYLE command.
Introduction to TFORM FORMAT string The FORMAT option provides you with an alternate way to modify labels for standard list items. Instead of using the BEGIN LIST STYLE feature, you specify the list type and customize the label for that list type with the FORMAT option. The FORMAT string is a “picture” that defines what you want the label to look like. A question mark in the string in the command line represents the portion that TFORM must compute. To generate each list item’s label, TFORM 1.
Introduction to TFORM To redefine the bullet as another character (for example, a “>>”), simply enter \BEGIN LIST BULLET FORMAT ">> " If you do not specify a FORMAT string, TFORM supplies the default FORMAT string for the specified list type; the label of the list type appears in its standard format or, if one is provided, with a STYLE exp. ITEM ITEM signals the start of each new item (including the first) in a list.
Introduction to TFORM Tips Recall that characters enclosed within quotation marks represent a string to TFORM. Thus, TFORM can convert any system variable occurring within quotation marks to a string entity. When you use the BEGIN LIST STYLE command and the two variables SYS_LNUM and SYS_LDESC together, you are combining a numeric entity and a string entity.
Introduction to TFORM LOOP The LOOP construct lets you perform repeated actions such as executing the same commands and/or writing the same text the number of times you specify. The LOOP construct also has command options for immediate restarting or immediate termination of the loop. What to Enter \LOOP [ exp ] . . . commands and/or text . . . [ \NEXTLOOP ] . . . commands and/or text . . . [ \EXITLOOP ] . . . commands and/or text . . .
Introduction to TFORM You can also use a LOOP construct to create several boxes side by side on the text page. The tops and bottoms of the boxes are simply text lines, but the sides (you define the depth of the boxes) are in a short LOOP construct =========== ==================== \assign box_depth 5 1 \loop \(box_depth\) 2 = \endloop = = = =========== = = 2 =========== ==================== =========== 1 ASSIGN command stores value of 5 in variable box-depth.
Introduction to TFORM How to Use the LOOP Construct The different commands of the LOOP construct are described in the following paragraphs. LOOP exp LOOP exp specifies that TFORM is to format all the text and/or execute all the commands that appear between the LOOP command and the following ENDLOOP command, int times. You must provide TFORM with an expression that evaluates to int ; it can be of any numeric type, but TFORM truncates any fraction to produce an integer.
Introduction to TFORM Tips You can’t abbreviate LOOP, NEXTLOOP, EXITLOOP, or ENDLOOP commands or combine them with other commands; each must be on a line by itself. If you omit exp, TFORM goes into an infinite loop, which you must explicitly terminate with an EXITLOOP command. All the commands that make up a LOOP construct must be in a single input file. You should, therefore, check that any LOOP construct contained in a sourced-in file is both begun and ended in that file.
Introduction to TFORM MACRO A macro is a group of commands and text that you define as a unit. You can refer to it repeatedly within the main body of your document, and you can pass arguments to it so that its action can be dynamically altered. A macro resembles a subroutine. What to Enter \MACRO macro-name BEGIN [ LOCAL var [‚ var] ... ] APPEND DELETE . . . commands and/or text . . . [ \EXITMACRO | \RETURN ] . . . commands and/or text . . .
Introduction to TFORM How to Use the MACRO Construct You call a macro by using the name in a macro invocation command (described elsewhere in this section). You can also change the structure of a macro within your document by appending lines to it, and you can delete the macro (usually to make way for another macro with the same name) during document processing. The different commands of the MACRO construct are described in the following paragraphs.
Introduction to TFORM MACRO macro-name APPEND This command defines the beginning of a group of lines, up to the corresponding ENDMACRO command, that you want to add to an existing macro with the specified name. If no such macro exists, APPEND has the same effect as BEGIN. ENDMACRO macro-name This command defines the end of the macro named in the MACRO BEGIN command. You must enter this command on its own line.
Introduction to TFORM You can put macro definitions anywhere you want in your document, but it’s a good idea to group them together in one place. If you put them in a separate file and read them in, several different documents can share them. You can abbreviate macro-names, just as you can TFORM-supplied macro and command names. For this reason, any name you use must be unique within its first three characters. You can use 1- and 2-letter names if you wish, but they can’t be abbreviated.
Introduction to TFORM Macro Invocation You use a macro invocation command to start execution of a macro and to Command pass arguments to it. What to Enter \macro-name [ exp1 [ [ exp2 ] ... [ [ exp(n) ] ] ] ] How to Use the Macro Invocation Command Within the body of the macro, you can use the ARG(exp) function (described in Section 5) to access the value, or the text, of each argument you pass to it. ARG(0) gives the number of arguments passed in the current invocation.
Introduction to TFORM NEW The NEW command creates a page break and causes printing to begin on a new page. What to Enter \NEW [ ODD | EVEN ] Examples: \NEW \NEW ODD \NEW EVEN How to Use NEW The different options of the NEW command are described in the following paragraphs. NEW NEW tells TFORM to start a new page. If the formatted output is already at the top of a new page, the NEW command has no effect.
Introduction to TFORM NEW EVEN NEW EVEN starts a page with the next even number following that of the current page, incrementing the page counter accordingly. If the current page has an even number, or if the formatted output is already at the top of a new odd-numbered page, TFORM issues a blank oddnumbered page before continuing the text on the next even page. If the formatted output is already at the top of an even-numbered page, the NEW EVEN command has no effect.
Introduction to TFORM PAGE You use the PAGE command to turn page numbering on and off, set the page counter to begin at a certain integer, and determine the increment TFORM uses to increase or decrease the page numbering. (See also the HEADER and FOOTER commands). What to Enter \PAGE ON OFF [ + | - ] int [ .int ] Examples: \PAGE ON \PAGE -53 \PAGE 14.1 \PAGE OFF How to Use PAGE The different options of the PAGE command are described in the following paragraphs.
Introduction to TFORM PAGE OFF PAGE OFF turns off page numbering. TFORM continues to increment the page counter, however, so that if you issue a later PAGE ON command, the next page will have the correct sequential number. PAGE int [ .int ] PAGE int [ .int ] sets the page counter to int or int.int. TFORM then continues to increment the page counter from that value. If you choose the option of “point” page numbering with int.int, TFORM increments by .01 to number subsequent pages up to int .
Introduction to TFORM Tips The PAGE command is effective only if you have made provision for printing page numbers by putting the page-number character, #, in a title. Refer to the HEADER or FOOTER command for a description of title and how to use the # character in the title. If you enter a PAGE command at the beginning of a page, it takes effect with that page; if any text has already appeared on that page, however, the PAGE command has no effect until the next page.
Introduction to TFORM PRINT The PRINT command controls a number of options available to you in producing your document. These options include printing from selected bins of a cut-sheet feeder, printing selected pages by number, and defining an offset for each page to allow for binding or hole punching.
Introduction to TFORM Examples: \PRINT BIN ALL ODD \PRINT ERRORS OFF \PRINT OFFSET FIRST 5 CHARS \PRI PAG 25/75, 80, 100 How to Use PRINT The options you define with the PRINT command normally remain in effect for the entire document, so you will usually put this command at the beginning of the input file. You can alter a previous command or add a new option by inserting PRINT commands later in the file.
Introduction to TFORM PRINT BIN Options The BIN options control the feeding of paper from either of the two bins of the cut-sheet feeder available with the Tandem 5530 letter-quality printer. If the printer you’re using isn’t a 5530 or doesn’t have a cutsheet feeder attached, TFORM issues a warning message and ignores a PRINT BIN command.
Introduction to TFORM PRINT BIN int The int option allows you to define the bin, 1 or 2, from which paper is to be fed. If you omit it, TFORM resets the bin number for the specified or implied range of pages to the default, bin number 1. For example, if you have letterhead paper in bin 2 and blank paper in bin 1, you could type \PRINT BIN FIRST 2 to print the first page on letterhead paper and all others on plain paper. The default is PRINT BIN 1 and applies to all pages.
Introduction to TFORM PRINT ERRORS Option The PRINT ERRORS option allows you to control the printing of error pages. PRINT ERRORS ON PRINT ERRORS ON (or just PRINT ERRORS) causes TFORM to print error messages when it sends output to an actual device (if any errors exist). For each page of text containing errors, TFORM prints the error messages for that page on another page, separate from the text output. The error pages are numbered to correspond with the respective text pages.
Introduction to TFORM PRINT MANUALLY Option The MANUALLY option, which works only with the 5530 letter-quality printer, lets you feed the first page by hand. Alternately, if you direct your document to your terminal first instead of to an output device, this option allows you to tell TFORM to process your document page by page so you can check it at your own speed. PRINT MANUALLY ON PRINT MANUALLY ON (or just PRINT MANUALLY) causes the printer not to eject a page before starting printing.
Introduction to TFORM PRINT OFFSET Options The OFFSET options let you shift the entire printed portion of a page to the right on odd-numbered pages and to the left on even-numbered pages, thus allowing space for binding or hole-punching. You can create this type of space for an odd-numbered page, for example, by defining a narrow left margin and a wide right margin, then by using PRINT OFFSET commands, which TFORM applies to a page after all other formatting has been done.
Introduction to TFORM PRINT OFFSET +num This command adds num to the current offset for the specified or implied scope of lines. PRINT OFFSET -num This command subtracts num from the current offset for the specified or implied scope of lines. PRINT PAGES Options. The PRINT PAGES options allow you to specify which pages you want printed. The default condition is PRINT PAGES (print all pages automatically).
Introduction to TFORM PRINT PAGES CHANGES This command tells TFORM to print only those pages that contain one or more lines marked with the change character (see also the CHANGES command). PRINT WARNINGS Option The PRINT WARNINGS option enables or disables the printing of warning messages. TFORM classifies certain error conditions as warnings, most of which are the result of the printer (other than a 5530 printer) being unable to do a requested action.
Introduction to TFORM Tips TFORM processes PRINT commands in the order in which it encounters them; a later command supersedes any previous command of the same type that refers to the same scope of pages. The minimum page offset is 0 minus the width of the left margin. The sum of the page offset and the line length must be less than or equal to the current width of the page.
Introduction to TFORM SET The SET command controls environment parameters that govern the way in which TFORM formats lines. What to Enter BOX ON [ ARROW ] OFF CHANGES { ON | OFF } DOWNSHIFT { ON | OFF } ERRORS { ON | OFF } HYPHENS ON int ENGLISH ANYWHERE OFF JOIN { ON | OFF } \SET JUSTIFY { ON | OFF } PITCH HORIZONTAL int PROPORTIONAL VERTICAL int SEQUENCING { ON | OFF } SPACING [ num ] [ FIXED ] TABS { ON | OFF } [ int [ , int ] ...
Introduction to TFORM Examples: \SET BOX ON ARROW \SET JOIN OFF \SET PITCH HORIZONTAL 12 \SET TABS ON 5, 25, 45 How to Use SET The different options of the SET command are described separately on the following pages. SET BOX Option The SET BOX command allows you to create a box in your document. The box can contain as little as two lines or the entire page, and you can put whatever you choose inside it.
Introduction to TFORM SET BOX ON ARROW If you include the keyword ARROW and the box extends over a page boundary, TFORM inserts an extra line with a right-pointing arrow at the right side to indicate that the box continues on the next page. TFORM then closes the box with a line of “box-bottom” characters (hyphens, by default), ends the page, and starts a new box at the top of the next page, continuing to print the text where it left off. If you include ARROW, one less line will fit on the page.
Introduction to TFORM SET DOWNSHIFT Option The SET DOWNSHIFT command allows you to convert all uppercase letters in the number of lines you define to lowercase. SET DOWNSHIFT ON SET DOWNSHIFT ON causes TFORM to convert all uppercase letters to lowercase between this command and the corresponding SET DOWNSHIFT OFF command. SET DOWNSHIFT OFF TFORM continues to execute a SET DOWNSHIFT ON command until it locates this command, which turns off the SET DOWNSHIFT.
Introduction to TFORM SET HYPHENS Option You use the SET HYPHENS command to control hyphenation in your output. SET HYPHENS ON SET HYPHENS ON turns on automatic hyphenation, which remains in effect until TFORM encounters a SET HYPHENS OFF command. The different features that you can choose to customize SET HYPHENS ON are the following SET HYPHENS ON int specifies that int is the smallest number of characters that can be broken off from the rest of the word. The default is 3.
Introduction to TFORM SET JOIN Option You can control the joining of lines with the SET JOIN command. Joining is a feature of TFORM that involves lengthening or shortening lines of text to fit within a certain text width. SET JOIN ON SET JOIN ON turns on line joining, which remains in effect until TFORM encounters a SET JOIN OFF command. When joining is ON, TFORM examines each input line in a paragraph. If a line is too short, TFORM adds one or more words from the next line to your current line.
Introduction to TFORM SET JUSTIFY Option You can control the justification of text lines (vertical alignment of text at the left and right margins) with the SET JUSTIFY command. SET JUSTIFY ON SET JUSTIFY ON causes TFORM to insert extra horizontal space, as needed, in output lines to align the first and last characters of each line with the left and right margins, respectively. TFORM justifies lines differently for different printers.
Introduction to TFORM SET PITCH Option SET PITCH commands control horizontal and vertical spacing of the output text (the number of characters per inch horizontally or the number of lines per inch vertically). The different features you can specify to customize the SET PITCH option are the following SET PITCH HORIZONTAL int sets the horizontal spacing to int characters per inch.
Introduction to TFORM SET SEQUENCING Option The SET SEQUENCING command allows you to number one or more lines of your printed output. SET SEQUENCING ON This command causes TFORM to print a sequence number to the right of each text line, starting with 1 at the point where the command occurs, then starting over with 1 at the top of each page. These are the sequence numbers of the lines on a given page, not the original edit line numbers in the input file.
Introduction to TFORM Spacing Option You can use the SET SPACING command to control how many lines TFORM places between text lines. SET SPACING num This command tells TFORM to output (num-1) blank lines after each line of text. So SET SPACING 1 produces 0 blank lines between text lines (single spacing), SET SPACING 2 gives one blank line (double spacing), and so on. Spacing can be done in half-line increments, too SET SPACING 1.5 yields “line-and-a-half” spacing, and so on.
Introduction to TFORM SET TABS Options The SET TABS command lets you set, remove, and change tab stops. When TFORM sees a symbolic tab escape sequence (\>) in the text (see the explanation of the escape sequences in Section 4), it adjusts the output to begin at the next tab stop to the right of the current print position, or, if no such tab stop exists, at the beginning of the next line (the left margin is always an implicit tab stop). You set tab stops in increments of character positions.
Introduction to TFORM SET UPSHIFT Option The SET UPSHIFT command allows you to convert all lowercase letters in the number of lines you define to uppercase. SET UPSHIFT ON SET UPSHIFT ON causes TFORM to convert all lowercase letters to uppercase between it and the corresponding SET UPSHIFT OFF. SET UPSHIFT OFF TFORM continues to execute a SET UPSHIFT ON command until it locates this command, which turns off SET UPSHIFT. The default condition is SET UPSHIFT OFF.
Introduction to TFORM Tips If you issue a NEW command while a SET BOX command is in effect, TFORM carries the box to the bottom of the page and closes it (printing an arrow if you included the keyword), starts a new page, and reopens the box. This happens even if the very next command after the NEW command is a SET BOX OFF command—in that case, the result is a two-line empty box at the top of the new page.
Introduction to TFORM SOURCE The SOURCE command allows you to include another input file as part of your current document at any point in the document. What to Enter [ PROFILE ] RESTORE SKIP RETAIN USE \SOURCE filename VERBATIM filename is a valid GUARDIAN 90 file name belonging to a file that is either an EDIT file (file code 101) or a T-TEXT file (file code 102). It can be from one to eight alphanumeric characters; the first must be alphabetic.
Introduction to TFORM How to Use SOURCE When TFORM encounters a SOURCE command, it opens the specified file; reads and formats it; and, when TFORM arrives at the end of that file, resumes processing the current file. Additional options in the SOURCE command let you specify whether T-TEXT profile commands in that other file should be used or ignored.
Introduction to TFORM SOURCE filename USE PROFILE RESTORE This command tells TFORM to use any T-TEXT “profile” and formatter settings at the start of the named filename (see SOURCE SKIP RESTORE). The RESTORE option instructs TFORM that when it resumes processing the current file, any changes in format settings caused by commands in the secondary file should be superceded by the settings defined in the current file.
Introduction to TFORM Tips If the secondary file you name is an EDIT file instead of a T-TEXT file, TFORM ignores any profile-oriented options. Because the idea of a T-TEXT profile is inherent in the SOURCE SKIP or SOURCE USE commands, the word PROFILE in the command line is optional. You can use the RETAIN and RESTORE options with or without the SKIP and USE options. RETAIN and RESTORE options do not affect values you assign to variables with ASSIGN commands.
Introduction to TFORM SPACE The SPACE command advances the paper a specified distance. What to Enter \SPACE [ num [ units ] [ PAGE ] ] Examples: \SPACE 4 INCHES \SPACE 12.5 \SPACE 30 PICAS PAGE How to Use SPACE The different options of the SPACE command are described separately on the following pages. SPACEnum [ units ] This command spaces vertically, to the nearest half line, the specified distance. For example, SPACE 1.
Introduction to TFORM Tips To avoid unnecessary white space at the top of a page, TFORM discards any blank lines, such as gaps between paragraphs, when they fall at a page break. TFORM always obeys the SPACE command, however, regardless of where the spacing occurs. This is useful when you need to leave space—perhaps for an illustration—at the top of a page. Interline spacing does not affect the SPACE command.
Introduction to TFORM STYLE The STYLE command specifies formatting conditions that normally refer to the entire document; you should usually put STYLE commands at the beginning of the input file, before any text, or immediately after a NEW command.
Introduction to TFORM Examples: \STYLE FONT 4 "0,8U,0,10,12,0,3,3" \STYLE FORM LENGTH 65 PICAS \STYLE GAP HEADER 1 \STYLE MARGIN HEADER LEFT 5 CHARS \STYLE PARAGRAPHS GAP 2.5 How to Use STYLE STYLE commands normally appear at the beginning of an input file, before you enter any text.
Introduction to TFORM STYLE CHANGES ALTERNATE STYLE CHANGES ALTERNATE tells TFORM to print change bars on the left side for even-numbered pages and on the right side for oddnumbered pages. This feature causes the change bars to appear on the outside borders of facing pages of an open manual. The default condition for STYLE CHANGES ALTERNATE is STYLE CHANGES, which tells TFORM to print the change bars on the right side of every page.
Introduction to TFORM STYLE FORM WIDTH This command provides TFORM with the width of your desired page size. STYLE FORM WIDTH, with no value for num, resets the form width to its default setting, which is STYLE FORM WIDTH 8.5 INCHES. STYLE GAP Options The GAP options specify the amount of space between the lowest header and the first line of text, or the space between the last text line and the topmost footer. STYLE GAP, with no options at all, resets both gaps to their defaults (as described below).
Introduction to TFORM STYLE GAP FOOTER commands These commands work in exactly the same way as the STYLE GAP HEADER commands. STYLE GAP FOOTER, with no value for num, resets the named gap to its default value. The default footer gap is STYLE GAP FOOTER 0, if no footer is defined for the current page (text continues to the bottom margin), or STYLE GAP FOOTER 1, if any footers exist.
Introduction to TFORM STYLE MARGIN BOTTOM Commands These commands work exactly the same as the STYLE MARGIN TOP commands, but reference the space below the last footer line (if any). STYLE MARGIN BOTTOM, with no value for num, resets the bottom margin to its default value, which is STYLE MARGIN BOTTOM 0.5 INCH. STYLE MARGIN LEFT num units You use this command to set the amount of space between the left edge of the form and the leftmost character of the text region to num units.
Introduction to TFORM STYLE MARGIN RIGHT +num This command adds to the current margin setting. If you don’t specify any units, TFORM assumes you mean INCHES. STYLE MARGIN RIGHT -num This command works exactly as the STYLE MARGIN RIGHT +num command does, except that TFORM subtracts from, rather than adds to, the current right margin setting.
Introduction to TFORM STYLE MARGIN HEADER RIGHT +num This command adds to the current header margin setting. If you don’t specify any units, TFORM assumes you mean INCHES. STYLE MARGIN HEADER RIGHT -num This command works exactly as the STYLE MARGIN HEADER RIGHT +num command does, except that TFORM subtracts from, rather than adds to, the current header margin setting.
Introduction to TFORM You can do all paragraph styling on a paragraph-by-paragraph basis. Each STYLE PARAGRAPHS command takes effect with the beginning of the next paragraph. However, you must issue a SET JOIN ON command for STYLE PARAGRAPHS commands to have any effect at all. STYLE PARAGRAPHS, with no options at all, resets both gap and indentation to their respective defaults, described below.
Introduction to TFORM When you define an interparagraph gap with the STYLE command, TFORM outputs exactly that number of blank lines, regardless of the spacing between paragraphs in the input file. (Since TFORM defines a paragraph as “the text that exists between blank lines,” you must separate paragraphs by blank lines in your input file.
Introduction to TFORM STYLE PARAGRAPHS INDENT num units You use this command to tell TFORM to indent the first line of each paragraph num units from the left margin. If you omit the units TFORM assumes you mean CHARS. STYLE PARAGRAPHS INDENT, with no value for num, resets the paragraph indentation to its default setting, which is STYLE PARAGRAPHS INDENT VERBATIM. STYLE PARAGRAPH INDENT + num This command adds to the current indentation.
Introduction to TFORM STYLE SENTENCES Options The SENTENCES options allow you to specify the number of spaces that follow output sentences. SET JOIN ON must be in effect for this feature to work. When joining is on, TFORM looks for sentence endings so that it can adjust the spacing following each sentence. TFORM uses the following algorithm to identify a sentence ending. 1. A word is followed by a period, colon, question mark, or exclamation point.
Introduction to TFORM STYLE SENTENCES VERBATIM You use this command to tell TFORM not to adjust sentence endings at all. (However, if a sentence ends at the end of an input line, TFORM inserts two spaces after it since there might be room on the output line to start the next sentence.) STYLE SENTENCES, with no options at all, sets sentence styling to its default, which is STYLE SENTENCES 2.
Introduction to TFORM The algorithm TFORM uses to add spaces in sentences places one space between words within a sentence and two spaces after sentences (determining the end of a sentence with the conditions listed above). Two unusual conditions cause TFORM to add only one space instead of two between sentences a. The first case is a sentence ending with a single character; for example, “We now move on to Category 3.
Introduction to TFORM Temporary Indentation You use the TI command to indent a single output line of your document. (TI) The TI command always refers to one, and only one, OUTPUT line. What to Enter \TI [ + | - ] num [ units ] num specifies the number of units to indent the affected input lines. If you put a plus or minus sign before num, TFORM adds that amount to or subtracts that amount from the existing indentation; if you omit the sign, TFORM uses that amount as the actual indentation.
Introduction to TFORM How to Use TI If you want to indent just one OUTPUT line, you can use the TI command. It has a similar syntax to an INDENT command, but this command has no range because it only affects a single line. Note also that you can’t specify LEFT, RIGHT, or BOTH; the TI command indents on the left side only. This command must be entered on a line by itself, and the text line to be indented must immediately follow the command line.
Introduction to TFORM TIME The TIME command calls the TIME macro, which uses a system variable, SYS_TIME, to assemble the current time in a standard format. You can use SYS_TIME to include the current time anywhere in your document.
Introduction to TFORM TITLE The TITLE command lets you arbitrarily put a three-part title anywhere in the text region. What to Enter \TITLE title title is a one-, two-, or three-field entity, depending on how you enter it. Its syntax appears as " [ text ] [ | [ text ] [ | [ text ] ] ] " TFORM recognizes the vertical bars (|) as the field delimiters, which divide title into left, center, and right fields.
Introduction to TFORM How to Use TITLE If you need to insert a title in your text, use the TITLE command. As with any title, you can use any combination of one, two, or three fields to produce a title line that is left-justified, centered, right-justified, or any combination of these. You can also include the page number character (#) to print the current page number. The TITLE command causes both a line break and a paragraph break.
Introduction to TFORM TODAY The TODAY command calls the TODAY macro, which manipulates a system variable, SYS_DATE, so that you can include today’s date in your document in any of several formats. You can alter the actual date with the CHANGE option. What to Enter \TODAY SHORT ["char"] LONG USA WORLD [ "m1‚...‚m12" ] CHANGE [ exp1 exp2 exp3˚] m1,...,m12 are names or abbreviations of the twelve months of the year.
Introduction to TFORM Examples: \TODAY SHORT WORLD \TODAY SHORT " " \TODAY LONG WORLD "JAN.,FEB.,...DEC.
Introduction to TFORM TODAY SHORT WORLD In this command, TFORM uses the European convention of listing the day before the month and replaces the slashes with periods. The date is formatted as DD.MM.YY. TODAY SHORT "char" You can add char to the TODAY SHORT command to redefine the field separator to whatever character you choose. For example, TODAY SHORT ”-” formats the date as MM-DD-YY. Remember to enclose char in quotation marks.
Introduction to TFORM TODAY CHANGE exp1 exp2 exp3 If you want to use a date other than the actual current date supplied by TFORM, use this option of the TODAY command. Defining the three exp values sets up the conditions for the TODAY command so it can reassign new values to the SYS_DATE variable. To use this option, you follow these three steps 1. Enter the TODAY CHANGE command with the components of the new date. All three numeric expressions must be present.
Introduction to TFORM Tips To use the command and the variable in your document, you need to first enter the TODAY command. At this point you have defined the variable. You then place SYS_DATE in your input where you want the current date to appear.
Introduction to TFORM VERBATIM The VERBATIM command tells TFORM to treat everything it sees in a file as text and to print the specified range of lines in a file exactly as it appears. Using the VERBATIM command allows you to print a file without TFORM executing any of the commands.
Introduction to TFORM How to Use VERBATIM You use the VERBATIM command if you want to temporarily suspend any text formatting. Your output will be printed exactly as it appears in the file. VERBATIM int This command causes TFORM to treat the next int input lines as text and to print them exactly as they appear in the input file, ignoring any commands and escape sequences. VERBATIM, with no modifier, assumes 1 as the int and prints only the next line exactly as it appears.
4 Escape Sequences A trigger character in the first position of an input line signals the presence of a command line. If TFORM sees a trigger character elsewhere in a line, it expects to find an escape sequence (although an escape sequence can occur at the beginning of a line as well). TFORM can tell by the context whether the entity following a trigger is indeed an escape sequence or something else, such as a comment.
Escape Sequences Comment Metacharacter The comment metacharacter is a trigger character followed by an exclamation point. It looks like this: \! When TFORM sees this character anywhere in a text or command line, it considers this character and everything else on the line to be a comment; thus, it will not print them. If it appears in the first column, TFORM ignores the entire line. (See the description of the COMMENT command.
Escape Sequences Backspace Symbol The backspace symbol is a trigger character followed by a “less than” sign. It looks like this: \< When TFORM sees this metacharacter, it moves the print position to the left one space before resuming printing. You can use this metacharacter to print composite characters such as ¢, ≠, and 6. A number of other possibilities exist, particularly for foreign-language applications.
Escape Sequences Required Carriage Return The required carriage return is a trigger character followed by a period. It looks like this: \. When TFORM sees this metacharacter, it inserts a break and starts a new line. You must put this metacharacter at the end of an input line for it to be recognized. Word Concatenator The word concatenator is a trigger character followed by an ampersand.
Escape Sequences Rendition Controls Rendition control escape sequences tell TFORM to custom-print given segments of text (which you enclose in parentheses). You can nest an escape sequence within another (boldface and overstrike, for example, or subscript and underline) to achieve different printing effects. A nested rendition control can begin anywhere within the scope of an outer one; each closing escape parenthesis in sequence terminates the most recent rendition control.
Escape Sequences Changing Fonts The FONT rendition control causes the enclosed text to be printed in the specified font. It looks like this: \FONTn ( text \) n is a number from 0 through 9. If the font number has been defined in a STYLE FONT command, that font is used; otherwise, the default font 0 is used. Examples: \FONT2(This is a Title\) The first FONT command TFORM encounters is \FONT2; therefore, the following text is printed in font 2 until the \FONT4 command.
Escape Sequences Shadow Type The SHADOW rendition control causes the enclosed text to be shadowprinted. It looks like this: \SHADOW ( text \) Only the 5530 letter-quality printer is capable of true shadow-printing, which consists of printing a character, then printing it again 1/120th of an inch to the right. Other printers print each character twice, producing an effect that is darker than normal type but not as dark as boldface.
Escape Sequences Superscripts The UP rendition control the enclosed text to be printed one-half line above the current line. It looks like this: \UP ( text \) Normally, TFORM moves the current line and all following lines down half a line to make room for the superscript, unless you tell it not to with a SET SPACING FIXED command. For example: This line contains a superscript.
Escape Sequences Indirection Escape Sequence The keyword VALUE (possibly abbreviated) followed by a left parenthesis (or just a left parenthesis immediately following the trigger) identifies an indirection, or value substitution, escape sequence. Following any of these is an expression to be evaluated, then another trigger and a closing right parenthesis.
Escape Sequences In the following example, the ASSIGN command tells TFORM what values to give to the two variables chapter_name and chapter_number: 20. 21. 22. 23. \ASSIGN \ASSIGN This is This is chapter_name "Introduction" chapter_number 1 Chapter chapter_number: chapter_name. Chapter \(chapter_number\): \(chapter_name\).
Escape Sequences Double Indirection Another way of using the indirection escape sequence is with “double indirection” (sort of “the-value-of-the-value-of"). You do this by doubling the trigger character at the start and end of the escape sequence. Such an escape sequence would look like this: \\VALUE ( exp \\) or simply: \\( exp \\) You use double indirection in commands that contain a title, primarily the CONTENTS, HEADER, and FOOTER commands.
Escape Sequences TFORM does the pre-execution scan only once and stores the resulting command image for future use. That's why, in the following example, you don't have to issue a FOOTER command at the end of each page; TFORM just keeps executing the saved one until you issue a new one: \PAGE 1 \FOOTER "\\(sys_pagenumber\\)|\(sys_pagenumber\)|sys_pagenumber" TFORM evaluates the FOOTER command to \FOOTER "\(sys_pagenumber\)|1|sys_pagenumber" when it first encounters it.
Escape Sequences For a command that can evaluate its own expressions (such as ASSIGN or FILE WRITE), it's best to use the expression alone, without any indirection. However, if the expression yields a numeric value and a string is required, you can use either the indirection escape sequence or the STRING function (see Section 5) to convert the numeric value to a string type. For example, given the following source lines: 66. 67. 68. 69.
5 Expressions Introduction An expression is an item of data in various forms that TFORM evaluates to a single value.
Expressions Primary Expressions TFORM expressions can be divided into two categories: primary and complex expressions. A primary expression represents a single value. TFORM evaluates all primaries before going on to evaluate higher ranking entities. Primary expressions include constants, variables, and functions; these are described below. A constant is any expression that contains a value in its structure that can never change.
Expressions Complex Expressions A complex expression is a group of primary expressions, also called operands, that are combined with operators; the operators indicate actions for TFORM to perform on the operands to evaluate the expression to a single result. The types of operators, and the actions they perform, must match the types of the operands (this is explained further under “Operands” and “Operators” later in this section).
Expressions Table 5-1.
Expressions Variables A variable is a name that represents a value. You create your variables and assign it a value. The name must begin with a letter; the remaining characters may be letters, numbers, and/or underscore (_) characters. A variable name is restricted to 32 characters; if TFORM finds a name longer than that, it issues an error message. You can use variable names that are as short as you like, but it’s advisable to use enough characters to make the names meaningful.
Expressions SYS_CHARS This variable is a string that contains the current values of control characters that you can change by means of the DEFINE command. The various characters in the string are shown in Table 5-2. Table 5-2.
Expressions SYS_DEVICETYPE This variable contains an integer, 0 or 1, that represents the type of output device in use. TFORM determines this value either from a PARAM DEVICE^TYPE command or from the actual device type specified in the RUN TFORM command. Device type 1 indicates the 5530 letter-quality printer; 0 indicates any other type of Tandem supported printer.
Expressions SYS_LEFTINDENT SYS_LEFTMARGIN This variable contains the current indentation, in decipoints, from the left margin setting stored in SYS_LEFTMARGIN. This value can be negative. (N) This is the current setting of the text area left margin, in decipoints. (N) SYS_LINEHEIGHT This variable contains the current height, in decipoints, of an output line in the text region, computed from the current values for vertical pitch and interline spacing.
Expressions SYS_PRINTFLAGS This is a string of characters that represent the current values of flags set by the PRINT command. Each is either “1” or “0,” indicating true or false, respectively. The various characters in the string are displayed in Table 53. Table 5-3.
Expressions SYS_SETFLAGS This variable is a string of characters that represent flags set by the SET command. Each is either “1” or “0,” indicating true or false, respectively. The various characters in the string are displayed in Table 5-4. Table 5-4.
Expressions SYS_STACKFLAGS This variable is a string of characters representing flags that indicate whether TFORM is currently processing lines within the scope of various commands. Each is either “1” or “0,” indicating true or false, respectively. The various characters in the string are shown in Table 5-5. Table 5-5. SYS_STACKFLAGS Characters Position 1 2 3 4 5 Command CENTER CHANGES INDENT LEFT|BOTH INDENT RIGHT|BOTH KEEP You can access individual characters through the use of the STRING function.
Expressions SYS_TOPMARGIN This is the number of decipoints between the top of the form and the first header. (N) SYS_VOLUME In this variable, TFORM keeps the external name of the current volume/subvolume, for expansion of file names specified in SOURCE commands. The initial value is the volume and subvolume you were in when you invoked TFORM. (S) SYS_YEAR Note 5-12 This is a 4-digit integer that represents the current year.
Expressions Operands As defined before, operands are groups of constants or variables that are combined with operators and then reduced to a single value. Before going on to the operators, here are some things to remember about operands: TFORM stores all numeric values as 32-bit binary data with an implied decimal point 3 places from the right end, so the range for numeric values is from –2147483.647 through +2147483.647.
Expressions Table 5-6.
Expressions Logical Operators The logical operators are of two types: those that specify a comparison between two numeric or two string operands and that yield a Boolean result (true if the stated comparative relationship between the two operands exists, false if it doesn’t); and those that combine two Boolean entities to produce one Boolean value. They are shown in Table 5-8. Table 5-8.
Expressions Evaluation of Expressions In evaluating a compound expression, TFORM begins with entities that already represent a single value each; these entities are called primaries. TFORM next applies the effects of any unary operators (signed primaries, or factors). Then it goes on to perform multiplication and division, addition and subtraction, comparisons, and conjunctions (Boolean “and” ), in that order. It reserves any Boolean “or” operations until the last.
Expressions The value that a function returns is of the type defined for that function. The expressions you supply must also be of the proper types for that function. This list defines the abbreviations used in the following function descriptions. Note ABS Function exp represents an expression of a nonspecific type. b-exp represents a Boolean expression. i-exp is an integer expression. n-exp is a numeric expression (either an integer or an integer-andfraction combination).
Expressions ALIGN Function The ALIGN function returns a string, s-exp1, aligned in a field. ALIGN (s-exp1, n-exp [ ,s-exp2 [, s-exp3 ] ] ) n-exp specifies the width, in decipoints (1/72 of an inch) of the field. If n-exp is less than the number of characters in s-exp1, ALIGN uses the string width as the field width to avoid truncating the string. The optional s-exp2, if present, must begin with one of the letters L, C, or R (any string will do, as long as it begins with one of those letters).
Expressions ARG Function The ARG function processes macro or user-function arguments; you may use it only in macros or functions. ARG ( i-exp [ , b-exp ] ) ARG (n) or ARG (n,#b-exp), where b-exp evaluates to “false,” returns the value of the nth argument in the list of arguments passed to the macro by the invocation command. ARG (n,#b-exp), where b-exp evaluates to “true,” returns the actual string that was passed as the nth argument.
Expressions CHR Function The CHR function returns a character. CHR (exp) If exp is a string, CHR (s-exp ) returns the first characters of that string. If exp is a number, CHR(n) returns the character that is the nth position in the ASCII collating sequence. In this case, n must be within the range of 0 through 255. With this function, you can obtain characters you can’t type in from the keyboard (and the printer can’t print).
Expressions If you omit i-exp or if it’s less than 1, the FIND function starts its search at the first character position. If s-exp2 is an empty string, FIND returns the value of i-exp. JUSTIFY Function (N) The JUSTIFY function returns a string, s-exp1, justified in a field. JUSTIFY( s-exp1 , n-exp [ , s-exp2 [ , s-exp3 ] ] ) n-exp specifies the width, in characters, of the field.
Expressions When using proportional spacing, you may need to use a “fudge factor” to get a string to justify properly. The equation js_fixed = WIDTH(jstring) / WIDTH(" ") (where JSTRING is the string expression to be justified) gives the number of character positions the string would occupy if all characters were the same width as the average-sized space character.
Expressions MIN Function The MIN function returns the value of whichever argument is the lesser of the two. MIN ( n-exp ,n-exp ) (N) MODULO Function The MODULO function returns a number that is the remainder of the division, in integer arithmetic, of the first argument by the second, or n-exp modulo i-exp. MODULO ( n-exp ,i-exp ) Computations done by MODULO make use of an implied function that could be called INT (n), which returns the largest integer that is not greater than n.
Expressions NUMERIC Function The NUMERIC function returns a number that it obtains from the first argument. NUMERIC ( exp [ ,i-exp ] ) If exp is a numeric expression, NUMERIC simply returns that same value. If exp is a string, and if it has one or more leading characters that are digits (“0” through “9”) or “numeric punctuation” (leading + or – sign, decimal point), NUMERIC converts as much of the string as meets that criterion into a numeric value (for example, “–127.39K” becomes –127.39).
Expressions ROMAN Function The ROMAN function returns a lowercase Roman numeral that is the equivalent of the integer argument. ROMAN ( i-exp ) The argument must be greater than zero. SELECT Function (S) The SELECT function returns one of the listed arguments, numeric or string, as determined by the value of i-exp. SELECT ( i-exp ,exp [ ,exp ] ... ) If, for example, the value of i-exp is 3, SELECT returns the value of the third argument (starting with the one after i-exp).
Expressions STRING Function The STRING function returns the value of exp in the form of a string; it can also return a portion of that string, a substring with the beginning and ending characters specified by the two other arguments. STRING ( exp [ ,n-exp1 [ ,n-exp2 ] ] ) If you enter a starting-character expression that is less than or equal to zero, or if you omit it, the STRING function extracts a substring beginning with the first character of the main string.
Expressions If you enter the same value for the starting and ending character specifications, it means you want a substring of just one character. For example: STRING(sys_chars,4,4) returns the string “#” (the fourth character in the string making up the SYS_CHARS variable). If you enter beginning-character and endingcharacter specifications that designate positions within the main string, it means you want a substring that starts and ends with the characters in those positions.
Expressions The TRANSLATE function returns unchanged in the output string all characters from the source string that have no corresponding character in the key string. The TRANSLATE function deletes from the output string all source characters that appear in the key string, but for which there is no corresponding character in the replacement string. For example: \TRANSLATE("James","am","on") returns the string “Jones” .
6 System Parameters This section describes parameters set by the GUARDIAN 90 command interpreter PARAM command that affect TFORM. The PARAM command has the form: PARAM [ parameter-name parameter-value [ , ... ] ] The parameters you set before running TFORM determine several environmental effects on TFORM and the spooler, such as the number of copies to print, whether a document is to be printed immediately or held in the spooler, and what report name is sent to the spooler.
System Parameters COPIES This parameter specifies how many copies you want printed. What to Enter PARAM COPIES int How to Use COPIES TFORM tells the spooler how many copies to print when it calls SPOOLSTART. Level 3 spooling (see the description of the SPOOLOUT parameter in this section) must be in operation for this parameter to have any effect. If you don’t enter this parameter, TFORM prints one copy.
System Parameters DEVICE^TYPE This parameter specifies the device class to which TFORM output is sent. What to Enter PARAM DEVICE^TYPE int int must be 0, 1, 2, or 3. How to Use DEVICE^TYPE This parameter gives you a way to tell TFORM to output the controlling codes for the letter-quality printer, regardless of where the output is actually being sent.
System Parameters For DEVICE^TYPE 2 or 3, Tandem has adopted a standard set of printer features (and corresponding commands) for use in its printers. The set of features used is PCL (Printer Control Language) command language developed by Hewlett-Packard Company. Tandem is a licensee of Hewlett-Packard Company. PCL command language defines a standard for printer features and feature access by software applications. It provides the highest level of communication between the system and the printer.
System Parameters FORM This parameter specifies a spooler form name if you wish to have one other than the default (all blanks). What to Enter PARAM FORM string string can contain from zero to 16 characters. How to Use FORM TFORM sends the specified form name to the spooler when it calls SPOOLSTART. Level 3 spooling (see the SPOOLOUT parameter) must be in operation for this parameter to have any effect.
System Parameters HOLD This parameter allows you to specify the state of the document in the spooler. What to Enter PARAM HOLD boolean boolean can assume one of two values, corresponding to TRUE or FALSE. How to Use HOLD By specifying 0 or 1, you can tell TFORM whether you want documents to be formatted and printed (0) or formatted only (1). TFORM sends this value to the spooler when it calls SPOOLSTART. It tells the spooler whether to make the status of the spool job READY (0) or HOLD (1).
System Parameters PRINTER^TYPE This parameter specifies the device class for the type of formatting to be sent to the printer. What to Enter PARAM PRINTER^TYPE int int must be 0 or 1. How to Use PRINTER^TYPE TFORM recognizes two classes of devices: 1 = Tandem 5530 letter-quality printer 0 = All other Tandem printers If PRINTER^TYPE is 0, lines can never be wider than the specified margins.
System Parameters REPORT^NAME This parameter determines what is sent as a report name to the spooler. What to Enter PARAM REPORT^NAME boolean boolean can assume one of two values, corresponding to TRUE or FALSE. How to Use REPORT^NAME If REPORT^NAME is false (0), TFORM sends to the spooler the user-name portion of the user ID of the process that started TFORM. If REPORT^NAME is true (1), TFORM sends the subvolume-name and file name of the input file to the spooler.
System Parameters SPOOLOUT This parameter determines whether level 3 spooling is to be done on output. The various levels of spooling are described in the Spooler Programmer's Guide. What to Enter PARAM SPOOLOUT boolean boolean can assume one of two values, corresponding to TRUE or FALSE. How to Use SPOOLOUT Setting SPOOLOUT to true (1) specifies that level 3 spooling is to be done.
Appendix A Syntax Summary This appendix contains a summary of the syntax of TFORM commands, expressions, and escape sequences for quick reference. Although the “&” trigger character is shown in these illustrations, you can use any trigger that you define instead.
Syntax Summary TOP BOTTOM SIDES [LEFT RIGHT] BOX CORNERS TOP LEFT ["char"] RIGHT BOTTOM LEFT RIGHT \DEFINE CHANGES [ "char" ] CONTENTS [ "string" ] OVERSTRIKE [ "char" ] TITLE FIELD [ "char" ] PAGENUMBER [ "char" ] TRIGGER [ "char" ] \ELSE \ENDFUNCTION [ function-name ] \ENDIF \END LIST [ list-name ] \ENDLOOP A-2 11387 Tandem Computers Incorporated
Syntax Summary \ENDMACRO [ macro-name ] SYSTEM \system-name \ENV VOLUME $[volume-name $volume-name.] subvol-name ˚ \ERROR string \EXIT \EXITLOOP \EXITMACRO OPEN file-name READ WRITE APPEND [ PURGE ] \FILE READ { filename | * } var [ ‚var ] ... WRITE { filename | * } exp [ ‚exp ] ...
Syntax Summary \FUNCTION function-name BEGIN [LOCAL var [‚ var]... ] APPEND DELETE . . . commands . . . \RETURN expression . . . commands . . .
Syntax Summary \IF exp . . . commands and/or text . . . \[ ORIF exp ] . . . commands and/or text . . . \[ ELSE ] . . . commands and/or text . . .
Syntax Summary \LETTER body-file list-file [date [top-space [addr-lines] ]] 0 title [int] int string FORMAT int BEFORE int AFTER int PAGE ODD EVEN STYLE int \LEVEL CONTENTS LEFT CENTER RIGHT BOLD NUMBER ... UNDERLINE UPSHIFT ON | OFF int INDENT int1 int2 ... int11 LINES int1 int2 ...
Syntax Summary \LOOP [ exp ] . . . commands and/or text . . . \[ NEXTLOOP ] . . . commands and/or text . . . \[ EXITLOOP ] . . . commands and/or text . . . \ENDLOOP \MACRO macro-name BEGIN [ LOCAL var [‚ var] ... ] APPEND DELETE . . . commands and/or text . . . [ \EXITMACRO | \RETURN ] . . . commands and/or text . . . \ENDMACRO [ macro-name ] \macro-name [ exp1 [ [ exp2 ] ...
Syntax Summary \NEXTLOOP \ORIF exp ON \PAGE OFF [ + | - ] int [ .int ] FIRST [ALL] ODD EVEN BIN [ int ] DRAFT [ON | OFF] ERRORS [ON | OFF] MANUALLY [ON | OFF] \PRINT OFFSET FIRST [ALL] ODD EVEN PAGES int int | int CHANGES WARNINGS [ON | OFF] A-8 11387 Tandem Computers Incorporated [[+|—] num [units]] , ...
Syntax Summary BOX ON [ ARROW ] OFF CHANGES { ON | OFF } DOWNSHIFT { ON | OFF } ERRORS { ON | OFF } HYPHENS ON int ENGLISH ANYWHERE OFF JOIN { ON | OFF } \SET JUSTIFY { ON | OFF } PITCH int PROPORTIONAL HORIZONTAL VERTICAL int SEQUENCING { ON | OFF } SPACING [ num ] [ FIXED ] TABS { ON | OFF } [ int [ , int ] ...
Syntax Summary \SPACE [ num [ units ] [ PAGE ] ] CHANGES ALTERNATE FONT num "string" FORM LENGTH WIDTH num [ units ] GAP HEADER FOOTER [[+|—]num [units]] TOP BOTTOM LEFT RIGHT \STYLE MARGIN HEADER LEFT RIGHT FOOTER LEFT RIGHT PARAGRAPHS BOTTOM [int] TOP [int] GAP INDENT SENTENCES int VERBATIM \TI [ + | - ] num [ units ] A-10 11387 Tandem Computers Incorporated [[+|—]num [units]] [+|—]num [units] VERBATIM
Syntax Summary \TIME \TITLE title \TODAY SHORT ["char"] USA [ "m1‚...
Syntax Summary Table A-1. A-12 Escape Sequences Metacharacters Description \! \\\ \# \.
Syntax Summary Expressions In this syntax, "::=" means "is defined as", "character" is any ASCII character, and "digit" is any ASCII numeric character.
Syntax Summary A-14 primary ::= constant | variable | function | (exp) constant ::= string | number variable ::= name function ::= name ( expression [ , expression ] ... ) digit letter name ::= letter string ::= " [ character [ character ] ... ] " number ::= integer [ . integer ] integer ::= digit [ digit ] ... 11387 Tandem Computers Incorporated ...
Syntax Summary Functions The following are brief descriptions of the TFORM-supplied functions you can use in expressions. In this syntax, b-exp represents a Boolean expression, i-exp is an integer expression, n-exp is a numeric (either an integer or an integer-and-fraction combination) expression, and s-exp is a string expression; exp is an expression of any type. ABS ( n-ex ) returns the absolute value of nex. ARG ( i-exp [ ,b-exp ] ) returns the specified argument value.
Syntax Summary ORD ( exp ) returns the ASCII code for first character of s-exp, or n-exp modulo 256. ROMAN ( i-exp ) returns a lowercase Roman numeral equal to i-exp. SELECT ( i-exp ,exp [ ,exp ] ... ) returns the i-exp(th) expression in the list. STRING ( exp [ ,n-exp1 [ ,n-exp2 ] ] ) returns the string value of exp, or substring defined by other arguments. TRANSLATE ( s-exp1 ,s-exp2 ,s-exp3 ) returns the encrypted form of s-exp1, using other strings as keys.
Syntax Summary System Variables The following are the variables that TFORM creates and maintains. You can use them, as well as variables you define, in expressions. Do not use the prefix "SYS_" in any of your variable names. In the following list, (N) indicates a numeric variable and (S) a string variable. SYS_BOTTOMMARGIN – Number of decipoints between last footer and bottom of form. (N) SYS_CHARS – String of characters that can be changed by DEFINE command.
Syntax Summary SYS_DATE – String form of date maintained by TODAY macro. Current form depends on how macro was last invoked; default form is "mm/dd/yy". (S) SYS_DAY – Integer, 1..31, representing current day of month. (N) SYS_DAYOFWEEK – Integer, 1..7, representing current day of week. (N) SYS_DEVICETYPE – Integer, 0 or 1, representing type of output device in use. (N) SYS_FILECODE – GUARDIAN 90 file code of current input file.
Syntax Summary SYS_LDESC – Descriptive label obtained from ITEM command. (S) SYS_LEFTINDENT – Current indentation, in decipoints, from left margin. (N) SYS_LEFTMARGIN – Current left margin setting, in decipoints. (N) SYS_LEVELn_TITLE – Title supplied by current LEVELn (0..10) macro (this entry refers to eleven different variables). (S) SYS_LINEHEIGHT – Current height of a text line in decipoints; includes vertical pitch and line spacing factors.
Syntax Summary SYS_PARAGRAPHINDENT – Current indentation setting, in decipoints, for first line of each paragraph. (N) SYS_PARAGRAPHTOP – Current setting, in lines, for the number of lines kept together at the top of a paragraph. (N) SYS_PRINTFLAGS – String of characters that represent the flags set by the PRINT command. Individual characters are shown in Table A-2. Table A-3.
Syntax Summary SYS_SETFLAGS Table A-4. Position 1 2 3 4 5 6 7 8 9 10 11 12 13 14 – String of characters representing flags that can be changed by SET command. Individual characters are shown in Table A-3.
Syntax Summary Table A-5. String of Characters Representing Flags Position 1 2 3 4 5 Command CENTER CHANGES INDENT LEFT | BOTH INDENT RIGHT | BOTH KEEP You can access any character by use of the STRING function. (S) A-22 SYS_SYSTEM – External name of current system SYS_TABS – List of column numbers, separated by commas, of tabs currently set. (S) SYS_TEXTAREALENGTH – Length, in decipoints, of text region (area left after accounting for headers, footers, and gaps).
Appendix B TFORM Messages Error Messages If PRINT ERRORS ON is in effect (it is by default), TFORM prints an error message on an extra page following the one on which an error occurs. It also includes the number of the line in the source file that contains the error, and the line itself. An asterisk below the line marks the location of the error within the line. The following are descriptions of the error messages that may appear.
TFORM Messages BAD MACRO/FUNCTION NAME A macro or function name must conform to the same rules as a variable name. The macro name in a MACRO BEGIN or MACRO APPEND command, or a function name in a FUNCTION BEGIN or FUNCTION APPEND, violates one or more of those rules. This message also results if an ENDMACRO or ENDFUNCTION command contains a name that isn’t the same as the name in the corresponding macro- or function-beginning command.
TFORM Messages BAD VOLUME NAME A disc volume name must begin with a dollar sign followed by a letter, may contain only letters and numerals in the rest of the name, and may not exceed a total of eight characters. An identifier that violates one or more of these rules appeared in a place where a volume name was expected. COMMAND ERROR A trigger character in the first character position of an input line was followed by an identifier that doesn’t resemble any known TFORM command or macro name.
TFORM Messages "ENDIF" COMMAND MISSING An IF construct must end with an ENDIF command; TFORM found more IF commands in the input file than ENDIF commands. "ENDFUNCTION" COMMAND MISSING A FUNCTION definition must end with an ENDFUNCTION command; TFORM found more FUNCTION BEGIN and/or FUNCTION APPEND commands than ENDFUNCTION commands. "ENDLOOP" COMMAND MISSING A LOOP construct must end with an ENDLOOP command; TFORM found more LOOP commands than ENDLOOP commands.
TFORM Messages FILENAME IS INVALID A GUARDIAN 90 file name must begin with a letter, must contain only letters and numerals in the remainder of the name, and must not exceed eight characters. If the name is expanded to include disc volume and subvolume, they must have the same form (except that the volume name must begin with a dollar sign) and all must be separated by periods. A SOURCE command or a FILE command contains a file name that violates the naming rules.
TFORM Messages I/O ERROR, ERROR CODE file-error-number A data transfer error occurred during execution of a SOURCE command. The accompanying GUARDIAN 90 file system error code tells the nature of the error. ILLEGAL CHARACTER VALUE A DEFINE command attempted to assign an illegal character value (for example, a space for the trigger character) to one of the TFORM control characters. ILLEGAL USE OF SYSTEM VARIABLE You can access system variables, but you’re not allowed to assign values to them.
TFORM Messages INDENT STACK CLEARED; RESET TO MARGINS Indentation is based on the current margin setting. If a subsequent margin change renders the existing indentation impossible, TFORM resets all indentation to zero. INDIRECTION ESCAPE SEQUENCE WAS NOT ENDED An escape sequence of the form \VALUE( exp \) or \( exp \) was missing one or both of its final \) characters. INPUT FILE IS NOT AN EDIT FILE A SOURCE command attempted to read a file that is not an EDIT-format file.
TFORM Messages INVALID SCOPE FOR "VERBATIM" A VERBATIM command can have only two possible scopes: a number of lines (one line is implied when no scope is stated) or BLANK (until the next blank source line). ON, OFF, COMMAND, and so on, are unacceptable. LINE WAS LONGER THAN TEXT AREA WIDTH BY int COLUMNS When JOIN is off, TFORM can’t break a line that’s too long for the available area, so it issues this error message.
TFORM Messages NULL STRING FOR CHAR VALUE You can’t assign null values to control characters with a DEFINE command. "OFF" MUST CORRESPOND TO "ON" If you enter a CENTER OFF, CHANGES OFF, KEEP OFF, or SET BOX OFF command, you must have previously entered a matching ON command. Otherwise, TFORM issues this error message.
TFORM Messages REDUNDANT "ON" COMMAND A SET BOX ON command follows another SET BOX ON command, with no SET BOX OFF in between. REQUIRED PARAMETER IS MISSING A command lacks a needed parameter, such as PAGE with no page number, or MACRO with no BEGIN or APPEND modifier, or SET BOX without specifying ON or OFF. REQUIRED PARAMETER IS MISSING, ZERO WILL BE ASSUMED TFORM did not find any value specified for the expression contained in a RETURN command within a FUNCTION construct.
TFORM Messages STACK TOO FULL FOR FUNCTION INVOCATION The stack space was minimal when you tried to invoke a function. TFORM refused to invoke it to prevent a possible abort. STRING TABLE OVERFLOW This is a TFORM internal error, which can be caused by repetitive or recursive macro activities involving string manipulation or assignment.
TFORM Messages TEXT LINES SHOULD NOT APPEAR WITHIN A FUNCTION A function is not able to produce text lines like a macro can. TFORM returns this message if it finds any text entered into the FUNCTION construct; you can only enter certain commands (see the description of FUNCTION in Section 3). THE FIELD AND PAGENUMBER CHARS MUST DIFFER The title field separator character (default “|”) and the page number character (default “#”) must be different.
TFORM Messages THIS WORD IS AMBIGUOUS If the beginning letters of a user-defined macro are the same as those of a TFORM command or macro, an attempt to invoke either the TFORM entity or the user macro in abbreviated form (within the number of letters that are the same) produces this message.
TFORM Messages TOO MANY "SOURCE" COMMANDS ENCOUNTERED A file read in by a SOURCE command may contain a SOURCE command that reads another file, which in turn may source in a third file, and so on; but not more than 32 input files may be open at one time. TWO "ELSE" COMMANDS FOR AN "IF" COMMAND An IF construct can have only one ELSE command. TYPE MISMATCH A numeric entity and a string entity can’t be combined by a single operator.
TFORM Messages UNKNOWN ESCAPE CODE ENCOUNTERED A trigger character, not in the first character position, is followed by something that doesn’t resemble any known rendition control code (the key in this case is the left parenthesis that begins a rendition control; TFORM simply treats as text a trigger followed by unrecognizable characters with no parenthesis). UNRECOGNIZED KEYWORD A command contains an entity that doesn’t resemble any keyword the command expects to see.
TFORM Messages YOU ATTEMPTED AN INFINITE SERIES OF SUBSTITUTIONS A recursive assignment would have continued indefinitely if TFORM hadn’t caught it and reported it with this message. An example of such is: \ASSIGN is_a_rose "\\(is_a_rose\\)" Gertrude says, "Rose \(is_a_rose\)." YOU HAVE REACHED THE LIMIT FOR NUMBER OF OPEN FILES Only four auxiliary files can be open at any given time. If you have opened four files with the FILE READ command, TFORM will return this error message.
TFORM Messages Warning Messages Warning messages describe conditions less severe than those named in error messages. If you want TFORM to print warning messages, you must use the SET command to set WARNINGS ON. By default, TFORM does not print them. The TFORM warning messages are as follows: WARNING - BIN CANNOT BE SELECTED FOR THIS PRINTER The output device is not a 5530 letter-quality printer and therefore doesn’t have a cut-sheet feeder with the capability of feeding from either of two bins.
TFORM Messages WARNING - PITCH CANNOT CHANGE FOR THIS PRINTER Only the 5530 letter-quality printer can change pitch programmatically. High-speed line printers can’t change (horizontal) pitch at all. WARNING - SUBSCRIPTS AND SUPERSCRIPTS IGNORED WITH THIS PRINTER Printers other than the 5530 can’t move the paper forward and backward from the current line to produce subscripts and superscripts. WARNING - THE PITCH HAS BEEN ADJUSTED TO MATCH THIS PRINTER The printer can’t accept the pitch you specified.
TFORM Messages Stop Codes If a drastic error occurs, TFORM calls a STOP process (instead of DEBUG) and displays a stop message, in the format TFORM STOP - text [ (FILE SYSTEM ERROR nn) ] on your home terminal (except in the case of the “could not open home terminal” error). The following stop messages may appear in the text portion.
Appendix C Limits and Defaults The following list summarizes the minimum, maximum, and default values for the various form measurements and environment settings used by TFORM. The values given for margins are measured from the left edge of the form or from the top of the form where not otherwise specified. The right margin is measured from the right edge of the form. The left margin includes the print offset.
Limits and Defaults Header gaps Minimum: 0 Maximum: form length - footer gap - SUM1 – 0.5 inch Default: 1 line when one or more headers are defined; 0 when no headers are defined Indentation Left Minimum: print offset Maximum: right margin – 0.5 inch Default: 0 chars Right Minimum: form width Maximum: left margin + 0.5 inch Default: 0 chars Line spacing Minimum: 1 (single-space; any value <1 is the same as 1) Maximum: 32 Default: 1 Margins Bottom Minimum: 0 Maximum: form length—top margin—SUM2 + 0.
Limits and Defaults Right Minimum: 0 Maximum: left margin + 0.5 inch Default: 0.75 inch Top Minimum: 0 (LQP only) 0.5 inch (all other supported Tandem printers) Maximum: form length—bottom margin—SUM2 + 0.5 inch Default: 0.
Limits and Defaults Print offset Minimum: 0 Maximum: right margin Default: 0 chars Sentence spacing Minimum: 0 spaces at end Maximum: 2 spaces at end Default: 2 spaces at end Tab stop range Minimum: column 1 Maximum: lesser of form width (in columns) and 255 Default: no tabs set C-4 11387 Tandem Computers Incorporated
Appendix D Comparison of TGAL and TFORM For those accustomed to using TGAL, Table D-1 below provides a comparison (where comparison can be made) of TGAL commands and TFORM constructs. In most cases, examples are simplistic to show direct parallels with TGAL and do not attempt to show the full range of possibilities in TFORM. Table D-1.
Comparison of TGAL and TFORM Table D-1.
Comparison of TGAL and TFORM Table D-1.
Comparison of TGAL and TFORM Table D-1. Comparison of TGAL and TFORM (continued) TGAL TFORM NEW NEW NEW ODD NEW ODD NEW EVEN NEW EVEN OUT n PRINT PAGES n OUT n1 / n2 PRINT PAGES n1 / n2 OUT "text" n [ / ...
Comparison of TGAL and TFORM Table D-1.
Comparison of TGAL and TFORM Table D-1. Note D-6 Comparison of TGAL and TFORM (continued) TGAL TFORM TAG "text" n TAG "text" n TAG "text" ON TAG "text" ON TAG "text" OFF TAG "text" OFF TAG "text" B TAG "text" BLANK TAG "text" trigger TAG "text" COMMAND TEXT ON SET JOIN ON; SET JUSTIFY ON TEXT OFF SET JOIN OFF; SET JUSTIFY OFF TODAY (all forms) TODAY (all forms) TOPMARGIN n STYLE MARGIN TOP (n-3) LINES TRANSPARENT ...text... TRANSPARENT VERBATIM ON ...text...
Appendix E TFORMCVT: Converting From TGAL to TFORM TFORMCVT is a utility that provides a simple migration path from existing TGAL files to TFORM files. TFORMCVT accepts a file containing TGAL commands and creates an edit file containing the TFORM commands that provide similar formatting. This appendix gives an overview of the operation and functioning of TFORMCVT.
TFORMCVT: Converting From TGAL to TFORM Translation Overview The input to TFORMCVT is a syntactically valid TGAL file. (The term “TGAL file” means a file—usually in edit format—containing TGAL commands, intended to be input to TGAL for formatting and printing; a “TFORM file” is one containing TFORM commands.) The output file begins with the translation of TGAL defaults, followed by text lines, TFORM commands, and (possibly) error messages. Output text lines generally remain identical to input text lines.
TFORMCVT: Converting From TGAL to TFORM Differences in Command Scope TFORMCVT does not account for the differences in scope algorithms between TGAL and TFORM; you should therefore be aware of those differences. TGAL uses the concept of “recency”; that is, the scope of a given command depends on how recently it was stated. TFORM simply uses the scope of each command.
TFORMCVT: Converting From TGAL to TFORM Commands That Cause Line Breaks Paragraph Control In TGAL, all commands cause a break in line joining whenever they appear; in TFORM, only the CENTER, DEFINE, FOOTER, HEADER, KEEP, NEW, SPACE, STYLE, TITLE, and VERBATIM commands cause a break. Naturally, this is apparent only when JOIN is ON.
TFORMCVT: Converting From TGAL to TFORM TFORMCVT assumes that input paragraphs are homogeneous. If a paragraph has a ragged left margin beyond the second line, the indentation remains that of the second line. It’s your responsibility to add the appropriate INDENT commands to maintain the ragged edge. TFORMCVT interprets text in the scope of an OV command as being a command line. The result is that a paragraph starting with overstruck text doesn’t have an INDENT command until the second line.
TFORMCVT: Converting From TGAL to TFORM TFORMCVT Diagnostic Messages If TFORMCVT encounters a command that can’t be translated to TFORM, or that is positioned wrongly for TFORM’s requirements, or that may have an unforeseen effect, it inserts one or more comments in the output file at the point where the command appears.
TFORMCVT: Converting From TGAL to TFORM Sourced Files TFORMCVT cannot tell whether a file named in a TGAL IN command is a TFORM file or a TGAL file, so it inserts the following message following the resulting TFORM SOURCE command. The second line appears only on later occurrences of IN command translation. \COMMENT ^ WARNING **** SOURCE FILE MAY NEED TRANSLATION.
TFORMCVT: Converting From TGAL to TFORM Command Translation Summary Note The following descriptions are organized alphabetically by TGAL command. Each syntax option for the TGAL command is boxed, with the TFORM translation following. If there are special considerations for a given TGAL command—such as differences between the TGAL input and the translation, or error messages that may be displayed in certain situations—this information is collected under the heading “Tips” for each command.
TFORMCVT: Converting From TGAL to TFORM Tips The TFORMCVT translation of the ALT command is effectively the translation of ALT ON ALWAYS since TFORM doesn’t care if page numbering is in effect during alternation. If ALT is ON and page numbering is off in the input file, alternation occurs in the TFORM translation even though it would not in TGAL output. In TGAL, when ALT is ON and TAG is in effect, the tag characters appear on the same side as the page number.
TFORMCVT: Converting From TGAL to TFORM TFORMCVT always updates the SECT command to change the pagenumber position: \FOOTER 2 \FOOTER 2 EVEN "text#" \FOOTER 2 ALL ODD "||text#" As with TGAL, if the CENTER option for the SECT command is in effect, TFORMCVT doesn’t update it. If a HEAD or SUBHEAD command appears while the ALT command is in effect, TFORMCVT outputs it as shown above.
TFORMCVT: Converting From TGAL to TFORM BLANK Command \BLANK "char" TFORMCVT doesn’t output a TFORM command for this command, but sets an internal flag to cause all instances of the specified character to be output as the trigger character followed by “#”. If the trigger character is “\”, TFORMCVT replaces the required blank character with “\#”. \BLANK TFORMCVT turns off the internal flag.
TFORMCVT: Converting From TGAL to TFORM BOTTOMMARGIN Command \BOTTOMMARGIN int The TFORMCVT output is: \STYLE MARGIN BOTTOM (int-3) LINES Tips TFORMCVT subtracts three lines from the number specified in the TGAL command since TGAL assumes the bottom margin includes 3 lines at the bottom of each page (a blank line, the FOOT line, and the SECT line) but TFORM does not. The TFORM STYLE command must follow a page break to work the same way as BOTTOMMARGIN.
TFORMCVT: Converting From TGAL to TFORM BOX Command \BOX The TGAL BOX command is used both to commence and to close off box construction. TFORMCVT can tell from the context what the TGAL BOX command means and act accordingly.
TFORMCVT: Converting From TGAL to TFORM Tips If ARROW is ON, the TFORM command to turn on a box becomes SET BOX ON ARROW. If the box sides were redefined, TFORMCVT outputs the command DEFINE BOX when turning off the box, restoring the original box-side characters. TFORM automatically indents the text within a box, as though the command INDENT ON BOTH + 3 were present.
TFORMCVT: Converting From TGAL to TFORM BREAK Command \BREAK The TFORMCVT output is: \BREAK PARAGRAPHS The TGAL BREAK command always causes a paragraph break as well as a line break.
TFORMCVT: Converting From TGAL to TFORM CENTER Command \CENTER The TFORMCVT output is: \CENTER \CENTER ON The TFORMCVT output is: \CENTER ON \CENTER OFF The TFORMCVT output is: \CENTER OFF \CENTER int The TFORMCVT output is: \CENTER int E-16 11387 Tandem Computers Incorporated
TFORMCVT: Converting From TGAL to TFORM \CENTER B The TFORMCVT output is: \CENTER BLANK \CENTER \ The TFORMCVT output is: \CENTER COMMAND Tips To center overstruck lines in TGAL, the CENTER command must specify number of overprinting lines as well as the number of original text lines. Since the TFORM CENTER command does not work in this way, text lines following an OV command may be included in the scope of a CENTER command and be centered.
TFORMCVT: Converting From TGAL to TFORM CHANGES Command \CHANGES The TFORMCVT output is: \PRINT PAGES CHANGES COMMENT Command \COMMENT The TFORMCVT output is: \COMMENT \COMMENT text The TFORMCVT output is: \COMMENT text E-18 11387 Tandem Computers Incorporated
TFORMCVT: Converting From TGAL to TFORM DBL Command \DBL ON The TFORMCVT output is: \SET SPACING 2 \DBL OFF The TFORMCVT output is: \SET SPACING 1 ERRORS Command \ERRORS ON The TFORMCVT output is: \PRINT ERRORS ON \ERRORS OFF The TFORMCVT output is: \PRINT ERRORS OFF 11387 Tandem Computers Incorporated E-19
TFORMCVT: Converting From TGAL to TFORM EXIT Command \EXIT The TFORMCVT output is: \EXIT FOOT Command \FOOT "text" The TFORMCVT output is: \FOOTER 1 "|text|" \FOOT "text" TODAY or The TFORMCVT output is: \FOOTER 1 "|text\\(SYS_DATE\\)|" E-20 11387 Tandem Computers Incorporated FOOT "text" \\ TODAY
TFORMCVT: Converting From TGAL to TFORM Tips TFORMCVT ignores a trigger character preceding the TODAY option. The first occurrence of the TODAY option causes TFORMCVT to precede the TFORM command with a call to the macro TODAY (if the TODAY macro has not been invoked previously). This is done to initialize the system variable SYS_DATE. In TGAL, footers are stacked; that is, if the fifth FOOT command (for example) contains no text, TGAL uses the text specified in the fourth FOOT command.
TFORMCVT: Converting From TGAL to TFORM HEAD Command \HEAD "text" The TFORMCVT output is: \HEADER 1; HEADER 1 "||text" \HEAD "text" TODAY or HEAD "text" \\ TODAY The TFORMCVT output is: \HEADER 1; HEADER 1 "||text\\(SYS_DATE\\)" Tips TFORMCVT ignores a trigger character preceding the TODAY option. The first occurrence of the TODAY option causes TFORMCVT to precede the TFORM HEADER command with a call to the macro TODAY (if the TODAY macro has not been invoked previously).
TFORMCVT: Converting From TGAL to TFORM IF Command \IF The TFORMCVT output is: \ENDIF \IF int ON The TFORMCVT output is: \IF TGAL_int=1 \IF int OFF The TFORMCVT output is: \IF TGAL_int=0 11387 Tandem Computers Incorporated E-23
TFORMCVT: Converting From TGAL to TFORM Tips TGAL has 10 variables, called “toggles,” numbered 1 through 10; TFORMCVT provides the corresponding variables TGAL_1 through TGAL_10. In TGAL, any IF command terminates the previous IF command. Since an IF command must be explicitly turned off in TFORM, TFORMCVT issues the ENDIF command where appropriate.
TFORMCVT: Converting From TGAL to TFORM IN Command \IN filename The TFORMCVT output is: \SOURCE filename \COMMENT ^ WARNING****SOURCE FILE MAY NEED TRANSLATION. LINE: n As described under “TFORMCVT Diagnostic Messages,” translation of an IN command always causes a warning message to be included because TFORMCVT can’t tell if the file to be sourced in is a TFORM file.
TFORMCVT: Converting From TGAL to TFORM JUSTIFY Command \JUSTIFY ON or JUSTIFY ON ALWAYS The TFORMCVT output is: \SET JUSTIFY ON \JUSTIFY OFF The TFORMCVT output is: \SET JUSTIFY OFF Tips If JOIN is OFF, the TFORM translation of JUSTIFY ON has the same effect as TGAL JUSTIFY ON ALWAYS (justify all lines between JUSTIFY ON and JUSTIFY OFF). If JOIN is ON, the TFORM translation of JUSTIFY ON ALWAYS has the same effect as TGAL JUSTIFY ON (the last line before JUSTIFY OFF remains unjustified).
TFORMCVT: Converting From TGAL to TFORM LINENO Command \LINENO ON The TFORMCVT output is: \COMMENT LINENO ON \COMMENT ^ WARNING **** COMMAND NOT RECOGNIZED. LINE: n LINE: n \LINENO OFF The TFORMCVT output is: \COMMENT LINENO OFF \COMMENT ^ WARNING **** COMMAND NOT RECOGNIZED. There is no TFORM equivalent to the TGAL LINENO command, so TFORMCVT displays a warning message.
TFORMCVT: Converting From TGAL to TFORM NEED Command \NEED ON The TFORMCVT output is: \KEEP ON \NEED OFF The TFORMCVT output is: \KEEP OFF \NEED int The TFORMCVT output is: \KEEP int \NEED B The TFORMCVT output is: \KEEP BLANK E-28 11387 Tandem Computers Incorporated
TFORMCVT: Converting From TGAL to TFORM \NEED \ The TFORMCVT output is: \KEEP COMMAND $$ The TFORMCVT output is: \KEEP 5 Tips In TGAL, an IF command terminates the NEED command. This is not the case with TFORM. TFORMCVT can’t provide this feature, since KEEP OFF will turn off only KEEP ON (not KEEP int, KEEP BLANK, or KEEP COMMAND). In TGAL, a NEW command may appear within the scope of a NEED command without causing an error.
TFORMCVT: Converting From TGAL to TFORM NEW Command \NEW The TFORMCVT output is: \NEW \NEW ODD The TFORMCVT output is: \NEW ODD \NEW EVEN The TFORMCVT output is: \NEW EVEN Tips In TGAL, a NEW command may appear within the scope of a NEED command without causing an error. TFORM generates an error message if it finds a NEW command in the scope of a KEEP command.
TFORMCVT: Converting From TGAL to TFORM OUT Command \OUT int The TFORMCVT output is: \PRINT PAGES int \OUT int1 / int2 The TFORMCVT output is: \PRINT PAGES int1 / int2 \OUT "text" int The TFORMCVT output is: \PRINT PAGES int \COMMENT "text" \COMMENT ^ WARNING **** COMMAND NOT RECOGNIZED.
TFORMCVT: Converting From TGAL to TFORM \OUT "text1" int1 / "text2" int2 The TFORMCVT output is: \PRINT PAGES int1 / int2 \COMMENT "text1", "text2" \COMMENT ^ WARNING **** COMMAND NOT RECOGNIZED. LINE: n Tips There is no TFORM equivalent to a TGAL OUT command that contains strings, so TFORMCVT does what it can with it and then displays a warning message. If there is a trigger character in the specified string, it is doubled in the output message.
TFORMCVT: Converting From TGAL to TFORM OUTLEN Command \OUTLEN int When int is less than or equal to 85, the TFORMCVT output is: \STYLE MARGIN RIGHT (85-int) CHARS When int is greater than 85, the TFORMCVT output is: \STYLE FORM WIDTH (int+2) CHARS \ \STYLE MARGIN RIGHT 2 CHARS Tips The STYLE command must follow a page break to work the same way as OUTLEN.
TFORMCVT: Converting From TGAL to TFORM OV Command \OV The TFORMCVT output is: \BREAK PARAGRAPHS \BOLD or \UNDERLINE or \< Tips In TGAL, the OV command causes a break but the TFORM escape sequence does not. To make the TFORM output behave as in TGAL, TFORMCVT outputs a BREAK command before the escape sequence. In TGAL, to center overstruck lines, the CENTER command must specify the number of lines to be overprinted as well as the number of original text lines.
TFORMCVT: Converting From TGAL to TFORM TFORMCVT can figure out whether you intend to print in boldface, underline, or overstrike. If you intend to overstrike (not underline or boldface, but overprint different characters) two or more different characters in the same character position, TFORMCVT does what it can, then generates an error message. For example: TGAL Input: \OV 4 SILLY SILLY fools I say ----- The TFORMCVT output is: BREAK PARAGRAPHS COMMENT I say COMMENT ^ WARNING **** COMMAND NOT RECOGNIZED.
TFORMCVT: Converting From TGAL to TFORM PAGELEN Command \PAGELEN int The TFORMCVT output is: \STYLE FORM LENGTH int LINES Tips The minimum page length in TGAL is 1 text line; the minimum page length in TFORM is 3 lines. Although TFORMCVT can properly translate a TGAL command of PAGELEN int (where int is less than 15), TFORM generates an error message for the command when it processes the file. The STYLE command must follow a page break to work the same way as PAGELEN.
TFORMCVT: Converting From TGAL to TFORM PAUSE Command \PAUSE ON The TFORMCVT output is: \COMMENT PAUSE ON \COMMENT ^ WARNING **** COMMAND NOT RECOGNIZED. LINE: n LINE: n \PAUSE OFF The TFORMCVT output is: \COMMENT PAUSE OFF \COMMENT ^ WARNING **** COMMAND NOT RECOGNIZED. TFORM has no equivalent to the TGAL PAUSE command, so TFORMCVT issues a warning message instead.
TFORMCVT: Converting From TGAL to TFORM SECT Command \SECT "text" int The TFORMCVT output is: \FOOTER 2; PAGE int; FOOTER 2 "||text#" \SECT "text" int CENTER The TFORMCVT output is: \FOOTER 2; PAGE int; FOOTER 2 "|text#|" \SECT "text" int CENTER "text2" The TFORMCVT output is: \FOOTER 2; PAGE int; FOOTER 2 " |text#text2| " E-38 11387 Tandem Computers Incorporated
TFORMCVT: Converting From TGAL to TFORM Tips If a trigger character occurs in the text string, it appears as four triggers in the TFORM string to ensure that TFORM accepts the character properly. When the number specified is zero, the argument to the PAGE command is OFF, not 0, and the page-number character (#) doesn’t appear in the text string.
TFORMCVT: Converting From TGAL to TFORM SEQ Command \SEQ ON The TFORMCVT output is: \SET SEQUENCING ON \SEQ OFF The TFORMCVT output is: \SET SEQUENCING OFF Tips The effects of the TGAL SEQ command and the TFORM SET SEQUENCING command are different, so identical results can’t be guaranteed. The TGAL command affects the entire page, while the TFORM command affects only those text lines between the SET SEQUENCING ON and SET SEQUENCING OFF commands.
TFORMCVT: Converting From TGAL to TFORM SET Command \SET int ON The TFORMCVT output is: \ASSIGN TGAL_int 1 \SET int OFF The TFORMCVT output is: \ASSIGN TGAL_int 0 Tips TGAL has 10 variables, or “toggles,” numbered 1 through 10; TFORMCVT provides the corresponding variables TGAL_1 through TGAL_10.
TFORMCVT: Converting From TGAL to TFORM SPACE Command \SPACE The TFORMCVT output is: \SPACE 1 PAGE \SPACE int The TFORMCVT output is: \SPACE int PAGE Tips If the SPACE command is in the scope of a NEED (or $$) command, TFORMCVT omits the PAGE option from the TFORM command.
TFORMCVT: Converting From TGAL to TFORM SUBHEAD Command \SUBHEAD "text" The TFORMCVT output is: \HEADER 2; HEADER 2 "||text" \SUBHEAD "text" TODAY or \SUBHEAD "text" \ TODAY The TFORMCVT output is: \HEADER 2; HEADER 2 "||text\\(SYS_DATE\\)" Tips TFORMCVT ignores a trigger character preceding the TODAY option. The first occurrence of the TODAY option causes TFORMCVT to precede the TFORM HEADER command with a call to the macro TODAY (if the TODAY macro has not been invoked previously).
TFORMCVT: Converting From TGAL to TFORM TAG Command \TAG "text" ON The TFORMCVT output is: \TAG "text" ON \TAG "text" OFF The TFORMCVT output is: \TAG "text" OFF \TAG "text" int The TFORMCVT output is: \TAG "text" int E-44 11387 Tandem Computers Incorporated
TFORMCVT: Converting From TGAL to TFORM \TAG "text" B The TFORMCVT output is: \TAG "text" BLANK \TAG "text" \\ The TFORMCVT output is: \TAG "text" COMMAND Tips TFORM has no equivalent command to the TAG command; instead, TFORMCVT issues a call to a TFORM macro called TAG. In TGAL, footers are stacked; that is, if the third FOOT command (for example) contains no text, TGAL uses the text specified in the second FOOT command.
TFORMCVT: Converting From TGAL to TFORM TEXT Command \TEXT ON The TFORMCVT output is: \SET JUSTIFY ON; SET JOIN ON \TEXT OFF The TFORMCVT output is: \SET JUSTIFY OFF; SET JOIN OFF TODAY Command \TODAY SHORT ["char"] LONG USA WORLD The TFORMCVT output is: \TODAY SHORT [ "char" ] LONG USA WORLD Tips TFORM has no equivalent command to the TGAL TODAY command, so TFORMCVT issues a call to a TFORM macro called TODAY, which accepts arguments in the same format as a TODAY
TFORMCVT: Converting From TGAL to TFORM TOPMARGIN Command \TOPMARGIN int The TFORMCVT output is: \STYLE MARGIN TOP (int-3) LINES Tips TFORMCVT subtracts three lines from the number specified in the TGAL Command, since TGAL assumes the top margin includes 3 lines at the top of each page (the HEAD line, the SUBHEAD line, and a blank line) but TFORM doesn’t. The STYLE command must follow a page break to work the same way as TOPMARGIN.
TFORMCVT: Converting From TGAL to TFORM TRANSPARENT Command \TRANSPARENT In TGAL the TRANSPARENT command is used both to turn transparency on and to turn it off. TFORMCVT can tell from the context to which use the command is being put. When the command is turning transparency on, the TFORMCVT output is: \TRANSPARENT ON When the command is turning transparency off, the TFORMCVT output is: \TRANSPARENT OFF Tips TFORM has no TRANSPARENT command; instead, TFORMCVT issues a call to a TFORM macro.
TFORMCVT: Converting From TGAL to TFORM TRIGGER Command \TRIGGER "char" The TFORMCVT output is: DEFINE TRIGGER "char" Tips All subsequent translated commands will begin with the specified trigger character. When the TRIGGER command is controlled by an IF command, all trigger characters still become the specified trigger, regardless of the state of the TGAL variable.
TFORMCVT: Converting From TGAL to TFORM UPSHIFT Command \UPSHIFT ON The TFORMCVT output is: \SET UPSHIFT ON \UPSHIFT OFF The TFORMCVT output is: \SET UPSHIFT OFF Tips The effects of the TGAL UPSHIFT command and the TFORM UPSHIFT command are different; identical results can’t be guaranteed. The TGAL command affects the entire page, while the TFORM command affects only those text lines between the SET UPSHIFT ON and SET UPSHIFT OFF commands.
TFORMCVT: Converting From TGAL to TFORM VERSION Command \VERSION "text" The TFORMCVT output is: \VERSION "text" Tips TFORM has no VERSION command; instead, TFORMCVT issues a call to a TFORM macro that performs the same functions. In TGAL, footers are stacked (a VERSION command with no text uses the text from the footer previous to the one currently being displayed). Footers aren’t stacked in TFORM, and TFORMCVT provides no substitute for this TGAL feature.
TFORMCVT: Converting From TGAL to TFORM Special Characters \ When the TGAL file contains a trigger character alone in column 1, the TFORMCVT output is: \BREAK PARAGRAPHS When the TGAL file contains a trigger character alone in a column other than 1, the TFORMCVT output is a double trigger (a literal trigger). For example: The system name is \PRUNE. becomes The system name is \\PRUNE.
TFORMCVT: Converting From TGAL to TFORM Tips If the TGAL required blank character is specified as the trigger character, TFORMCVT does not double it in the output (when it’s not in column 1); instead, it translates it to the trigger followed by “#”. TFORMCVT doubles the trigger character (when it’s not in column 1) in all text lines. TFORMCVT also checks the strings in the following commands for triggers: FOOT, HEAD, OUT, SECT, SUBHEAD, TAG, TODAY, and VERSION.
Appendix F Moving Between TFORM and T-TEXT Running TFORMCVT In addition to converting TGAL to TFORM files, as described in Appendix E, the TFORMCVT utility can convert a T-TEXT file to a TFORM file or a TFORM file to a T-TEXT file. TFORMCVT provides a bidirectional filter that transforms T-TEXT or TFORM commands as precisely as possible to their TFORM or T-TEXT counterparts.
Moving Between TFORM and T-TEXT TTEXT indicates that the input is a T-TEXT file. The output is automatically a TFORM file. TFORM indicates that the input is a TFORM file. The output is automatically a T-TEXT file. You can also include standard RUN command options, such as NOWAIT, between the slashes.
Moving Between TFORM and T-TEXT TFORM to T-TEXT Translation Overview The input to TFORMCVT is a syntactically valid T-FORM file. TFORMCVT does not issue warnings or T-TEXT syntax errors. An invalid escape in the input file may be ignored or cause TFORMCVT to go into DEBUG. This should not be a problem if the T-TEXT file is created using the T-TEXT product.
Moving Between TFORM and T-TEXT TFORM to T-TEXT Translation Overview The input to TFORMCVT is a syntactically valid TFORM file. TFORMCVT does not issue warnings for TFORM syntax errors. An invalid command in the input file may be ignored or cause TFORMCVT to go into DEBUG. This should not be a problem if you have run the input file through TFORM without errors. The output is a valid T-TEXT file. This file produces similar output from T-TEXT as the input file does from TFORM.
Moving Between TFORM and T-TEXT If your output command line will be longer than 80 characters, the following error message is displayed: COMMENT WARNING **** T-TEXT MAY BREAK THIS LINE. LINE: line-number COMMENT **** LAST WQARNING OCCURRED ON LINE: line-number The line numbers of the text lines containing the errors (current and preceding) is indicated in line-number. If this is the first unrecognized command, the second comment line is not displayed.
Appendix G A FUNCTION Construct Examples of Function and Macro Constructs You use a function to evaluate an expression and determine its value. It can also accept and process arguments, but a function cannot produce any lines of text. A function can only return a single value.
Examples of Function and Macro Constructs FUNCTION Example 1 Let’s start with a simple function where you use TFORM system variables. Remember, you cannot assign values directly to these variables—TFORM assigns the appropriate values when you use them.
Examples of Function and Macro Constructs \FUNCTION span BEGIN LOCAL month_from,day_from,month_to,day_to,time 1 \ FUNCTION month_length BEGIN \ RETURN SELECT(ARG(1),31,28,31,30,31,30,31,31,30,31,30,31) \ ENDFUNCTION month_length 2 \ASSIGN \ASSIGN \ASSIGN \ASSIGN \ASSIGN 3 \ \ \ \ \ month_from ARG(1) day_from ARG(2) month_to ARG(3) day_to ARG(4) time 0 LOOP month_to_month_from ASSIGN time time+(month_length(month_from)-day_from)+1 ASSIGN day_from 1 ASSIGN month_from month_from+1 ENDLOOP \ ASSIGN ti
Examples of Function and Macro Constructs The following application of span shows how you can use digits to represent two specified days (the month and day for each) and then call span to evaluate those digits to produce a result. When your file is run, span is enclosed in an indirection escape sequence; this tells TFORM to evaluate the expression (arguments 1, 2, 3, and 4) and put the resulting value in the text in place of the expression.
Examples of Function and Macro Constructs This is what the result of that application looks like: Dear Diary, February 1, 1986: I start my diary. Steve. I want to tell you all about February 25: 24 days have gone by, me. and he still hasn't noticed April 3: It has been 37 days since I wrote, but today's the day he finally said "Hi!" to me.
Examples of Function and Macro Constructs Refer to Section 3 under “TFORM Commands” for more information about these macros. The lines between the MACRO BEGIN and ENDMACRO commands define the actions of the macro. A macro must be entered on a line by itself beginning in column one. The following examples demonstrate how you can design macros to accomplish almost any task (subject to the rules of TFORM).
Examples of Function and Macro Constructs The following input file uses the point macro to tell TFORM where to insert the results of the point macro. \SOURCE $Volume.Subvolume.point Dear J.D. I would like to address the following items: \point You should not use the phrase "minimal profits for a lose. \point Our loss was not "minor." \point Our company is bankrupt; don't refer to it as a "leave of absence." Your nephew and V.P., Robespierre The printed results of your input file looks like this: Dear J.D.
Examples of Function and Macro Constructs MACRO Example 2 This example prints a line of bullets from margin to margin. You can use this to delineate features (say in a program) by sandwiching text between such lines.
Examples of Function and Macro Constructs If you run the above macro with a program (in this case a macro named simplex), the result would look like this: ************************************************** This simplex macro disables left/right alternation of headers and footers, for printing single-sided draft copies.
Examples of Function and Macro Constructs MACRO Example 3 This example demonstrates a macro designed to collect index entries and then print the entries. You could use this macro by placing idx strings in your input file with the particular index item in quotes at the point where each item appears in your document. See the following input file example. After you are finished with your document, you make a call to the macro and tell it to build your index using all the collected index items.
Examples of Function and Macro Constructs \ IF UPPER(ARG(1,1))="BUILD" \ \ ASSIGN k 1 ASSIGN last1 idx_count 4a \ LOOP 4b \ \ \ IF idx_count<=0 EXITLOOP ENDIF \ \ ASSIGN first 1 ASSIGN j 2 4c \ LOOP last1-1 4d \ \ \ IF idx_item\(j\)
Examples of Function and Macro Constructs 1 - The name of this macro is idx. Your input to this macro either generates a new index entry or is a command to print an index. 2 - This IF construct checks to see if there is any input (arguments in TFORM) in your file for this macro. If there is no input or if the input is incorrect, TFORM displays this error message and exits the macro. If input exists and is correct, then the next macro statement is executed.
Examples of Function and Macro Constructs The following application shows the input file with the idx strings in place, referencing various items for the index. The last line of the file calls the IDX macro with the argument BUILD recognized as the keyword for building the index. I would first like to discuss alligators of the swamps \idx "Vicious lizards" in Florida, which have been escaping and terrorizing the nearby neighborhoods. Three recent occurrences are noteworthy.
Examples of Function and Macro Constructs The result of the input file should look like this: I would first like to discuss alligators of the swamps in Florida, which have been escaping and terrorizing the nearby neighborhoods. Three recent occurrences are noteworthy. Next we move on to examining the swamps themselves. How safe are they for the casual visitor? Three recent occurrences are noteworthy. My final statements focus on predictions for the impact of man on swamps and their inhabitants.
Appendix H Font Characteristics Introduction A typical document is printed using a variety of fonts. For example, a large font might be used for the title and chapter headings of a document, a standard-size font might be used for the body of the document, and key words or phrases might be highlighted using a bold or italic font. A number of fonts are supplied with a printer; these fonts are referred to as internal fonts.
Font Characteristics Any internal, cartridge, or soft font can be selected for printing. Fonts are selected using the TFORM STYLE FONT command (refer to Section 3) or the FONT rendition control escape sequence (refer to Section 4). This appendix describes fonts and how to select them. Font Selection There are several characteristics used to identify a font; these characteristics are described in detail later in this appendix. A font is selected by specifying its characteristics.
Font Characteristics When selecting a font, the printer compares the highest-priority characteristic in the table to the corresponding characteristic of the available fonts. If only one font, that font is selected. However, when several fonts match, the printer compares the next-highest-priority characteristic to the corresponding characteristic of the available fonts, and so on down the list. When only one font remains, that font is selected.
Font Characteristics To select a portrait, Roman-8, fixed-spaced, 10 pitch, 12 point, upright, bold, Courier font, specify each of the characteristics using the STYLE FONT command and enter it like this: \STYLE FONT 8 "0, 8U, 0, 10, 12, 0, 3, 3" | | | | | | | | | | | | | | | | | | | | | | | | | | Typeface = Courier | | | | | | | | | | | | | | | Stroke weight = Bold | | | | | | | | | | | | | Style = Upright | | | | | | | | | | | Height = 12 point | | | | | | | | | Pitch = 10 CPI | | | | | | | Spacing = F
Font Characteristics Table H-2. Default Fonts and Characteristic Values Font Orientation Portrait Symbol Set Roman-8 PC-8 Latin1 Spacing Fixed Pitch 10 CPI 16.6 CPI Height 12 Pt 8.5 Pt Style Upright Stroke Weight Medium Bold Typeface Courier Line Printer 0 1 2 3 4 5 6 7 8 9 = 00 0 0 0 0 0 0 0 0 0 0 = 8U = 10U = 0N 8U 10U 10U 0N 8U 10U 10U 0N 8U 10U =0 0 0 0 0 0 0 0 0 0 0 = 10 = 16.6 10 10 10 10 10 10 10 10 16.6 16.6 = 12 = 8.
Font Characteristics Font Characteristics A font is a set of characters that have similar characteristics. Fonts are made up of the following characteristics: Orientation – Portrait or landscape Symbol set – Roman-8, PC-8, and so forth Spacing – Proportional or fixed Pitch – Characters printed per horizontal inch Height – Character height (point size) Style – Upright or italic Stroke weight – Medium, bold, and so forth Typeface – Courier, Times Roman, Helvetica, and so forth Orientation.
Font Characteristics The orientation characteristic sets the page length, top margin, text length, and the left and right margins. Once print orientation is chosen, only those fonts with the corresponding orientation are available for selection. The default setting is portrait. Symbol Set. This is a unique ordering of the characters in a font. Each symbol set is defined with a specific set of applications in mind.
Font Characteristics Table H-3.
Font Characteristics Spacing. This is another characteristic that differentiates fonts. Fonts have either fixed or proportional spacing. Fixed-spaced fonts are those for which the intercharacter spacing is constant. Proportionally-spaced fonts are those for which the intercharacter spacing varies with the natural shape of the character. You can see the difference in the following diagram.
Font Characteristics Pitch. This characteristic describes the number of characters printed in a horizontal inch (that is, characters per inch or CPI). Pitch applies only to fixed-spaced fonts, because the number of characters per inch varies for proportionally-spaced fonts. The default setting ten characters per inch. The following diagram illustrates the difference between a line of text printed in 10, 12, and 16.6 CPI. This pitch is 10 characters/inch This pitch is 12 characters/inch This pitch is 16.
Font Characteristics Style. This characteristic is defined by the angle of the strokes of the characters with respect to the X-axis. Style is either upright or italic. The default style is upright. The following examples compare the upright and italic styles. UPRIGHT UPRIGHT UPRIGHT ITALIC ITALIC ITALIC Stroke Weight. This characteristic designates the thickness of the strokes that compose the characters of a font. Table H-4 shows the different stroke weights. Table H-4.
Font Characteristics The default setting is 0. The following diagram shows light, medium, and bold stroke weights. Typeface. This is a generic name for graphics symbols having common design features. Each typeface has unique and distinguishing characteristics. Here are three different typefaces: Table H-5 lists the typeface values that you can specify in the STYLE FONT command.
Font Characteristics Table H-5. Note Typeface Values Value Typeface 0 3 4 5 6 8 11 17 18 19 20 21 22 23 24 Line Printer Courier Helvetica Times Roman Letter Gothic Prestige Presentations Optima ** Garamond ** Cooper Black ** Coronet Bold ** Broadway ** Bauer Bodoni Black Condensed ** Century Schoolbook ** University Roman ** Typefaces that have trailing asterisks (**) might be registered trademarks of a third party.
Index 5530 printer and device type 5-7 and the MANUAL option printing to terminal 3-113 effects of LEVEL macro 3-77 SET command 3-130 how to specify 6-3 metacharacter and correct proportional pitch 4-5 printing documents 3-109 shadow-printing 4-8 A Abbreviate keywords 1-3 ABS function description , syntax, and type 5-21 Addition (+) operator 5-18 ADDRESS macro description and how to use 3-68 Advanced features auxiliary files 3-31 ALIGN function description , syntax, and type 5-23 ALPHABETIC used as a bullet
Index APPEND used in a macro 3-99 when using a function construct 3-43 ARG function description, syntax, and type 5-24 using in a macro 3-102 ARROW inserting in a box 3-119 ASSIGN and indirection escape sequences 4-11 description and syntax 3-6 use to give variables a value 5-5 when and how to use 3-6 Auxiliary files how many can you manipulate 3-31 maximum that can be opened 3-36 B Backslash character (\) 1-2, 1-6 BEGIN beginning of a macro 3-99 BEGIN LIST ALPHABETIC 2-22 definition 2-21, 3-85 how to use
Index Bit-map data sending to the printer 3-34 BLANK option to the VERBATIM command 3-162 Blank lines inserted in a box 3-119 specify for table of contents 3-80 pages when one prints 2-13 space in your text 2-12 use a trigger character 4-4 BOLD description 4-6 used in titles 3-77 Boolean “and”(&&) operator 5-19 combining 5-19 expression 5-3 inclusive "or" (//) operator 5-19 results as TFORM views it 5-17 returning a true value using a function 5-25 Boxes and spaces 2-23 changing horizontal and vertical sid
Index ending 2-24 simple usage 2-23 SET (STYLE command option) creating a box 3-119 BREAK 2-8 description and syntax 3-9 how to use 3-10 trigger character 3-10 BULLET using with a list of items 3-87 Bulleted lists 2-22 C Cancelling indentation 3-59 left indentation 3-61 Capitalization in specific place in text 2-29 Carriage return and a trigger character 4-5 CENTER command a line break 2-10 and heads 2-20 description and syntax 3-11 examples 2-10 how to use 3-12 line breaks 3-10, 3-12 Centered heads 2-20 C
Index CHANGES command allowing enough space for change marks 3-15 alternating change bars 3-138 control printing of change bars 3-120 description and syntax 3-13 examples 2-26 print only pages with changes 3-115 used with the TODAY command 3-158 Changing default margins 2-4 headers in text 3-49 source file 1-5 system, volume, and subvolume 3-26 Characters printed per inch H-12 CHARS unit of measure 1-4 used in print offset 3-117 used with paper size 3-139 CHR function description, syntax, and type 5-25 Cle
Index Commands and the IF construct 3-57 ignoring TFORM and printing 3-161 TODAY 3-156 ASSIGN 3-6 BREAK 3-9 CENTER 3-11 CHANGES 3-13 COMMENT 3-16 CONTENTS 3-18 DEFINE 3-21 ENV 3-26 ERROR 3-29 EXIT 3-30 FILE 3-31 FOOTER 3-37 HEADER 3-46 HELP 3-50 INDENT 3-58 KEEP 3-62 LETTER 3-64 LEVEL 3-71 LIST 3-83 list of control type 3-3 formatting type 3-1 programmatic type 3-4 LOOP 3-94 MACRO 3-98 NEW 3-103 Index–6 11387 Tandem Computers Incorporated
Index overview of 3-1 PAGE 3-105 PRINT 3-108 SET 3-118 SOURCE 3-131 SPACE 3-135 STYLE 3-137 that cause mandatory line breaks 3-10 that stop the joining of text 3-123 TI 3-151 TIME 3-153 TITLE 3-153 VERBATIM 3-161 COMMENT command description and syntax 3-16 examples 2-15 placement of in command line 3-17 Comments See COMMENT 15 Concatenation operator 5-18 Conditional operations and formatting 3-55 processing 2-31 Constant expression description 5-2 Construct 2-31 See also FUNCTION 32 See also IF construct S
Index CONTENTS command creating partial 3-20 description and syntax 3-18 how many section levels 3-72 how to use 3-19 printing 3-19 used in LEVEL macro 3-79 used with the TITLE command 3-155 using double indirection escape sequences 4-13 Control characters and printing 1-8 list of current values of 3-53 redefining 3-25 commands 3-3 Control-Y 3-30 Conversion values for units 1-4 Converting expressions to string 4-11 system variables 3-92 COPIES parameter option of PARAM command 6-2 Creating a table of conte
Index D Date formatting current date with digits 3-157 how to include in your document 3-156 resetting system date 3-160 DD (number of day) 3-157 DECIPOINTS (unit of measure) 1-4 Decipoints and indentation 3-60 Defaults a list of items 3-87 a summary of environmental settings C-1 footer and header gaps C-1 form length C-1 overstrike character 4-7 printer fonts H-5 DEFINE description and syntax 3-21 line breaks 3-10, 3-25 within a macro construct 3-101 BOX changing sides 2-24 function description, syntax, a
Index Descriptive lists 3-88 DEVICE^TYPE parameter option of the PARAM command 6-3 Division (/) operator 5-14 Double indirection with escape sequences 4-13 DOWN (for subscripts) description and syntax 4-8 Downloadable fonts H-1 DOWNSHIFT (SET command option) convert uppercase to lowercase 3-121 Drawing boxes 3-21 Duplication error 1-7 E ELSE and the IF construct 3-55 END LIST definition 2-21, 3-85 rules 3-92 End-of-file and the table of contents 3-20 ENDFUNCTION definition G-1 ENDIF and the IF construct EN
Index ENV description and syntax 3-26 how to use 3-27 Equal to (=) operator 5-15 Error 3-28 control printing pages with 3-111 description and syntax 3-29 end-of-file 3-33 GUARDIAN 90 file system stored where 5-7 minimizing line too long 2-8 reporting errors when processing input 3-121 writing an error message 3-29 Escape characters list of 3-24 sequence defintion and examples 2-27 description 4-1 help 3-52 Evaluating an expression then converting to a string 4-11 Evaluating strings of system variables 3-54
Index Expressions description and rules 5-1 description of complex and primary 5-2 evaluating compound 5-20 using functions 3-41 examples 5-3 syntax 5-4 External name See SOURCE F FILE command description and syntax 3-31 how to use 3-32 CLOSE option 3-35 OPEN option 3-32 overview 2-30 READ option 3-33 WRITE option 3-33 File auxiliary,using 2-30 checking for command errors 3-36 closing when stopping TFORM 3-36 code 3-31 correcting not found error 3-28 inserting comments 3-16 opening for read or write access
Index File name when it is expanded 3-27 FILE READ use to give variables a value 5-5 FILE WRITE example using indirection 4-16 FIND function description, syntax, and type 5-25 Fixed-spaced fonts H-9 Flexible units 1-4 FONT (rendition control) description how to change text 4-6 FONT (STYLE command option) different fonts H-1 specifying fonts when printing 3-139 Font characteristics See Fonts Fonts a list of characteristics H-7 an example of using the FONT command H-4 choosing one H-2 description H-1 height
Index FOOTER command and the page number 3-39 appearing on current page 3-39 blank footer 3-40 changing in text 3-40 creating a blank page 3-40 default gaps C-1 description and syntax 3-37 how to use 3-38 line break 3-10, 3-40 maximum number 3-37 pitch changes 3-40 used with the TITLE command 3-155 using double indirection escape sequences 4-13 Footers how many 2-7 margins 2-7 setting 2-6 setting margin of 3-144 single-spaced 2-7 Forcing a line break 2-8 FORM (STYLE command option) specifying the size of t
Index Formatting defaults 1-8 lines 3-118 list of commands 3-1 metacharacters to perform special 4-1 sentence examples 2-16 Freeing up space for more text 3-40, 3-49 FUNCTION construct description G-1 rules 5-20 description and syntax 3-41 example G-2 how to use 3-42 overview 2-32 placement of 3-45 returning a value 5-21 terminating 3-43 versus a macro 3-45 writing an error message for 3-29 Functional expression description and rules 5-2 G GAP (LIST command option) lines separating list items 3-90 overridi
Index Gaps between paragraphs 2-16, 3-146 default 2-7 Global variables 3-43 in a macro 3-99 Greater than (>) operator 5-19 or equal to (> =) operator 5-19 GUARDIAN 90 assigned file code 5-7 file system error 5-7 name of input file 5-7 PARAM command 6-1 H HEADER command creating a blank page 3-40 description and syntax 3-46 how many 3-46 line breaks 3-10 page numbers 3-48 pitch changes 3-40 used with the TITLE command 3-155 using double indirection escape sequences 4-13 Header default gaps C-1 Headers contr
Index margins 2-7 setting 2-5 single-spaced 2-7 Headings Level 0 2-18 specifying levels of 3-72 Height font characteristic description H-12 HELP command description and syntax 3-50 examples 3-51 how to use 3-51 HOLD parameter option of the PARAM command 6-7 Hyphenating words using a trigger character 4-2 Hyphenation and syllables 3-122 controlling 2-25 HYPHENS (SET command option) controlling output text 3-121 I IF construct description and syntax 3-55 how to use 3-56 overview 2-31 INCHES (unit of measurem
Index input and output lines 3-61 more or fewer lines 2-12 ON and OFF tips 3-61 similiar to TI 3-152 used with paragraphs 3-146 Indentation and the IF construct 3-57 and unit of measurement 2-11 defaults 2-11, 2-17, C-2 examples 2-10 in a list of items 3-85 in the table of contents 3-79 list of items 3-90 paragraphs 2-17 using the + sign 2-11 when using SET BOX ON 3-119 Indirection escape sequence rules 4-11 double indirection 4-13 Input EDIT file and current line number 5-8 date file was last modified 5-7
Index ITEM (part of LIST command) used in lists 3-85, 3-92 J JOIN (SET command option) and the paragraph SENTENCE option 3-147 controlling paragraphs 3-145 joining lines 3-122 turning off line justification 3-123 what stops joining 3-123 Joining overriding with BREAK 3-10 text 3-123 indented example 2-8 TFORM's rules 2-8 two words using a trigger character 4-5 JUSTIFY function description, syntax, and type 5-27 Justifying text examples 2-9 indentation in your text 2-11 K KEEP description and syntax 3-62 ef
Index L LEFT (LEVEL command option) and heads 2-20 Left justified heads 2-20 title 3-19 Left margin See Margins LEFTINDENT (LIST command option) indenting a list of items 3-90 LENGTH function description, syntax, and type 5-29 Length of document stored where 5-13 Less than (>) operator 5-19 or equal to (< =) operator 5-19 LETTER (macro) description and syntax 3-64 how to use 3-66 list file template overview 2-31 LEVEL command CONTENTS (option) definition 3-79 creating table of contents 2-21 description and
Index section level limits 3-72 simple useage 2-19 spacing around heads 2-19 specifying levels of headings 3-72 use to give variables a value 5-5 STYLE (option) BOLD 3-77 defaults 3-79 definition 3-76 NUMBER 3-77 UNDERLINE 3-77 UPSHIFT 3-77 style of heads 2-20 used with the TITLE command 3-155 when default is turned off and on 2-20 Library file for your own macros 3-102 Line current source stored where 5-8 Line breaks BREAK comamnd 3-10 CENTER command 3-12 DEFINE command 3-25 effects of KEEP 3-63 FOOTER co
Index Line too long error minimizing 2-8 using the address macro 3-68 LINES (unit of measure)1-4 Lines centering 3-11 maximum TFORM can keep together 3-63 LIST command BEGIN LIST option 3-86 default 2-22 description and syntax 3-83 examples 3-84 how to use 3-85 keyword definition 3-90 macro and the SYS_LNUM variable 5-16 modifying labels 3-90 steps for creating 2-21 List file template block 3-67 Lists and using double letters 2-23 LOCAL definition 3-43 variables in a macro 3-99 Logical operators descriptio
Index LOWER function description, syntax, and type 5-29 Lowercase how to specify 2-29 M MACRO See Macro Macro BEGIN definition 3-99 customized for letter 3-64 description and syntax 3-98 examples G-6 how to use 3-99 how to use invocation command 3-102 LEVEL macro for section headings 3-71 List of G-5 LOCAL definition 3-99 name of currently executing 5-9 overview 2-32 passing arguments 3-102 placement of construct 3-101 rules in using options 3-100 summary of 3-5 that maintain system variables 5-15 writing
Index MARGIN (STYLE command option) left and right 3-142 specifying area around text 3-141 Margins and indenting 2-12 and printing text with the VERBATIM command 3-162 change left and right temporarily 3-58 changing default 2-4 current indentation value stored where 5-8 defaults C-2 setting space to left and right of 3-143 MAX function description, syntax, and type 5-29 Maximum auxiliary files open 3-36 default values for measurements and environment settings C-1 lines TFORM can keep together 3-63 point pa
Index Multiple commands semicolons 1-3 Multiplication (*) operator 5-14 N Names rules for macros 3-98 rules for variables 5-2 Nested indentation using INDENT ON or OFF 2-12 NEW command changing page-formatting 2-14 description and syntax 3-103 effects of using KEEP with 3-63 getting a partial table of contents 3-20 inserting PRINT PAGES command 3-117 leaving blank lines 3-104 line breaks 3-10 page breaks 2-13 using with KEEP 3-104 where to place STYLE commands 3-137 NEW ODD or EVEN page 2-13 NEXTLOOP comma
Index Numeric expression 5-3 lists 2-22 values changed to string values 3-33 converting to string types 4-11 stored how 5-17 NUMERIC function description, syntax, and type 5-32 O ODD (NEW command option) 3-103 Odd-numbered pages and footers 3-38 Opening a file read or write access 3-32 Operand and operators mixing types 5-17 Operands description and rules 5-17 Operating in standalone mode 1-5 Operators description and the three types 5-17 help for 3-52 ORD function description, syntax, and type 5-32 Orient
Index Output lines INDENT 3-61 what effects them 3-151 specifying what device to use 6-3 specifying what type of output device 5-7 Overprinting characters 4-7 Overriding a paragraph gap 3-149 sequential page numbers 3-107 OVERSTRIKE (rendition control) description 4-7 Overstriking characters 3-21 Overview of commands 2-1 P Page breaks 2-13 breaks and blank lines 3-104 control 2-13 creating a first blank 3-40 description and syntax 3-105 get a page number 3-107 header on current 3-48 header on first 3-47 he
Index shifting whole text area 2-28 starting text on odd 3-103 stop page numbering 3-107 turning numbering on and off 3-105 using with headings 2-19 Page breaks NEW command 3-103 paragraph control 3-145 preventing with KEEP 3-62 Page counter when set 3-48 Page formatting NEW and STYLE commands 2-14 Page number and footers 3-39 and headers 3-48 consecutively printed 3-40 PAGE using the # (pound sign) 3-107 Paper where to specify size of paper 3-139 Paper size specifying 2-2 Paragragh and gaps between 2-16 b
Index PARAM command parameters COPIES 6-2 DEVICE^TYPE 6-3 FORM 6-6 HOLD 6-7 PRINTER^TYPE 6-8 REPORT^NAME 6-9 SPOOLOUT 6-10 setting the environment of TFORM 6-1 Parameters controlling environmental 3-118 Parenthesis and custom printing 4-6 PCL description 6-4 printers that recognize 6-3, 6-3 PICAS (unit of measurement) 1-4 Pitch determining tab stops 3-128 font characteristic description H-11 horizontal and vertical 3-49 horizontal and vertical spacing 3-124 Plus sign (+) indentation 2-11 paragraph indentin
Index PRINT command BIN (option) printing on the 5530 printer 3-109 current values of flags 5-10 description and syntax 3-108 DRAFT (option) printing drafts 3-111 ERRORS (option) error pages printed 3-111 list of characters of SYS_PRINTFLAGS 3-52 MANUALLY (option) printing only with 5530 printer 3-112 OFFSET (option) for hole-punch or binding 3-113 tab settings 3-130 PAGES (option) printing only specified pages 3-114 the pages with errors 3-117 WARNINGS (option) pages with errors 3-115 what order commands
Index Printing all text as is 3-161 at end of document 3-19 begin on new page 3-103 error messages 3-130 metacharacters 4-1 rendition control escape sequences 4-6 sequestial line numbers 2-26 shadow-printing 4-8 specific pages 2-29 specify what font 3-139 specifying how many copies 6-2 text with an overstrike character 2-27 underscore characters under text 4-10 using what type of device 6-8 what devices 1-8 which font to use H-3 with a specified font 4-7 your document 1-8 Processing conditional 2-31 pipeli
Index R RAM increasing memory for fonts H-1 Range of a function 3-43 Read access to a file 3-32 Repeating actions looping 3-94 REPORT^NAME parameter option of the PARAM command 6-9 RETURN statement and a function G-2 terminating macro execution 3-100 when using a function construct 3-43 Returning a single value G-1 value in a function construct 3-42 RIGHT (LEVEL command option) and heads 2-20 Right justified heads 2-20 title 3-19 Right margin See also Margins change marks in 3-15 RIGHTINDENT indenting list
Index RUN command and the device type specified 5-7 and the LETTER macro 3-66 printing pages 2-29 TFORM examples 1-5 Running TFORM 1-5 S Section heading saving in variable 3-81 Section number stored where 5-16 Section title begin on even or odd page 3-76 begining on new page 3-75 how to print left, center, or right 3-77 number of lines before and after 3-74 double indirection escape sequence 4-15 SEC_NUM used with section heading 3-81 SELECT function description, syntax, and type 5-33 Sending output to the
Index SEQUENCING numbering lines in your output 3-125 Sequentail line numbering 2-26 SET command automatic hyphenation 3-122 BOX (otpion) effects of a NEW command 3-130 examples 2-23 description and syntax 3-118 DOWNSHIFT ON or OFF 2-29 ERRORS (option)3-121 flags set by 5-12 how to use 3-119 HYPHEN ON default 2-25 inserting a blank line in a box 3-119 JOIN (option) description 3-122 JUSTIFY Option) justifying text lines (left and right) 3-123 JUSTIFY OFF and the address macro 3-68 line breaks 3-10 list of
Index SPACING (option) examples 2-30 lines between text lines 3-126 TABS (option) changing tab stops 3-127 TABS ON default 2-24 UPSHIFT (option) converting lowercase to uppercase 3-128 SHADOW (option) rendition control description and syntax 4-8 SHORT USA and WORLD option of TODAY command 3-157 Single spaced footers 3-40 headers 3-49 Soft fonts description H-1 SOURCE Command description and syntax 3-131 external name of system to expand file names 5-13 of volume and subvolume 5-15 how many files can be ope
Index SPACE command and footers 3-39 and headers 3-48 and the PAGE command 3-107 creating a blank page 3-40 description and syntax 3-135 examples 2-12 ignoring SPACE if KEEP is in effect 3-136 line breaks 3-10 overrriding a paragraph gap 3-149 Spaces between sentences when TFORM chooses not to add 3-150 SPACING lines between text lines 3-126 Spacing font characteristic description H-9 Special effects creating 2-15 Spooler level 3 spooling 6-10 Spooler form name specifying 6-6 SPOOLOUT parameter option of t
Index Storing a numeric or string value in a variable 3-6 String expression 5-3 STRING function and the SYS_CHARS variable 5-6 SYS_PRINTFLAGS variable 5-10 SYS_SETFLAGS variable 5-12 SYS_STACKFLAGS variable 5-13 description, syntax, and type 5-34 used to convert system variables 3-93 Stroke weight font characteristic description H-14 STYLE command and formatting sentences 2-16 comands sourcing into your file 2-30 creating a descriptive list 3-88 description and syntax 3-137 font characteristic description
Index overview 2-17 paragraph indenting 2-17 resetting paragraph style to default 2-18 resetting to the default 2-14 SENTENCES (option) 3-147 setting left and right margin headers 3-143 margin for footers 3-144 paragraph spacing 3-144 using when joining text 3-123 Subroutine See MACRO Subscript creating 2-28 line spacing 2-30 Subscripts and the SET FIXED option 3-127 using the DOWN rendition control 4-8 Subtraction (-) operator 5-18 Subvolume changing with ENV 3-26 Superscript creating 2-28 line spacing 2-
Index System functions and writing your own G-1 System variables description 5-5 SYS_BOTTOMMARGIN variable description and type 5-6 SYS_CHARS variable description and type 5-6 help for 3-52 SYS_DATE variable description and type 5-15 used with the TODAY command 3-156 using in a header 3-160 SYS_DAY variable description and type 5-7 used with TODAY 3-157 SYS_DAYOFWEEK variable description and type 5-7 SYS_DEVICETYPE variable description and type 5-7 SYS_FILECODE variable description and type 5-7 SYS_FILEDAT
Index SYS_FORMWIDTH variable description and type 5-8 SYS_HOURS variable description and type 5-8 used with TIME 3-153 SYS_INPUTLINENUM variable description and type 5-8 SYS_LDESC variable converting to string 3-92 description and type 5-15 used with descriptive lists 3-88 SYS_LEFTINDENT variable description and type 5-8 SYS_LEFTMARGIN variable description and type 5-8 SYS_LEVEL0_TITLE and the LEVEL macro 3-74 SYS_LEVELn_TITLE variable description and type 5-15 SYS_LINEHEIGHT variable description and type
Index SYS_MONTH variable description and type 5-9 used with TODAY 3-157 SYS_PAGENUMBER variable description and type 5-9 example double indirection 4-14 when using PAGE ON 3-105 SYS_PARAGRAPHBOTTOM variable description and type 5-9 SYS_PARAGRAPHGAP variable description and type 5-10 SYS_PARAGRAPHINDENT variable description and type 5-10 SYS_PARAGRAPHTOP variable description and type 5-10 SYS_PRINTFLAGS variable description and type 5-10 help for 3-52 SYS_RIGHTINDENT variable description and type 5-11 SYS_R
Index SYS_SYSTEM variable description and type 5-13 SYS_TABS variable description and type 5-13 SYS_TEXTAREALENGTH variable description and type 5-13 SYS_TEXTAREAUNUSED variable description and type 5-14 SYS_TFORMVERSION variable description and type 5-14 SYS_TIME variable how to use with TIME 3-153 system variable used with TIME 3-153 SYS_TOPMARGIN variable description and type 5-15 SYS_VOLUME variable description and type 5-15 SYS_YEAR variable used with TODAY 3-157 SYS_YEAR variable description and type
Index Tabs clearing 2-25 setting a three tab column table 2-25 using 2-24 Terminating the IF construct 3-55 Text area remaining on the current page 5-14 at the bottom of the page (footer) 3-37 freeing up space for more 3-40 preventing widows and orphans 3-144 with comments 3-16 Text, joining 2-8 TFORM current version running on your system 5-14 TFORMLIB system macros location 3-102 variables maintained by macros 5-15 TI command and indentation 3-61 effects of a blank line 3-152 indenting a single output li
Index Titles double indirection escape sequences 4-13 empty headers 3-49 in footers 3-37 in headers 3-46 in table of contents 3-18 TODAY command and the SYS_DATE variable string form 5-15 description and syntax 3-156 how to use 3-157 Tokens after command ignored error message 3-61 TRANSLATE function description, syntax, and type 5-35 Trigger character BREAK command 3-10 changing 3-24 concatenating a word 4-5 definition 1-2 exceptions 1-2 for a required blank 4-4 backspacing 4-4 comments in text 4-2 hyphena
Index Typeface font characteristic description H-15 T_TEXT and SET CHANGES 3-120 U Unary operators description and list of 5-17 UNDERLINE (rendition control) description and syntax 4-10 used in titles 3-77 Units conversion values 1-4 list of fexible ones 1-4 used in a STYLE command 3-149 UP (rendition control) description and syntax 4-10 UPPER function description, syntax, and type 5-36 Uppercase how to specify 2-29 UPSHIFT (SET command option) converting lowercase to uppercase 3-129 used in titles 3-77 Us
Index V VALUE (indirection escape sequence keyword) double indirection description and syntax 4-11 Value out of range error when using a macro 3-102 Variable expression description and rules 5-2 Variable values 1-3 Variables changing its type 3-8 converting system 3-92 declaring for a macro 3-101 description and rules 5-5 help for 3-53 in a macro 3-99 indirect using the letter macro 3-66 local and global ranges 3-43 maintained by macros 5-15 reading into a file 3-33 saving section heading in 3-81 storing a
Index VERBATIM command description and syntax 3-161 input file contents treat as text 3-133 line breaks 3-10 used in setting sentence endings 3-148 used with paragraphs 3-146 Vertical white space joining text 3-123 Volume changing with ENV 3-26 W WARNINGS specify whether to report 3-129 Wider lables for lists 3-88 Widows how to prevent 3-144 in your text 2-17 WIDTH label of a list item 3-90 WIDTH function description, syntax, and type 5-36 Write access to a file 3-32 Y YY meaning 3-157 Z Zeroes when TFORM
Index Special characters ! (exclamation point) used for the comment 4-2 " (quotation mark) character meaning in TFORM 3-92 when using in a string 5-17 # (pound sign) character to get page numbers; 3-107 using with CONTENTS 3-20 for blanks; 4-4 $SYSTEM.SYSTEM.TFORMLIB 3-102 & (ampersand) joining two words 4-5 + (plus sign) paragraph indenting 2-17 - (hyphen) used with to break a word 4-2 .
Index > (less than) operator 5-19 ? (question mark) and the letter macro 3-67 getting help; 3-50 \ (backslash) letter macro 3-66 _ (underscore character) using in text 4-10 _ (underscore character) used in variable names 5-2 | (change mark) character 2-26 | (vertical bar) change character in the margin 3-13 in headers 3-46 title in table of contents 3-18 11387 Tandem Computers Incorporated Index–49