
Real Time Information Director User Documentation


RTID Deployment
Hewlett-Packard Company 7 529618 - 002
Create the Dispatch EAR File
To deploy a solution, you must create an Enterprise Application deployment file
(Dispatch.ear) that describes your Director Enterprise application.
Create the EAR file by modifying the default Dispatch.ear file to include data for your
application and target system.
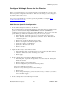
1. Open the BEA Weblogic Build tool from the start menu under BEA Weblogic 8.1
Platform -> Other Development Tools -> Weblogic Builder
2. Open the c:\rtid\lib\Dispatch.ear file from the WebLogic Builder tool.
3. Edit the DispatchServlet jndiProviderUrl parameter.
• In the tree on the left, click on the DispatchServlet.war element and then the
Servlets element.
• Select the Dispatch servlet and then the Init Params panel. Double click on the
jndiProviderUrl parameter to bring up an edit window.
• In the edit window change the IP:port value for this parameter to the IP and port
that your wls server is running at. Click OK.
• From the Build tool, click the ‘save’ button to save you changes to the
Dispatch.ear file.
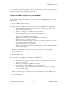
4.
If you want to change the application components deployed, you can do this by using
the WinZip tool to remove the components from the ear file. You then run the
Weblogic Build tool again to update the application.xml deployment descriptor inside
Dispatch.ear.
• Open the c:\rtid\lib\Dispatch.ear file from WinZip and then delete components not
wanted. Exit WinZip.
• Open the c:\rtid\lib\Dispatch.ear file from the Weblogic Builder tool and then save it
again. The build tool will change the application.xml file due to configuration
changes of component changes. For example you could delete the LoaderMDB if you
have no JMS inbound documents.
Create a Weblogic Server on Windows
You don’t have to deploy the Director on a workstation first, but it can be convenient to
do so, for example if you don’t yet have NonStop WLS installed on the NonStop Server.
1. Run the WebLogic Domain Configuration Wizard from the start menu.
Select ‘Create a new Domain,’ and click ‘Next’
Select ‘Basic Weblogic Server Domain,’ and click ‘Next’
Select ‘Express,’ and click ‘Next’
Type the BEA Admin username and password, and click ‘Next’