
ServerNet Cluster 6770 Hardware Installation and Support Guide


Installing Switch Components in an EIA Standard
Rack
ServerNet Cluster 6770 Hardware Installation and Support Guide—522544-002
5-2
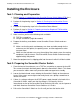
Procedure Summary
Procedure Summary
The ServerNet II Switch, AC transfer switch, and UPS are shipped separately. Install
these components in the rack as follows:
1. Task 1: Assemble the Required Tools on page 5-3
2. Task 2: Verify That You Have All the Parts in the Rack-Mount Kit on page 5-3.
3. Task 3: Install the Cage Nuts on page 5-4
4. Task 4: Install the Rails and Cable-Management Assembly on page 5-6.
5. Task 5: Install the UPS on page 5-8. Because this component is not customer
installable, you must contact your service provider.
6. Task 6: Install the AC Transfer Switch on page 5-8
7. Task 7: Install the ServerNet II Switch Into the Rack on page 5-8
8. Task 8: Connect and Route the Cables and Cords on page 5-9 .
9. Powering On a ServerNet Cluster Switch on page 7-2.
10. Refer to the ServerNet Cluster Manual to configure each ServerNet node. When
instructed to do so in the procedure for configuring a node, you connect the fiber-
optic ServerNet cables to the MSEBs . If you have more than one ServerNet II
Switch per fabric, you connect the switches together during the procedure for
adding a switch. That procedure is not necessary if you have only one switch per
fabric.
Note. Do not connect the fiber-optic ServerNet cables to the MSEBs at this time. The
Configure ServerNet Node (TSM) or Add Node to ServerNet Cluster action of the System
resource (OSM) provides instructions on connecting these cables to the MSEBs.