
SST Operations Bridge Administration Guide, Version 1.1
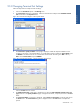
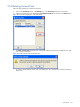
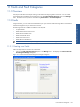
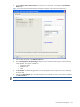
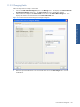
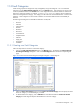
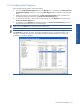
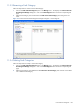
Table Of Contents
- SST Operations Bridge Administration Guide
- Preface
- Chapter 1: HP SST/OB: Overview
- Chapter 2: Getting Started
- Chapter 3: SST/OB Client Application
- Chapter 4: Application Options
- Chapter 5: User Profiles and Permissions
- Chapter 6: Policies
- Chapter 7: Global Parking and SLA Timers
- Chapter 8: Views
- Chapter 9: Dashboards
- Chapter 10: Terminal Sets
- Chapter 11: Faults and Fault Categories
- Chapter 12: Closure Codes
- Chapter 13: Object State Codes
- Chapter 14: Email Alerts
- Chapter 15: Thresholds and Threshold Alert
- Chapter 16: Commands
- Chapter 17: Terminal Trees
- Chapter 18: Action History
- Chapter 19: Data Management
- Chapter 20: Configuring Hours of Operation
- Appendix A: SST/OB Grid Features
- Appendix B: SST/OB Configuration Client Settings
- Appendix C: SST/OB Import Utility Configuration Parameters
- Document Feedback Form
Closure Codes 109
12 Closure Codes
12-1 Overview
Closure Codes provide information related to the problem that a Terminal has. Using this feature, an operator
working on a problem has quick access to information on how to fix the issue. Closure codes are directly related
to Policies. Each Policy may or may not have a Closure Code defined for it. Once you select a Terminal in a
Policy View, you can see the Closure Code information in the Details for Terminal area - Resolution tab page.
This tab is not visible if you select the Terminal in the Terminal Browser or in any local views.
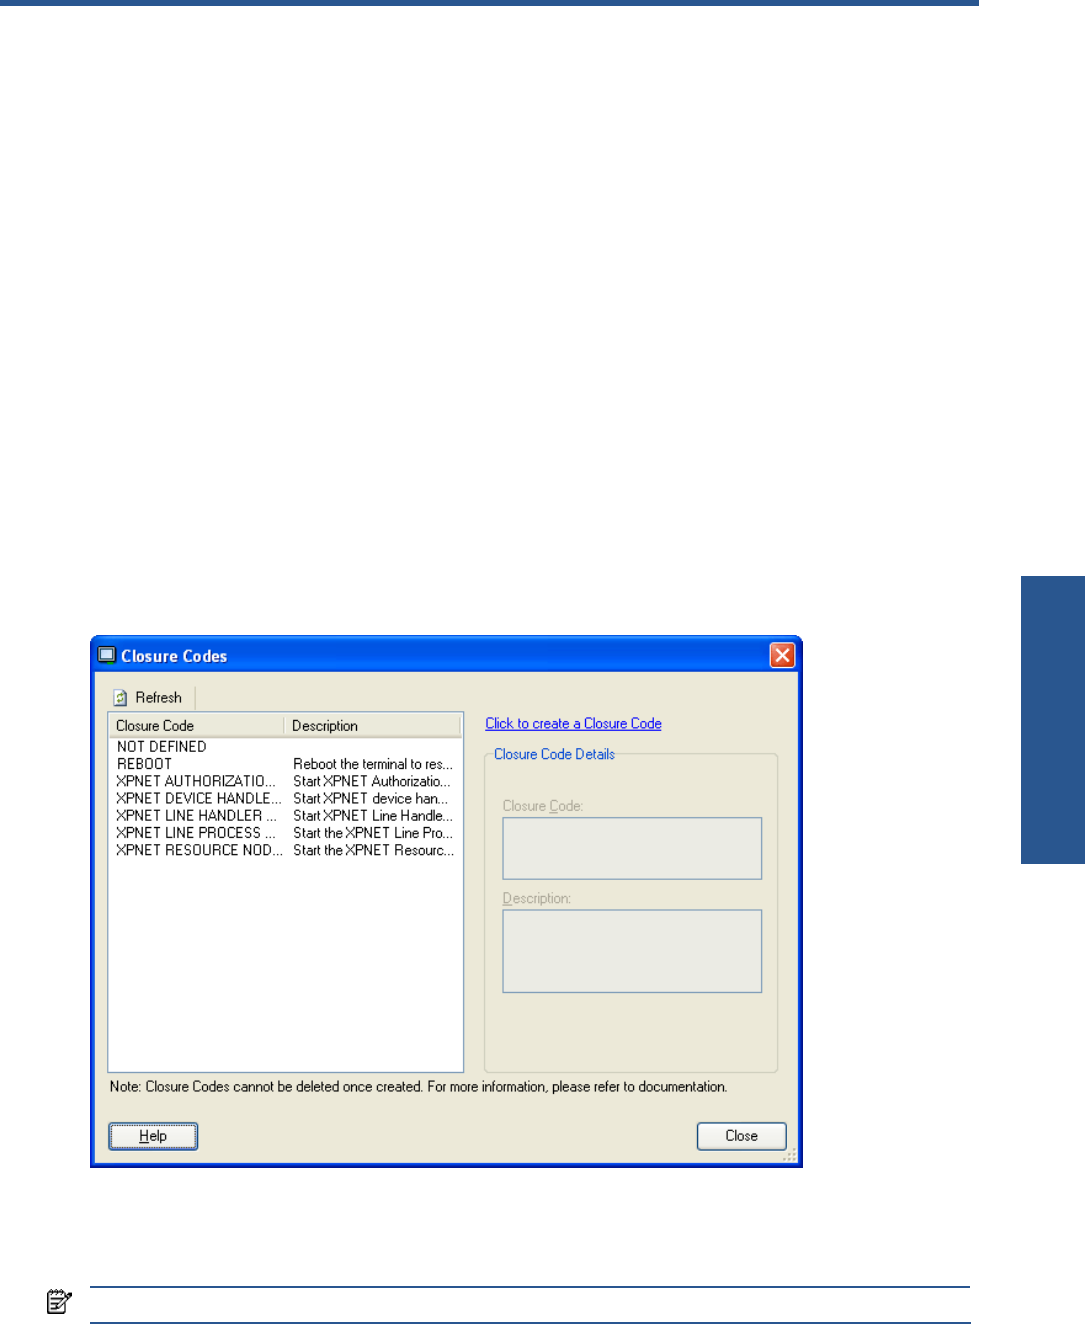
The default closure codes available with SST/OB are as follows:
• REBOOT: Reboot the Terminal to resolve the problem.
• XPNET AUTHORIZATION PROCESS STARTED: Start XPNET Authorization Process to resolve the
problem.
• XPNET DEVICE HANDLER STARTED: Start XPNET device handler process to resolve the problem.
• XPNET LINE HANDLER STARTED: Start XPNET Line Handler to resolve the problem.
• XPNET LINE PROCESS STARTED: Start XPNET Line Process to resolve this problem.
• XPNET RESOURCE NODE STARTED: Start the XPNET Resource Node to resolve the problem.
12-2 Creating new Closure Codes
Use the following steps to create a closure code:
1. Click on the Closure Codes option in the Manage menu. This displays the Closure Codes dialog box.
Figure 12-1 Closure Codes Dialog Box
2. Use the Click to create a Closure Code link to create a new closure code. This enables the Closure Code
Details area.
3. Enter the Closure Code details in the Closure Code box and the Description box.
4. Click on the Save Changes link to save the changes and to create the closure code.
NOTE: Closure Codes cannot be deleted once created.
Closure Codes