
SWAN Concentrator Installation and Support Guide


Installing a SWAN Concentrator
SWAN Concentrator Installation and Support Guide—429391-006
2-3
Installing a Replacement SWAN Concentrator
Installing a Replacement SWAN Concentrator
If you did not order the SWAN concentrator with your system, it should be configured
following the instructions provided in the WAN Subsystem Configuration and
Management Manual.
The configuration track-ID for your SWAN concentrator should have been recorded on
SWAN Concentrator Configuration Planning Form (provided in the WAN Subsystem
Configuration and Management Manual) and should have been specified during
SWAN concentrator configuration. The SWAN concentrator you install must match the
software configuration.
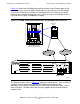
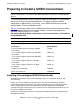
Tools Needed to Unpack and Install the SWAN Concentrator
You need the following tools to unpack and install the SWAN concentrator:
Installing a SWAN Concentrator
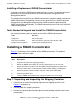
Table 2-2 summarizes the installation of the SWAN concentrator. The detailed
procedure topics follow the table.
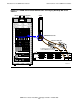
Step 1: Unpacking and Inspecting the Shipping Container
1. Carefully cut or remove the packing tape from the shipping container (see
Figure 2-1 on page 2-4).
2. Carefully open the shipping container.
3. Remove the top foam pad and foam picture-frame packing materials from inside
the container.
Tool Used to...
Utility knife Cut packing tape
Flat head screwdriver Connect interface converter cable to your cable
Phillips head screwdriver Install metric mounting brackets
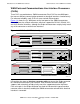
Table 2-2. SWAN Concentrator Installation Summary
Step Description
1. Unpack and inspect the shipping packages.
2. Mount the SWAN concentrator on a desk or table top or in a 19-inch rack.
3. Connect the Ethernet cables from the SWAN concentrator Ethernet ports to an
Ethernet switch, router, or directly to the E4SA, FESA, GESA, or G4SA ports.
4. Connect interface converter cables and your cables to the WAN ports.
5. Connect the power cord.
6. Turn the SWAN concentrator on to verify that it powers on successfully.