
Virtual TapeServer 6.03.42 Operations and Administration Guide
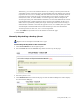


110 | Migrating Data to Physical Tape
Manually migrating virtual tapes
You can migrate a pool, which migrates all virtual tapes in the pool, or a single virtual tape.
The virtual tape or pool is migrated according to the hsm_ parameters in the VTS
configuration file.
Requires the HSM Migration access right
To migrate data
1. Click Virtual Media on the navigation pane. The Virtual Media - Operation page is
displayed:
2. Select a pool to migrate by clicking on the name of a pool in the pool column. Or, expand
a pool and select a virtual tape in the cartridge column.
Note To migrate a pool, there must be no locks on the pool or any of its virtual tapes.
3. Click the Migrate button at the top of the page.
4. When prompted, confirm the action.
Automating migration using VTSPolicy
After enterprise integration is configured, which enables a BMA server to read and write files
to and from VTS, you can use VTSPolicy to initiate migration by having the NonStop server
send an EMS message to the VTS server. The VTS server then passes the command to the
BMA. VTS waits for the return code from the BMA. If a successful return code is received,
VTS marks the virtual tape as migrated to physical tape. If the return code indicates a failure,
VTS does not mark the virtual tape as migrated and notes this in the log file.