
Virtual TapeServer 6.04.02 for NonStop Servers Quick Setup Guide

12 | Virtual TapeServer Quick Setup Guide
To connect to monitor, keyboard, mouse, and DVD/CD-ROM drive
A. Connect one end of a VGA cable into the 15-pin VGA port on the VTS server.
B. Connect the other end of the cable into the monitor or computer with terminal emulation.
C. If using a keyboard, connect it to a PS/2 or USB port on the VTS server.
D. If using a mouse, connect it to a PS/2 or USB port on the VTS server.
E. Connect one end of the USB cable to the DVD/CD-ROM drive.
F. Connect the other end of the cable to one of the USB ports on the back of the VTS server.
To connect to the management port for Lights-Out 100 support
A. Connect one end of an Ethernet cable to the Mgmt port.
B. Connect the other end of the cable to the LAN or WAN switch.
5 Power on the hardware
Perform these steps in order to power all VTS hardware:
A. Press the power button located on the front panel of the VTS server. The power button on the
front panel changes from yellow to green, and the server module self-boots.
Allow the VTS server to completely boot before proceeding. The console will display a login
prompt when it is ready to proceed.
B. Power up the VTS SCSI converter using the power switch on the rear panel, if necessary.
C. Start tape services on the host server. For example, on a NonStop server, use the SCF
START $VTAPE command, where VTAPE is the name of the tape device.
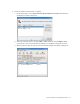
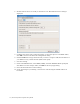
6 Configure network settings
You must configure the hostname, date, time, and time zone. If you do not want to use Dynamic
Host Configuration Protocol (DHCP), you can also reconfigure VTS to set the IP address (DHCP
is not supported with GFS).
A. Launch a console window and log in as root. Enter root as the login name and bbill as the
password.
B. Enter startx. The user interface is displayed.