
Virtual TapeServer 6.04.02 Operations and Administration Guide


82 | Using SecureVTS
5. Re-add the key server(s) as described in Adding a key server on page 73. This ensures that
the key servers are created with the current server’s credentials.
6. Re-add the key database backup host(s) as described in Adding a key database backup
host on page 74.
Backing up a key database
Each key server automatically backs up its key database when a new key is generated.
However, you can manually back up a key database.
Requires Administration group membership
To manually backup a key database
1. Click SecureVTS Setup on the navigation pane.
2. If necessary, log in using an account that is a member of the Administration group. Click
the Log In button at the top of the page and enter a username and password.
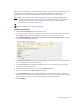
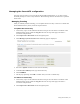
3. Under the host table in the KEY DATABASE BACKUP/RESTORE HOSTS section of the
page, click Backup to All.
If a backup host is highlighted red in the list of hosts, this indicates that the last backup
attempt to that host failed.
Deleting a key server
You can delete a key server. However, if you delete a key server to prevent it from generating
keys, VTS cannot retrieve keys that were generated on that server. This means you cannot
access virtual tapes encrypted by keys stored in that key database. Instead, you might want to
remove the key server and re-add it as a non-key generator so that VTS can continue to access
its key database. See
Adding a key server on page 73 for more information.
Note You cannot modify a key server. To change the settings of a key server, you must
delete it and then add it again, specifying the correct parameters. (The key database
remains on the server.)
Requires Administration group membership
To delete a key server
1. Click SecureVTS Setup on the navigation pane.
2. If necessary, log in using an account that is a member of the Administration group. Click
the Log In button at the top of the page and enter a username and password.
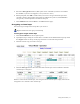
3. Click next to the server you want to delete in the KEY SERVERS section of the page.
4. When prompted, click OK to confirm the deletion.