
Virtual TapeServer 6.04.03 Operations and Administration Guide

Managing Pools and Virtual Tapes | 53
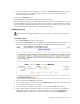
9. If the SecureVTS feature is enabled, you can select the Encrypted checkbox to encrypt
all cartridges that are added to the pool. See
Using SecureVTS on page 73 for more
information about this feature.
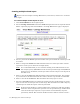
10. Click the CREATE button.
11. Click OK when prompted to confirm the creation of the pool.
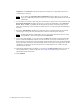
You can click the pool drop-down list to confirm that the pool was created. When you return to
the Virtual Media - Operation page, the new pool is listed and a red dot is displayed to the left
of its name. This symbol indicates that the pool is present but contains no virtual tapes. (The
+ symbol indicates that virtual tapes are contained in this pool.)
Modifying a pool
Requires the Virtual Tape Pool Maintenance, Vault Access, and Access to all Vaults access
rights
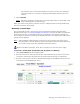
To modify a pool
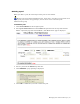
1. Click Virtual Media on the navigation pane.
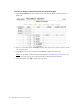
2. Select pool maintenance from the window drop-down list at the top of the Virtual
Media - Operation page. The Virtual Media - Pool Maintenance page is displayed.
3. Select a pool from the POOL drop-down list.
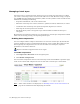
4. To rename the pool, enter a new name in the NEW POOL field. Specify a name that is up
to 255 alphanumeric characters in length.
5. To move the pool to another vault, select a vault from the VAULT drop-down list.
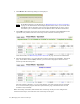
6. If you want to impose a size limit on the pool, such as because there are size limitations
when a virtual tape is exported to a physical tape drive, deselect the Cartridge Size
unlimited checkbox and enter a size from 1-1023 in the field. Select Megabytes,