
Virtual TapeServer 6.04.05 for NonStop Servers Supplemental Installation Guide


Installing GFS | 9
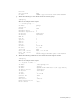
c. Enter the following command to verify that there is free space on the mounted GFS
file system.
df -h /VAULT10
Here is an example of the output:
Filesystem Size Used Avail Use% Mounted on
/dev/mapper/gfsvg1-lv1
17G 36K 17G 1% /VAULT10
d. Enter the following command to verify that you can write to the mounted GFS file
system.
touch /VAULT10/`hostname`
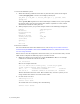
e. Verify that files written by other VTS servers are visible by entering the following
command:
ls -al /VAULT10
Here is an example of the output:
total 28
drwxr-xr-x 2 root root 3864 May 16 11:32 .
drwxr-xr-x 4 root root 4096 May 15 17:59 ..
-rw-r--r-- 1 root root 0 May 16 11:32
vtsdev27.commstor.crossroads.com
After completing these steps on each node, this output lists each system's hostname in
the vault directory. Be sure to delete these files after completing this installation
procedure.
16. Verify fencing.
Note These steps verify Brocade Fibre Channel fencing only.
Before performing these steps, make sure you are not logged into the switch through
Telnet. If you are logged in, the brocade fencing script will fails with an error similar to
the following:
/sbin/fence_brocade -a ip_addr -l username -n 2 -p password -o disable
pattern match read eof at ./fence_brocade line 138
# echo $?
255
where ip_addr, username, and password is that of the Fibre Channel switch. Consult your
SAN administrator for this information.
To verify the fencing method, enter the following commands:
/sbin/fence_brocade -a ip_addr -l username -n 2 -p password -o disable
/sbin/fence_brocade -a ip_addr -l username -n 2 -p password -o enable
17. Complete the following steps to configure fencing from luci:
a. From the luci web interface, select the node.
b. Select choose a task...
c. Select fence this node.