
Virtual TapeServer 8.2 Configuration Guide

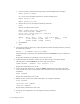
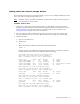
Table Of Contents
- Virtual TapeServer for NonStop Servers Configuration Guide
- Preface
- Introduction
- Overview of Tasks
- Reconfiguring Vaults
- Enabling Licensed Features
- Configuring Ports
- Creating and Managing VTLs and VTDs
- Enabling and Performing Tape-to-tape Exports
- Enabling and Performing Stacked Exports
- Enabling and Configuring Data Replication
- Enabling and Configuring Role Swapping
- Configuring EMS Communication
- Enabling and Configuring Data Encryption
- Creating and Managing Virtual Media
- Enabling and Configuring Scan/Cleanup
- Configuring User Accounts
- Configuring Web Interface Preferences
- Managing the VTS Server
- Troubleshooting
- Maintaining GFS for VTS
- Reinstalling and Restoring VTS
- Attaching External Devices after Initial Deployment
- TCP/IP Ports and Protocols
- Index
Reconfiguring Vaults | 9
3. Create partitions on the disk.
If the disk partition is less than 2TB in size, complete these steps:
a. Starting with the first recognized disk after the system disk, create the partition by
entering the following command:
fdisk /dev/cciss/c0d1
The fdisk command displays a : prompt.
b. Print the current partition table by entering the following command:
p
c. Delete any partitions that you want to reconfigure by entering the following
command:
d
d. Select the partition by entering the following command:
1
e. Add a new partition by entering the following command:
n
f. Choose the primary partition by entering the following command:
p
g. Select the first partition by entering the following command:
1
h. Accept the cylinder defaults by pressing ENTER twice.
i. Write the settings to a file by entering the following command:
w
This exits the fdisk utility and displays the # prompt.
j. Check the settings by entering the following command:
fdisk /dev/cciss/c0d1
k. Print the settings by entering the following command:
p
l. To exit the fdisk utility, enter the following:
q
m. Repeat these steps for each of the partitions.
If the disk partition is greater than 2TB in size, complete these steps:
a. Start the partition editor, which is an interactive program similar to fdisk:
parted /dev/cciss/c0d1
b. Create a GPT disk label, which is a GUID partition table:
mklabel gpt
c. When prompted, enter yes to confirm.
d. When prompted, enter gpt to specify the disk label type.