
Virtual TapeServer 8.2 Configuration Guide


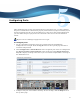

Table Of Contents
- Virtual TapeServer for NonStop Servers Configuration Guide
- Preface
- Introduction
- Overview of Tasks
- Reconfiguring Vaults
- Enabling Licensed Features
- Configuring Ports
- Creating and Managing VTLs and VTDs
- Enabling and Performing Tape-to-tape Exports
- Enabling and Performing Stacked Exports
- Enabling and Configuring Data Replication
- Enabling and Configuring Role Swapping
- Configuring EMS Communication
- Enabling and Configuring Data Encryption
- Creating and Managing Virtual Media
- Enabling and Configuring Scan/Cleanup
- Configuring User Accounts
- Configuring Web Interface Preferences
- Managing the VTS Server
- Troubleshooting
- Maintaining GFS for VTS
- Reinstalling and Restoring VTS
- Attaching External Devices after Initial Deployment
- TCP/IP Ports and Protocols
- Index
19
Configuring Ports
After cabling the host server(s) and external devices to the VTS server, you must configure
the ports to enable VTS to communicate properly with each device (target or initiator). If you
attach an external tape drive or external disk array to the server after initial configuration,
you must define the port as physical. Ports connected to host servers must be defined as
virtual.
Requires the View/Manage Configuration access right
To configure ports
1. Log in to the VTS web interface using an account that has the View/Manage
Configuration access right. Click the Log In button at the top of the page and enter a
username and password.
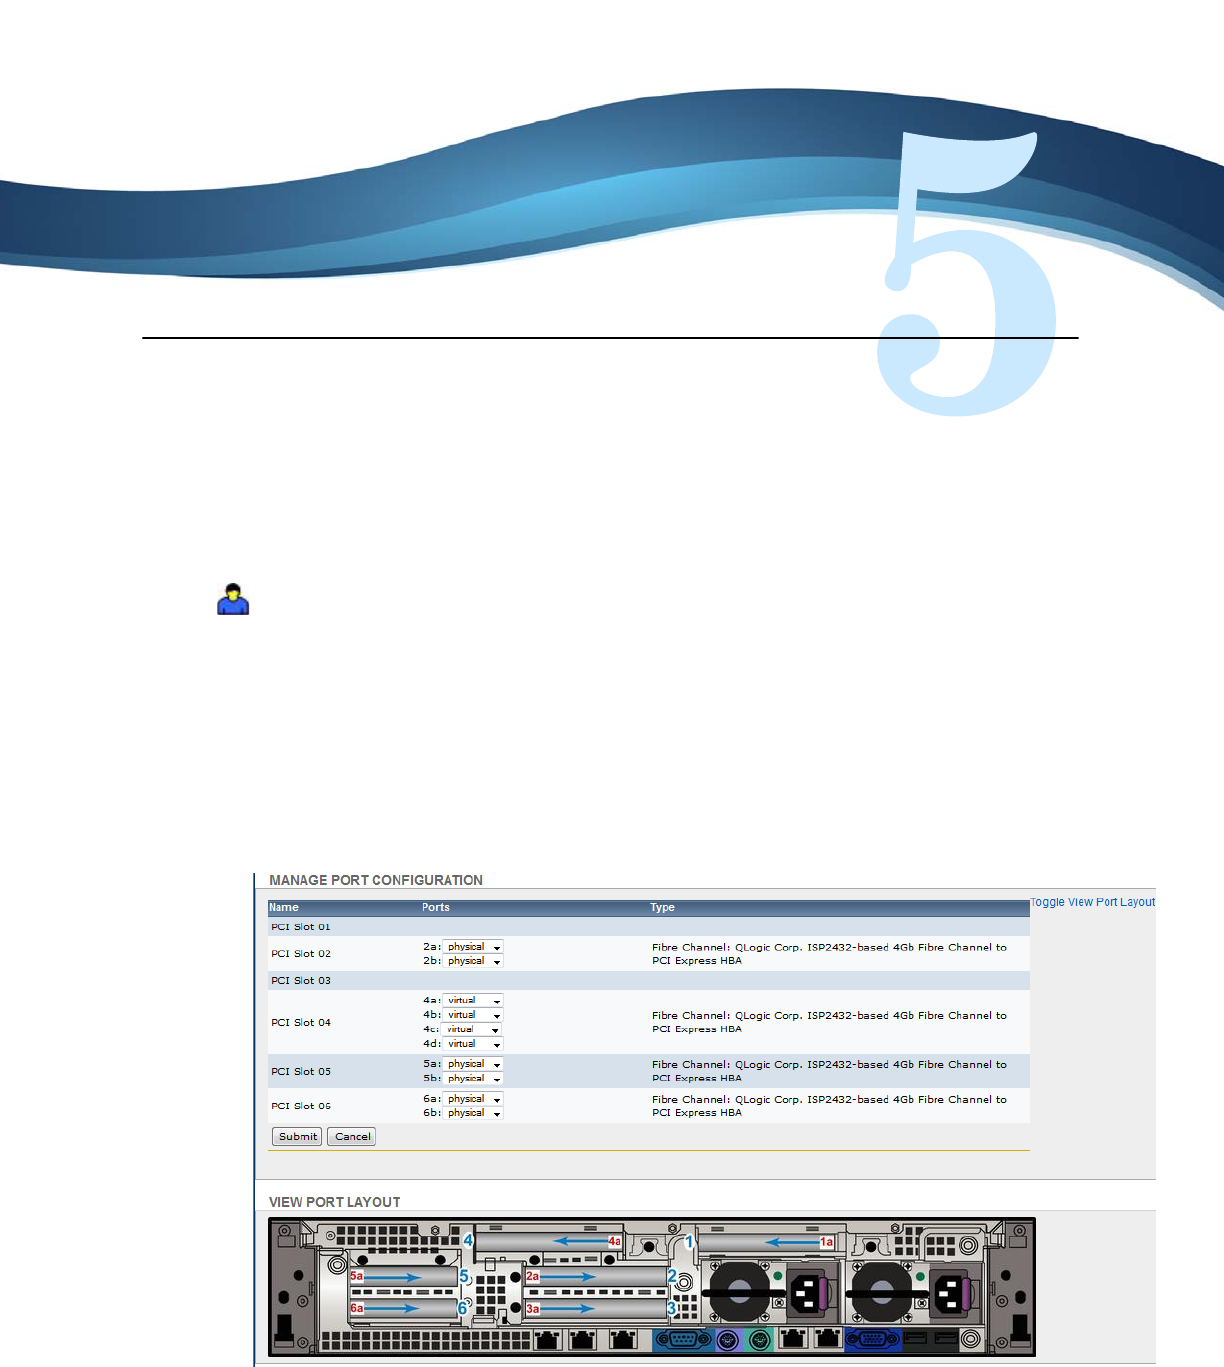
2. Click Configuration→Virtual Devices on the navigation pane. Ports are configured in
the MANAGE PORT CONFIGURATION section of the page. Click Toggle View Port
Layout to display an image of the back of your server. The example below is an image of
the DL380 G6 server.
3. Configure each port as described in the help. To view the help, click the Help button at
the top of the page.