
Virtual TapeServer 8.2 Configuration Guide


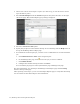
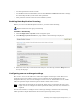
Table Of Contents
- Virtual TapeServer for NonStop Servers Configuration Guide
- Preface
- Introduction
- Overview of Tasks
- Reconfiguring Vaults
- Enabling Licensed Features
- Configuring Ports
- Creating and Managing VTLs and VTDs
- Enabling and Performing Tape-to-tape Exports
- Enabling and Performing Stacked Exports
- Enabling and Configuring Data Replication
- Enabling and Configuring Role Swapping
- Configuring EMS Communication
- Enabling and Configuring Data Encryption
- Creating and Managing Virtual Media
- Enabling and Configuring Scan/Cleanup
- Configuring User Accounts
- Configuring Web Interface Preferences
- Managing the VTS Server
- Troubleshooting
- Maintaining GFS for VTS
- Reinstalling and Restoring VTS
- Attaching External Devices after Initial Deployment
- TCP/IP Ports and Protocols
- Index
36 | Enabling and Performing Stacked Exports
interface. This restores the virtual tape to VTS so that a host server can then use the tape.
Refer to the help for importing instructions.
Configuring the physical drive or library
After attaching a physical drive or library to VTS as described in the Quick Start Guide, you
can export virtual tapes to physical tapes. Before creating stacked export jobs, you can assign
a user-friendly name to a drive or library, and you can dedicate a drive or library for stacked
exports. You can also disable an external tape device; the devices are then unavailable during
job creation.
Requires the System Maintenance Functions and View/Manage Configuration access
rights
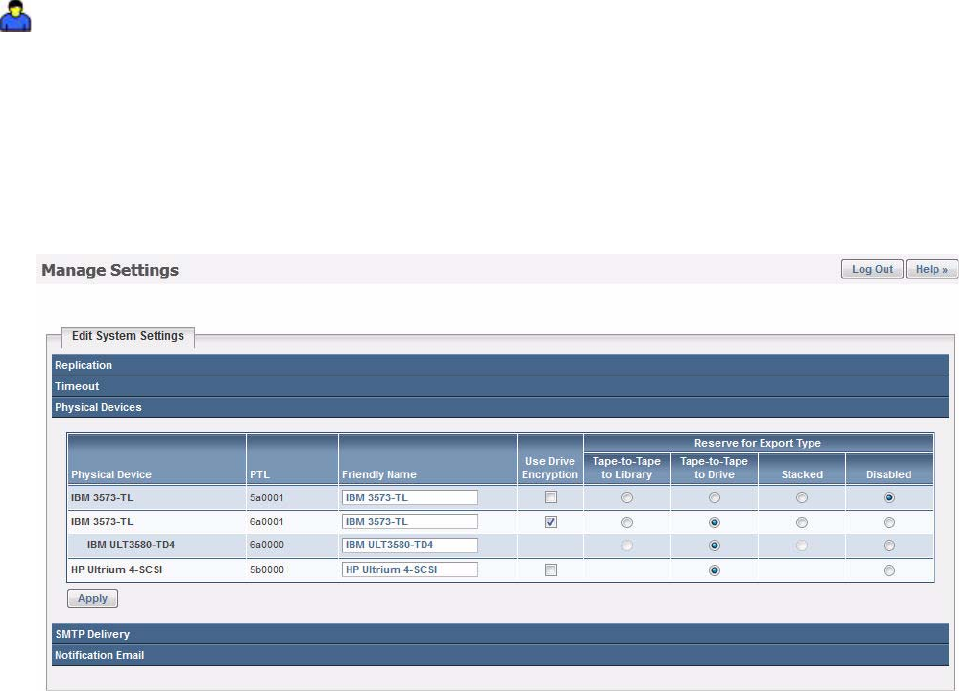
To configure a physical drive or library for stacked exports
1. Click Configuration→System on the navigation pane of the VTS web interface.
2. Click Edit System Settings.
3. Click Physical Devices to expand this area of the page. A page similar to the following is
displayed:
4. Specify friendly names and designate the devices for use by stacked export jobs and then
click Apply.
For more information, click the Help button at the top of this page.