
Virtual TapeServer 8.3 Configuration Guide


Creating and Managing Virtual Media | 97
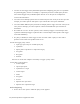
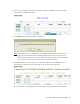
4. Select the virtual tape to mount. In the following snapshot, the DF0000 virtual tape will be
mounted on the VF40500 host device:
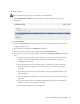
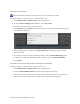
5. Click Mount. The following dialog box is displayed.
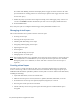
Note If the Mount button is not displayed, see "Configuring Web Interface Preferences" on
page 151 for information about displaying this button. Also, if you cannot click the
Mount button, maximize your browser; this should display an arrow cursor and enable
you to click the button. See the Release Notes for more information.
6. Click OK to mount the virtual tape for read and write operations. Click Cancel for read
operations only. VTS mounts the virtual tape on the selected virtual tape drive.
If the mount fails, see "Managing locks on virtual tapes" on page 123 for more information.