
Virtual TapeServer SCSI-to-FC Adapter User Manual


7-56
Chapter 7: Using the Serial/Telnet Interface
Display Trace and Assertion History
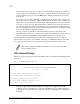
When this option is selected from the main menu, the Trace Dump Menu is displayed. Trace
options are set up in the Trace Settings Configuration menu.
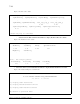
Figure 7-63. Trace dump menu
• Select 1 to display trace history for the current boot cycle.
• Select 2 to display trace history from the previous boot cycle.
• Select 3 to display trace history from the last assertion failure.
• Select 4 to clear the current trace buffer. If cleared, then the Display trace from current boot
cycle option will not show any data.
• Select 5 to clear the assert trace buffer. If cleared, then the Display trace from last assertion
failure option will not show any data.
Get a Copy of Trace Buffer
Using the following procedure, you can save copies of the trace buffers over FTP.
1. Connect the VT5900-SA to the Ethernet network used by your computer.
2. Start your FTP program using the VT5900-SA’s IP address:
ftp <IP address>
See the “Change IP Address” section of this chapter for information on changing the VT5900-
SA IP address.
Trace Dump Menu
X.X.XX XXXXXX XXXXXX-XXX_XXXXXXXXXXXXXX
01/07/2010 10:31:55
1) Display trace for current boot cycle
2) Display trace from previous boot cycle
3) Display trace from last assertion failure
4) Clear current trace buffer
5) Clear (flash) assert trace buffer
X) Return to previous menu
Note: You may also need to specify the directory location on your computer or
network where your FTP program will store the trace file.